
Craving something sweet? Look no further! This collection of dessert recipes is here to satisfy your sweet tooth with a variety of options, from quick and easy treats to more elaborate creations. Whether you’re a novice baker or a seasoned pro, there’s something for everyone to enjoy and impress friends and family!
Coconut Macaroons Dipped in Chocolate
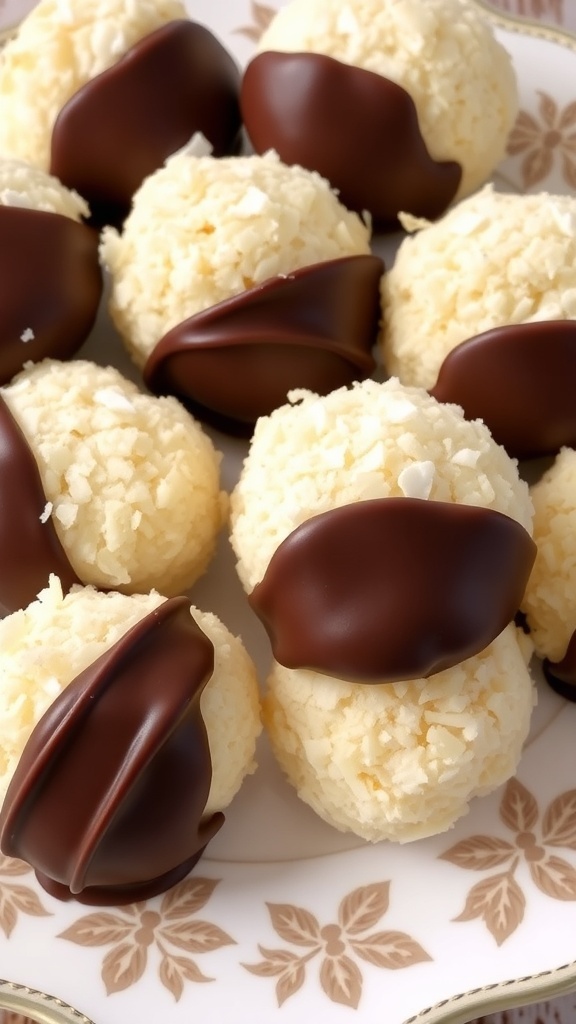
Coconut macaroons are a delightful treat that combines the sweet, chewy texture of coconut with the rich flavor of chocolate. These little bites are perfect for any occasion, whether it’s a casual snack or a fancy dessert. The image shows perfectly shaped macaroons, each dipped in smooth chocolate, creating a beautiful contrast between the white coconut and dark chocolate.
Making these treats is simple and fun. You can enjoy them fresh or store them for later. They’re a hit at parties and gatherings, and everyone loves the combination of coconut and chocolate.
Ingredients
- 3 cups sweetened shredded coconut
- 1 cup sweetened condensed milk
- 1 teaspoon vanilla extract
- 2 large egg whites
- 1/4 teaspoon salt
- 8 ounces semi-sweet chocolate, chopped
Instructions
- Preheat the oven to 325°F (160°C). Line a baking sheet with parchment paper.
- In a large bowl, mix the shredded coconut, sweetened condensed milk, vanilla extract, and salt until well combined.
- In another bowl, beat the egg whites until stiff peaks form. Gently fold the egg whites into the coconut mixture until just combined.
- Using a tablespoon, scoop the mixture onto the prepared baking sheet, forming small mounds.
- Bake for 20-25 minutes, or until the tops are golden brown. Let them cool completely on the baking sheet.
- While the macaroons cool, melt the chocolate in a microwave-safe bowl or over a double boiler until smooth.
- Dip the cooled macaroons halfway into the melted chocolate and place them back on the parchment paper to set.
- Once the chocolate has hardened, enjoy your delicious coconut macaroons!
Decadent Chocolate Lava Cake
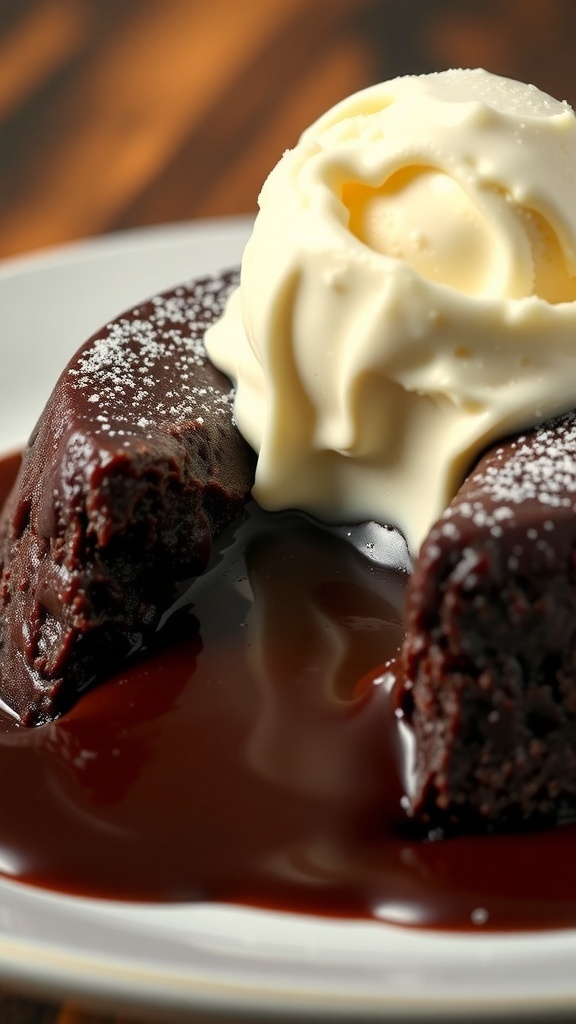
Chocolate lava cake is a true delight for dessert lovers. This rich, warm cake has a gooey chocolate center that flows out when you cut into it. It’s often served with a scoop of vanilla ice cream, which melts slightly into the warm chocolate, creating a heavenly combination.
The image shows a perfectly baked chocolate lava cake, with a luscious chocolate sauce pooling around it. The cake is topped with a generous scoop of creamy vanilla ice cream, making it look even more tempting. The contrast of the dark chocolate and the white ice cream is visually appealing and promises a delicious taste experience.
This dessert is perfect for special occasions or when you simply want to treat yourself. Making it at home is easier than you might think, and the results are sure to impress!
Ingredients
- 1/2 cup unsalted butter
- 1 cup semi-sweet chocolate chips
- 2 large eggs
- 2 large egg yolks
- 1/4 cup granulated sugar
- 2 tablespoons all-purpose flour
- 1/4 teaspoon salt
- Powdered sugar for dusting
- Vanilla ice cream for serving
Instructions
- Preheat the oven to 425°F (220°C). Grease four ramekins with butter and dust with flour.
- In a microwave-safe bowl, melt the butter and chocolate chips together in 30-second intervals, stirring until smooth.
- In another bowl, whisk together the eggs, egg yolks, and granulated sugar until thick and pale.
- Combine the melted chocolate mixture with the egg mixture. Stir in flour and salt until just combined.
- Divide the batter evenly among the prepared ramekins. Place them on a baking sheet.
- Bake for 12-14 minutes, until the edges are firm but the center is soft.
- Let the cakes cool for 1 minute, then carefully invert onto plates. Dust with powdered sugar and serve with a scoop of vanilla ice cream.
Rich Tiramisu with Coffee Layers
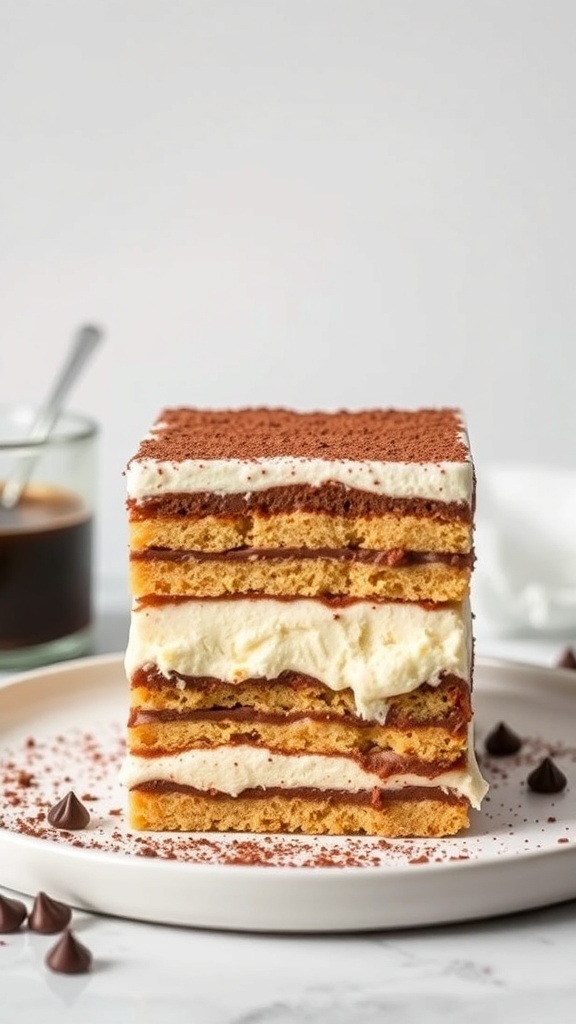
Tiramisu is a classic Italian dessert that combines layers of coffee-soaked ladyfingers with a rich mascarpone cream. The image shows a beautifully stacked tiramisu, showcasing its creamy layers and a dusting of cocoa powder on top. This dessert is perfect for coffee lovers and is sure to impress at any gathering.
The layers of coffee and cream create a delightful balance of flavors. Each bite melts in your mouth, making it a favorite for many. Whether you’re making it for a special occasion or just to treat yourself, this tiramisu recipe is simple yet satisfying.
Ingredients
- 1 cup strong brewed coffee, cooled
- 3 large eggs, separated
- 1/2 cup granulated sugar
- 1 cup mascarpone cheese
- 1 teaspoon vanilla extract
- 24 ladyfingers
- Cocoa powder for dusting
Instructions
- Prepare the Coffee: Brew a strong cup of coffee and let it cool.
- Make the Cream: In a bowl, beat the egg yolks and sugar until pale. Add the mascarpone and vanilla, mixing until smooth.
- Whip the Egg Whites: In another bowl, whip the egg whites until stiff peaks form. Gently fold the whipped egg whites into the mascarpone mixture.
- Assemble the Tiramisu: Dip each ladyfinger into the cooled coffee for a few seconds, then layer them in a dish. Spread half of the mascarpone mixture over the ladyfingers. Repeat with another layer of dipped ladyfingers and the remaining mascarpone.
- Chill: Cover and refrigerate for at least 4 hours, or overnight for best results.
- Serve: Before serving, dust the top with cocoa powder. Enjoy your delicious tiramisu!
Berry Pavlova with Whipped Cream
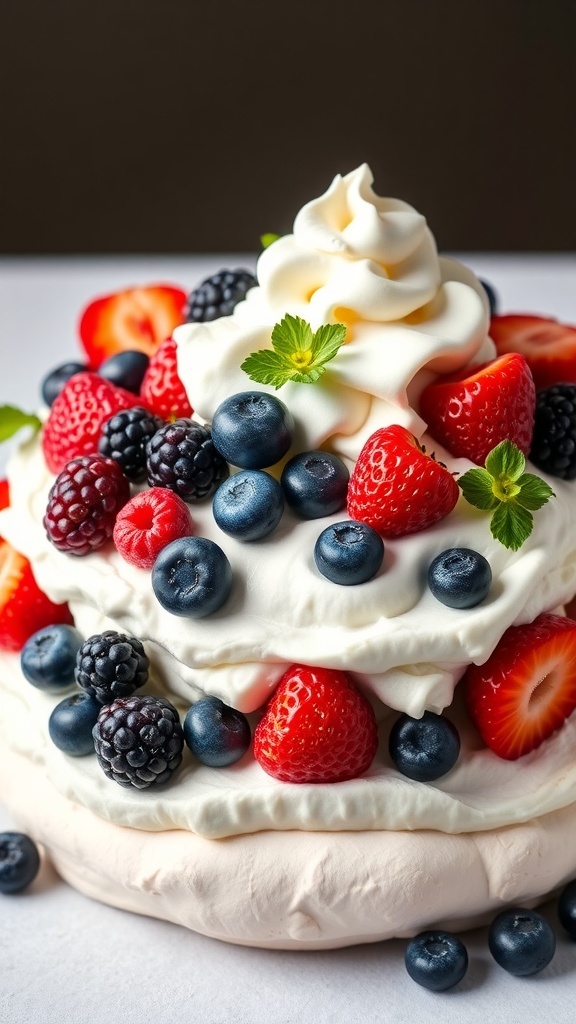
Berry Pavlova is a delightful dessert that combines a crispy meringue shell with soft, fluffy whipped cream and fresh berries. The contrast of textures makes it a favorite for many. The image showcases a beautiful pavlova topped with an array of vibrant berries like strawberries, blueberries, and blackberries, all drizzled with a generous layer of whipped cream. A sprig of mint adds a touch of freshness, making it not only delicious but visually appealing too.
This dessert is perfect for any occasion, whether it’s a summer picnic or a festive gathering. The lightness of the meringue and the cream balances perfectly with the tartness of the berries, creating a treat that everyone will love.
Ingredients
- 4 large egg whites
- 1 cup granulated sugar
- 1 teaspoon vanilla extract
- 1 teaspoon white vinegar
- 2 cups heavy whipping cream
- 2 tablespoons powdered sugar
- 1 teaspoon vanilla extract (for cream)
- 2 cups mixed berries (strawberries, blueberries, blackberries)
- Fresh mint leaves for garnish
Instructions
- Preheat your oven to 275°F (135°C). Line a baking sheet with parchment paper and draw a circle about 8 inches in diameter on it.
- In a clean bowl, beat the egg whites until soft peaks form. Gradually add the granulated sugar, continuing to beat until the mixture is glossy and stiff peaks form. Mix in the vanilla extract and vinegar.
- Spoon the meringue onto the prepared parchment, using the circle as a guide. Create a slight dip in the center to hold the cream and berries.
- Bake for 1 hour, then turn off the oven and let the pavlova cool completely inside.
- Once cooled, whip the heavy cream with powdered sugar and vanilla extract until soft peaks form.
- Spread the whipped cream over the pavlova, filling the center and allowing it to spill over the sides.
- Top with mixed berries and garnish with mint leaves. Serve immediately and enjoy!
Banoffee Pie with Caramel and Bananas
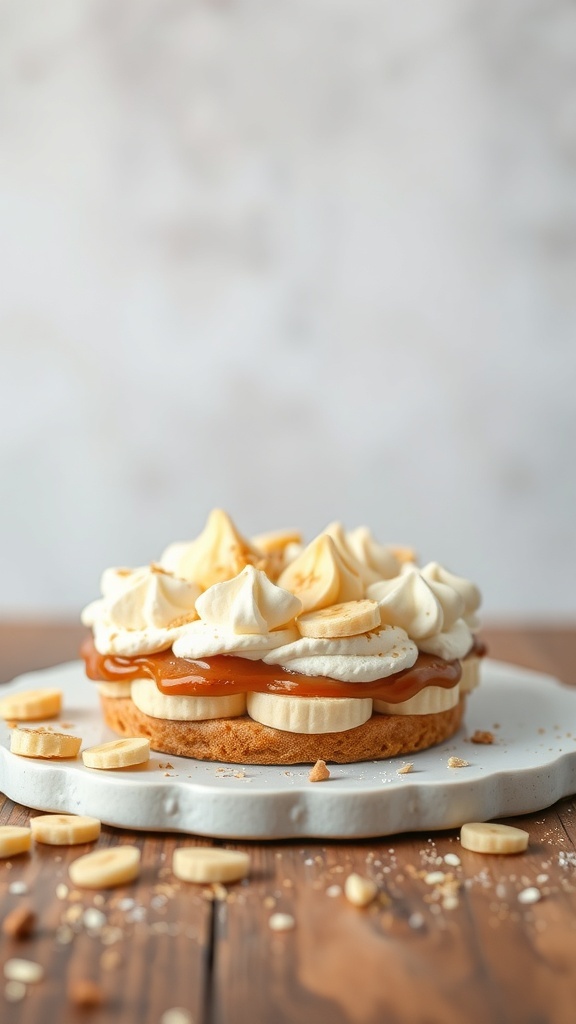
Banoffee pie is a delightful dessert that combines the sweetness of bananas with rich caramel. This pie is not only visually appealing but also incredibly tasty. The layers of creamy whipped topping, fresh bananas, and luscious caramel create a perfect balance of flavors.
The image showcases a beautifully crafted banoffee pie. The pie crust is golden and crumbly, topped generously with slices of banana and a smooth layer of caramel. The whipped cream on top is piped in swirls, making it look inviting and delicious. Crushed biscuits scattered around add a nice touch, hinting at the crunchy base underneath.
This dessert is perfect for any occasion, whether it’s a family gathering or a casual get-together with friends. It’s easy to make and sure to impress everyone at the table. Let’s get into the ingredients and steps to create this delightful treat!
Ingredients
- 1 ½ cups digestive biscuits, crushed
- ½ cup unsalted butter, melted
- 1 can (14 oz) sweetened condensed milk
- 4 ripe bananas, sliced
- 1 cup heavy cream
- 2 tablespoons powdered sugar
- 1 teaspoon vanilla extract
- ¼ cup caramel sauce
- Extra banana slices and caramel for garnish
Instructions
- Prepare the Crust: In a bowl, mix the crushed digestive biscuits with melted butter until combined. Press the mixture into the bottom of a pie dish to form a crust. Chill in the fridge for 30 minutes.
- Make the Caramel: In a saucepan, cook the sweetened condensed milk over low heat, stirring constantly for about 10-15 minutes until it thickens and turns a caramel color. Let it cool slightly.
- Layer the Bananas: Once the crust is set, spread the caramel evenly over the base. Arrange the banana slices on top of the caramel.
- Whip the Cream: In a mixing bowl, beat the heavy cream, powdered sugar, and vanilla extract until soft peaks form. Spread the whipped cream over the bananas.
- Garnish: Drizzle extra caramel sauce over the whipped cream and add some banana slices for decoration. Chill for another hour before serving.
Classic New York Cheesecake
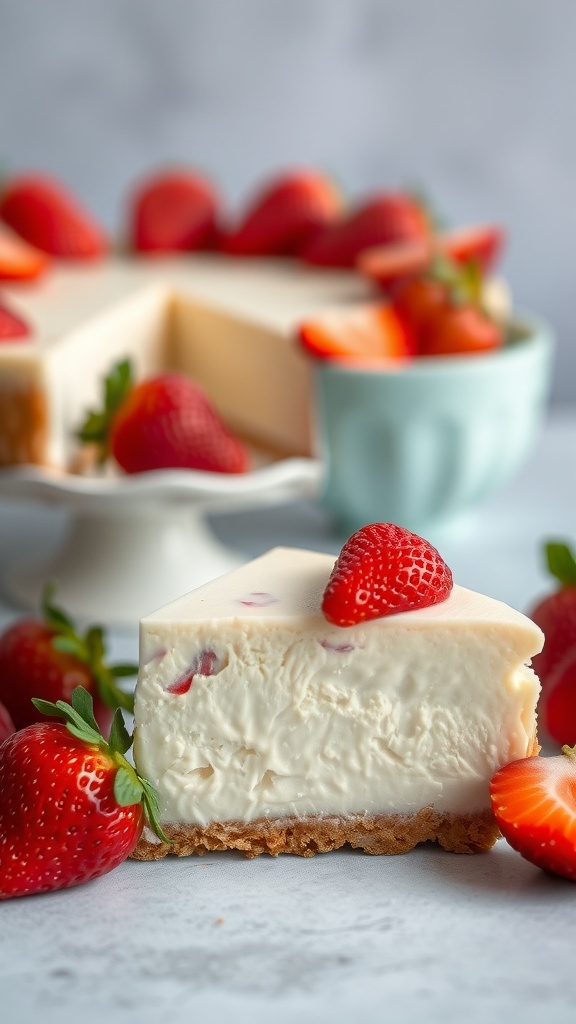
Classic New York cheesecake is a timeless dessert that never fails to impress. Its creamy texture and rich flavor make it a favorite for many. The image showcases a beautifully crafted cheesecake, topped with fresh strawberries that add a pop of color and a hint of sweetness. The golden crust, made from crushed graham crackers, provides a delightful crunch that complements the smooth filling.
This cheesecake is perfect for any occasion, whether it’s a birthday, holiday, or just a treat for yourself. The simplicity of the ingredients allows the flavors to shine through, making it a go-to recipe for both novice and experienced bakers.
Now, let’s get to the fun part—making this delicious cheesecake!
Ingredients
- 1 1/2 cups graham cracker crumbs
- 1/4 cup granulated sugar
- 1/2 cup unsalted butter, melted
- 4 (8-ounce) packages cream cheese, softened
- 1 cup granulated sugar
- 1 teaspoon vanilla extract
- 4 large eggs
- 1 cup sour cream
- 1/4 cup all-purpose flour
Instructions
- Prepare the Crust: Preheat your oven to 325°F (160°C). In a bowl, mix graham cracker crumbs, sugar, and melted butter until combined. Press the mixture into the bottom of a 9-inch springform pan.
- Bake the Crust: Bake the crust for about 10 minutes, then remove it from the oven and let it cool.
- Make the Filling: In a large bowl, beat the softened cream cheese until smooth. Gradually add sugar and vanilla, mixing well. Add eggs one at a time, beating after each addition. Stir in sour cream and flour until just combined.
- Pour and Bake: Pour the filling over the cooled crust. Bake for 50-60 minutes, or until the center is set but still slightly jiggly.
- Cool and Chill: Turn off the oven and let the cheesecake cool inside for an hour. Then, refrigerate for at least 4 hours or overnight for best results.
- Serve: Once chilled, remove the cheesecake from the springform pan. Top with fresh strawberries or your favorite fruit before slicing and serving.
Moist Red Velvet Cupcakes
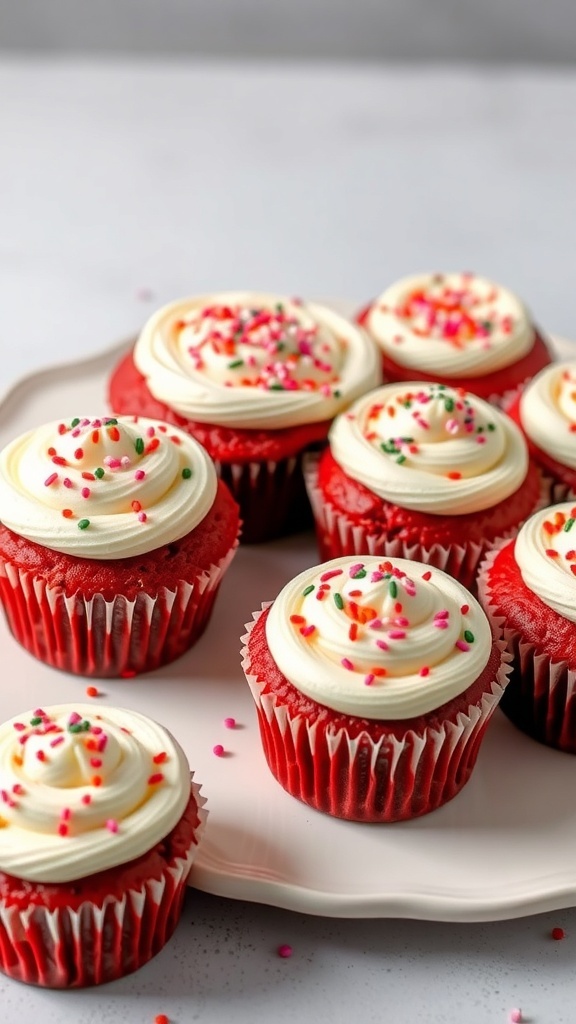
Red velvet cupcakes are a delightful treat that never fails to impress. Their vibrant red color and creamy frosting make them a favorite for celebrations and casual get-togethers alike. The image shows a beautiful display of these cupcakes topped with swirls of cream cheese frosting and colorful sprinkles, adding a fun touch to their elegant appearance.
Making moist red velvet cupcakes is easier than you might think. The key is to use the right ingredients and follow the steps closely. These cupcakes are soft, fluffy, and have a hint of cocoa flavor that pairs perfectly with the rich frosting.
Let’s get started on this delicious recipe!
Ingredients
- 1 ½ cups all-purpose flour
- 1 cup granulated sugar
- 1 teaspoon baking soda
- 1 teaspoon cocoa powder
- ½ teaspoon salt
- 1 cup vegetable oil
- 1 cup buttermilk, room temperature
- 2 large eggs, room temperature
- 2 tablespoons red food coloring
- 1 teaspoon vanilla extract
- 1 teaspoon white vinegar
- 1 cup cream cheese, softened
- 2 cups powdered sugar
- 1 teaspoon vanilla extract (for frosting)
Instructions
- Preheat the oven to 350°F (175°C) and line a cupcake pan with paper liners.
- In a large bowl, whisk together flour, sugar, baking soda, cocoa powder, and salt.
- In another bowl, mix the oil, buttermilk, eggs, food coloring, vanilla extract, and vinegar until well combined.
- Gradually add the wet ingredients to the dry ingredients, mixing until just combined.
- Fill each cupcake liner about two-thirds full with batter. Bake for 18-20 minutes or until a toothpick comes out clean.
- Let the cupcakes cool in the pan for 5 minutes before transferring them to a wire rack to cool completely.
- For the frosting, beat the cream cheese, powdered sugar, and vanilla extract until smooth and creamy.
- Once the cupcakes are cool, frost them generously and top with sprinkles if desired.
Lemon Meringue Pie
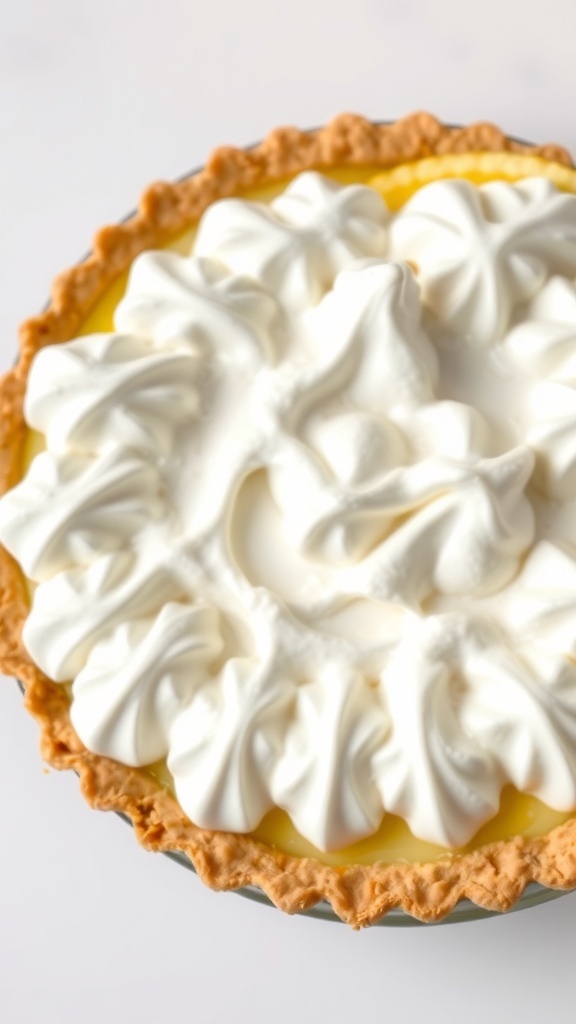
Lemon Meringue Pie is a classic dessert that brings a burst of sunshine to any table. The image shows a beautifully crafted pie with a golden crust, topped with fluffy meringue peaks. The bright yellow filling is both tangy and sweet, making it a favorite for many.
This pie is not just a treat for the taste buds; it’s also a feast for the eyes. The contrast between the smooth lemon filling and the airy meringue creates an inviting look. Perfect for gatherings or a cozy night in, this dessert is sure to impress.
Ingredients
- 1 pre-made pie crust
- 1 cup granulated sugar
- 2 tablespoons cornstarch
- 1/4 teaspoon salt
- 1 1/2 cups water
- 3 large egg yolks, beaten
- 1/4 cup fresh lemon juice
- 1 tablespoon lemon zest
- 2 tablespoons unsalted butter
- 3 large egg whites
- 1/4 teaspoon cream of tartar
- 1/2 cup granulated sugar (for meringue)
Instructions
- Preheat the oven to 350°F (175°C). Bake the pie crust according to package instructions until golden brown. Let it cool.
- In a saucepan, mix 1 cup sugar, cornstarch, and salt. Gradually stir in water. Cook over medium heat, stirring constantly until thickened.
- Remove from heat. Stir a small amount of the hot mixture into the beaten egg yolks, then return to the saucepan. Cook for 2 more minutes, then add lemon juice, lemon zest, and butter. Pour this filling into the baked pie crust.
- In a clean bowl, beat egg whites and cream of tartar until soft peaks form. Gradually add 1/2 cup sugar, continuing to beat until stiff peaks form.
- Spread the meringue over the lemon filling, sealing the edges. Bake for 10-12 minutes until the meringue is lightly browned.
- Let the pie cool completely before serving. Enjoy your delicious Lemon Meringue Pie!
S’mores Dip with Graham Crackers
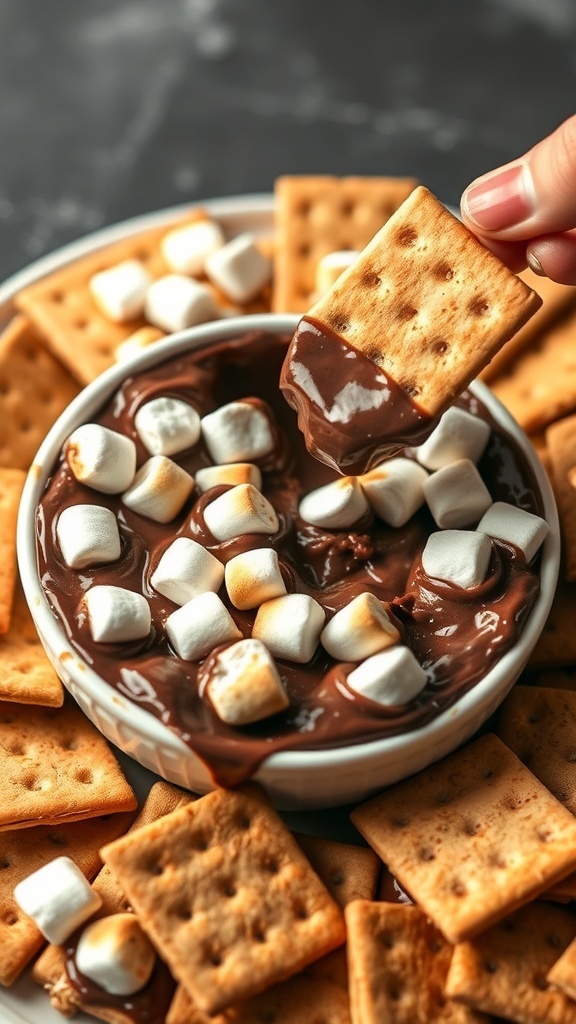
S’mores Dip is a fun twist on the classic campfire treat. Imagine gooey chocolate and melted marshmallows, all ready to be scooped up with crunchy graham crackers. It’s perfect for gatherings or a cozy night in.
The image shows a bowl filled with melted chocolate and marshmallows, surrounded by graham crackers. The warm, inviting colors make it look delicious and tempting. This dessert is not only easy to make but also a crowd-pleaser.
Gather your friends and family, and get ready to enjoy this delightful treat. It’s simple to prepare and even more fun to eat!
Ingredients
- 1 cup semi-sweet chocolate chips
- 1 cup mini marshmallows
- 1 tablespoon unsalted butter
- Graham crackers for dipping
Instructions
- Preheat your oven to 450°F (230°C).
- In an oven-safe dish, combine the chocolate chips and butter. Stir to mix.
- Bake for about 5 minutes, or until the chocolate is melted.
- Remove from the oven and sprinkle mini marshmallows on top.
- Return to the oven for another 2-3 minutes, until the marshmallows are golden brown.
- Serve warm with graham crackers for dipping.
Classic Apple Crisp with Oat Topping
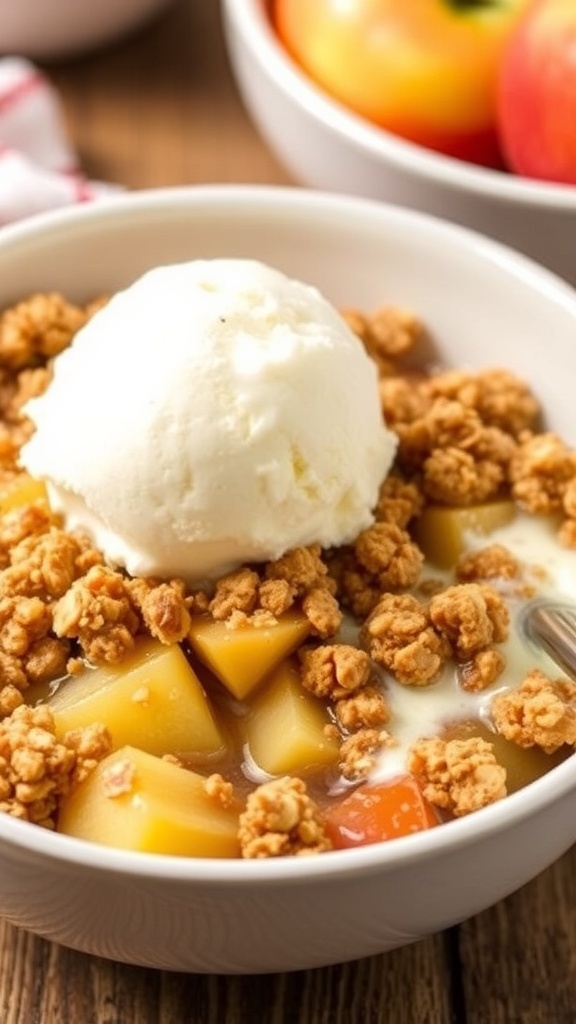
Classic apple crisp is a warm and comforting dessert that brings together sweet, tender apples and a crunchy oat topping. The image showcases a delightful bowl filled with baked apples, topped with a golden, crumbly mixture of oats and brown sugar. A scoop of vanilla ice cream sits on top, melting slightly into the warm apples, creating a perfect balance of flavors and textures.
This dessert is not only delicious but also easy to make. It’s a great way to use up fresh apples, especially during the fall season. The combination of cinnamon and nutmeg adds a lovely warmth, making it a favorite for gatherings and cozy nights in.
Ingredients
- 6 cups sliced apples (about 6 medium apples)
- 1 tablespoon lemon juice
- 1/2 cup granulated sugar
- 1 teaspoon ground cinnamon
- 1/4 teaspoon ground nutmeg
- 1 cup rolled oats
- 1 cup all-purpose flour
- 1/2 cup packed brown sugar
- 1/2 cup unsalted butter, melted
- 1/4 teaspoon salt
Instructions
- Preheat the oven to 350°F (175°C).
- In a large bowl, toss the sliced apples with lemon juice, granulated sugar, cinnamon, and nutmeg. Spread the apple mixture evenly in a greased 9×13 inch baking dish.
- In another bowl, combine the oats, flour, brown sugar, melted butter, and salt. Mix until crumbly.
- Sprinkle the oat mixture evenly over the apples.
- Bake for 35-40 minutes, or until the apples are tender and the topping is golden brown.
- Serve warm, topped with a scoop of vanilla ice cream if desired.
Fluffy Vanilla Bean Panna Cotta
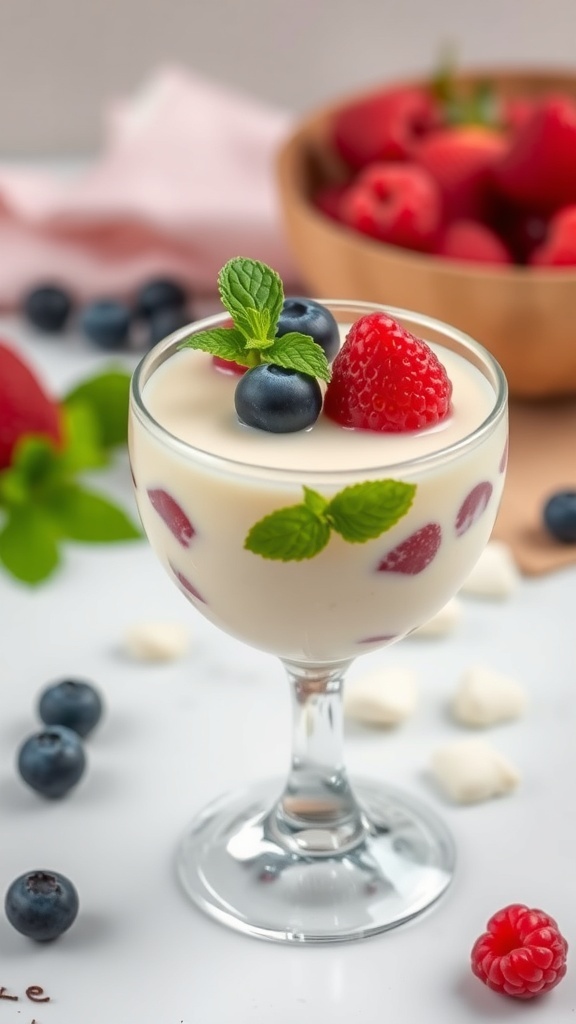
Fluffy vanilla bean panna cotta is a delightful dessert that brings a touch of elegance to any table. This creamy treat is not only simple to make but also looks stunning when served. The panna cotta is adorned with fresh berries and mint, making it a feast for the eyes as well as the palate.
The smooth texture of the panna cotta pairs beautifully with the tartness of the berries. In the image, you can see a glass filled with this luscious dessert, topped with vibrant strawberries and blueberries, along with a sprig of mint for that extra pop of color. It’s a perfect way to end a meal or to enjoy on a warm day.
Making panna cotta is straightforward. You’ll need just a few ingredients, and the steps are easy to follow. Let’s dive into the recipe!
Ingredients
- 2 cups heavy cream
- 1/2 cup granulated sugar
- 1 teaspoon vanilla bean paste
- 1 packet (2 1/4 teaspoons) unflavored gelatin
- 3 tablespoons cold water
- Fresh berries (strawberries, blueberries, raspberries)
- Mint leaves for garnish
Instructions
- Bloom the Gelatin: In a small bowl, sprinkle the gelatin over the cold water. Let it sit for about 5 minutes until it becomes soft.
- Heat the Cream: In a saucepan, combine the heavy cream and sugar. Heat over medium heat, stirring until the sugar dissolves. Do not let it boil.
- Add Vanilla and Gelatin: Remove the saucepan from heat. Stir in the vanilla bean paste and the bloomed gelatin until fully dissolved.
- Pour into Molds: Pour the mixture into serving glasses or molds. Let them cool to room temperature, then refrigerate for at least 4 hours or until set.
- Serve: Once set, carefully unmold the panna cotta if using molds. Top with fresh berries and a mint leaf before serving.
Chocolate Mousse with Fresh Berries
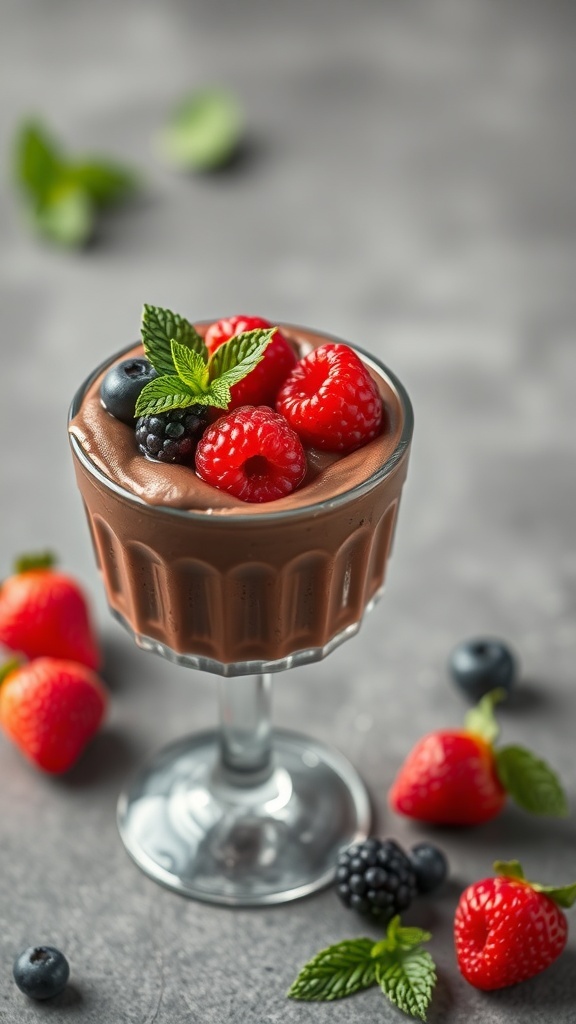
Chocolate mousse is a classic dessert that brings a touch of elegance to any meal. This rich and creamy treat is made with simple ingredients, yet it feels indulgent. The image showcases a beautifully presented chocolate mousse topped with fresh berries and mint leaves, making it not just delicious but also visually appealing.
The combination of chocolate and berries is a match made in heaven. The sweetness of the berries balances the richness of the chocolate, creating a delightful flavor experience. Plus, the vibrant colors of the berries add a pop to the dessert, making it a feast for the eyes as well.
Making chocolate mousse at home is easier than you might think. With just a few steps, you can whip up this delightful dessert. It’s perfect for dinner parties, special occasions, or simply when you want to treat yourself.
Ingredients
- 1 cup heavy cream
- 4 ounces dark chocolate, chopped
- 2 large eggs
- 1/4 cup granulated sugar
- 1 teaspoon vanilla extract
- Fresh berries (strawberries, blueberries, raspberries)
- Mint leaves for garnish
Instructions
- Melt the Chocolate: In a heatproof bowl, melt the chopped dark chocolate over a pot of simmering water. Stir until smooth, then set aside to cool slightly.
- Whip the Cream: In a separate bowl, whip the heavy cream until soft peaks form. Be careful not to over-whip.
- Mix Eggs and Sugar: In another bowl, whisk together the eggs and granulated sugar until pale and fluffy. Add the melted chocolate and vanilla extract, mixing until well combined.
- Fold in the Cream: Gently fold the whipped cream into the chocolate mixture. Be careful to keep the mixture light and airy.
- Chill: Spoon the mousse into serving glasses and refrigerate for at least 2 hours to set.
- Serve: Top with fresh berries and mint leaves before serving. Enjoy your delicious chocolate mousse!
Peach Cobbler with Biscuit Topping

Peach cobbler is a classic dessert that brings warmth and comfort to any table. The image shows a delicious peach cobbler, featuring juicy peaches swimming in a sweet syrup, topped with fluffy biscuit-like dough. The golden crust contrasts beautifully with the vibrant orange of the peaches, making it a feast for the eyes as well as the palate.
This dish is perfect for summer gatherings or cozy family dinners. The combination of sweet peaches and buttery biscuit topping creates a delightful harmony of flavors. Serve it warm, perhaps with a scoop of vanilla ice cream, for an extra treat!
Ingredients
- 4 cups fresh peaches, sliced
- 1 cup granulated sugar
- 1 tablespoon lemon juice
- 1 teaspoon ground cinnamon
- 1/4 teaspoon salt
- 1 tablespoon cornstarch
- 1/2 cup unsalted butter, melted
- 1 cup all-purpose flour
- 2 teaspoons baking powder
- 1/2 cup milk
- 1/4 cup brown sugar
Instructions
- Preheat your oven to 350°F (175°C).
- In a large bowl, combine sliced peaches, granulated sugar, lemon juice, cinnamon, salt, and cornstarch. Mix well and pour into a greased baking dish.
- In another bowl, whisk together flour, baking powder, and brown sugar. Stir in melted butter and milk until just combined.
- Drop spoonfuls of the biscuit mixture over the peach filling, covering as much as possible.
- Bake for 30-35 minutes, or until the topping is golden brown and the peaches are bubbly.
- Let it cool slightly before serving. Enjoy warm with ice cream or whipped cream!
Carrot Cake with Cream Cheese Frosting
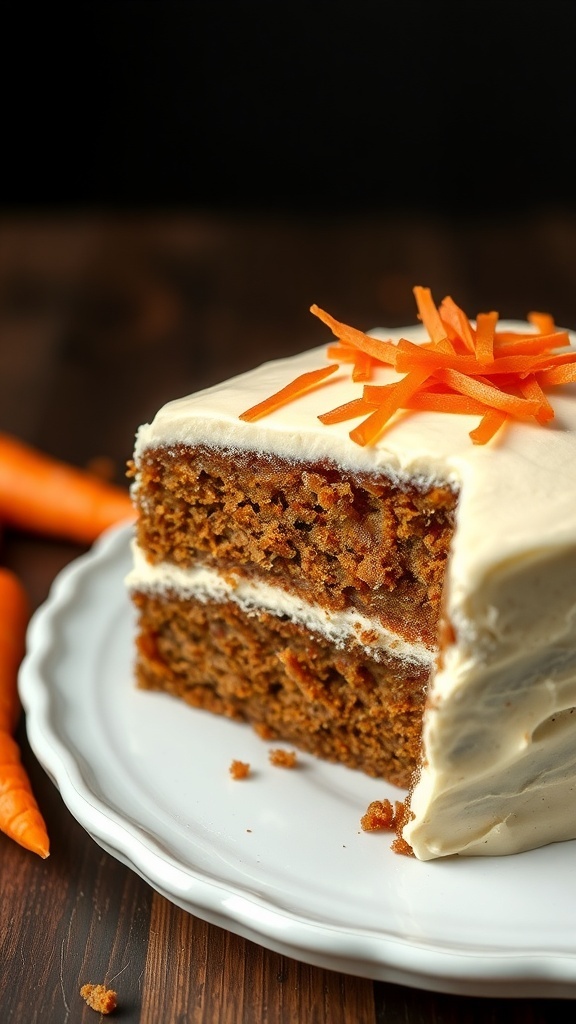
Carrot cake is a delightful treat that brings together the sweetness of carrots and the richness of spices. The image shows a slice of moist carrot cake topped with a creamy layer of cream cheese frosting. The bright orange carrot shavings on top add a lovely touch, making it visually appealing.
This cake is perfect for any occasion, whether it’s a birthday, holiday, or just a cozy afternoon at home. The combination of flavors is comforting and satisfying. Plus, it’s a great way to sneak in some veggies!
Ingredients
- 2 cups all-purpose flour
- 2 cups granulated sugar
- 1 teaspoon baking powder
- 1 teaspoon baking soda
- 1 teaspoon ground cinnamon
- 1/2 teaspoon salt
- 1 cup vegetable oil
- 4 large eggs
- 3 cups grated carrots
- 1 cup crushed pineapple, drained
- 1 cup chopped walnuts (optional)
- 8 oz cream cheese, softened
- 1/2 cup unsalted butter, softened
- 4 cups powdered sugar
- 1 teaspoon vanilla extract
Instructions
- Preheat the oven to 350°F (175°C). Grease and flour two 9-inch round cake pans.
- In a large bowl, mix flour, sugar, baking powder, baking soda, cinnamon, and salt.
- In another bowl, whisk together oil and eggs until well combined. Stir in grated carrots and crushed pineapple.
- Combine the wet and dry ingredients, mixing until just blended. If using, fold in the chopped walnuts.
- Divide the batter evenly between the prepared pans. Bake for 25-30 minutes or until a toothpick comes out clean.
- Let the cakes cool in the pans for 10 minutes, then transfer to wire racks to cool completely.
- For the frosting, beat together the cream cheese and butter until smooth. Gradually add powdered sugar and vanilla, mixing until creamy.
- Once the cakes are cool, spread a layer of frosting on top of one cake layer. Place the second layer on top and frost the top and sides of the cake.
- Garnish with additional carrot shavings if desired. Slice and enjoy!
Pistachio Baklava Drizzled with Honey
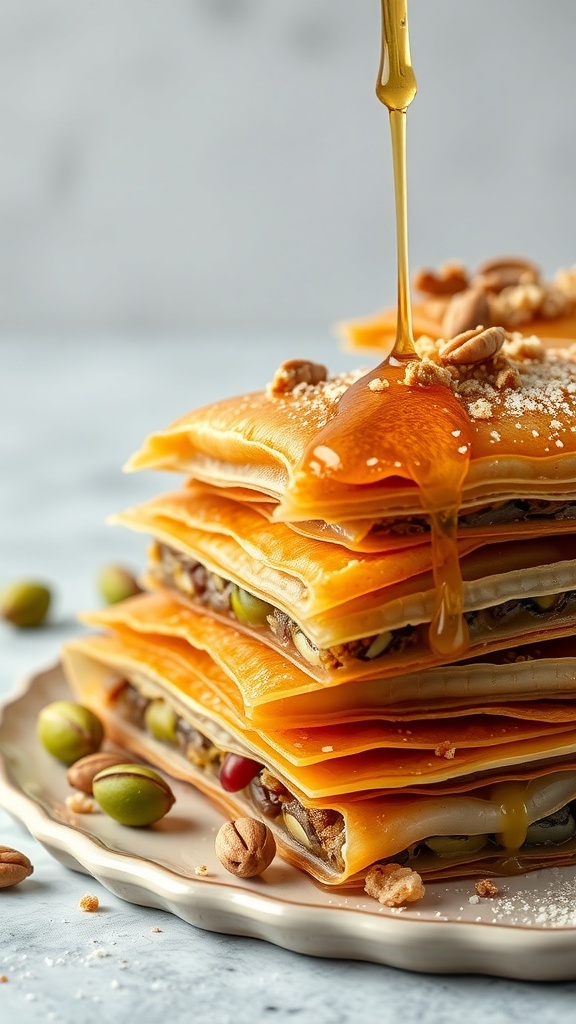
Pistachio baklava is a delightful treat that combines layers of flaky pastry with a rich nut filling. The image shows a stack of golden, crispy baklava drizzled with sweet honey, making it look irresistible. Each layer is perfectly baked, showcasing the beautiful texture that baklava is known for.
The combination of pistachios and honey creates a wonderful balance of flavors. The nuttiness of the pistachios pairs perfectly with the sweetness of the honey, making every bite a little piece of heaven. This dessert is not just a feast for the taste buds; it’s also a feast for the eyes!
Making baklava at home might seem challenging, but it’s quite straightforward. With just a few ingredients, you can create this scrumptious dessert that’s perfect for any occasion. Whether it’s a family gathering or a special celebration, pistachio baklava will surely impress your guests.
Ingredients
- 1 package of phyllo dough (16 oz)
- 2 cups unsalted pistachios, finely chopped
- 1 cup unsalted butter, melted
- 1 teaspoon ground cinnamon
- 1 cup granulated sugar
- 1 cup water
- 1/2 cup honey
Instructions
- Preheat your oven to 350°F (175°C).
- In a bowl, mix the chopped pistachios with ground cinnamon. Set aside.
- Unroll the phyllo dough and cover it with a damp cloth to prevent it from drying out.
- Brush a 9×13 inch baking dish with melted butter. Layer 8 sheets of phyllo dough, brushing each sheet with butter.
- Sprinkle a thin layer of the pistachio mixture over the phyllo. Repeat the layering process, adding 4 sheets of phyllo followed by the pistachio mixture until all the nuts are used. Finish with 8 layers of phyllo on top.
- Cut the baklava into diamond or square shapes before baking. Bake for about 45 minutes or until golden brown.
- While the baklava is baking, prepare the syrup. In a saucepan, combine sugar, water, and honey. Bring to a boil, then reduce heat and let simmer for about 10 minutes.
- Once the baklava is done, remove it from the oven and immediately pour the hot syrup over it. Let it cool completely before serving.
Chocolate Chip Cookie Dough Brownies
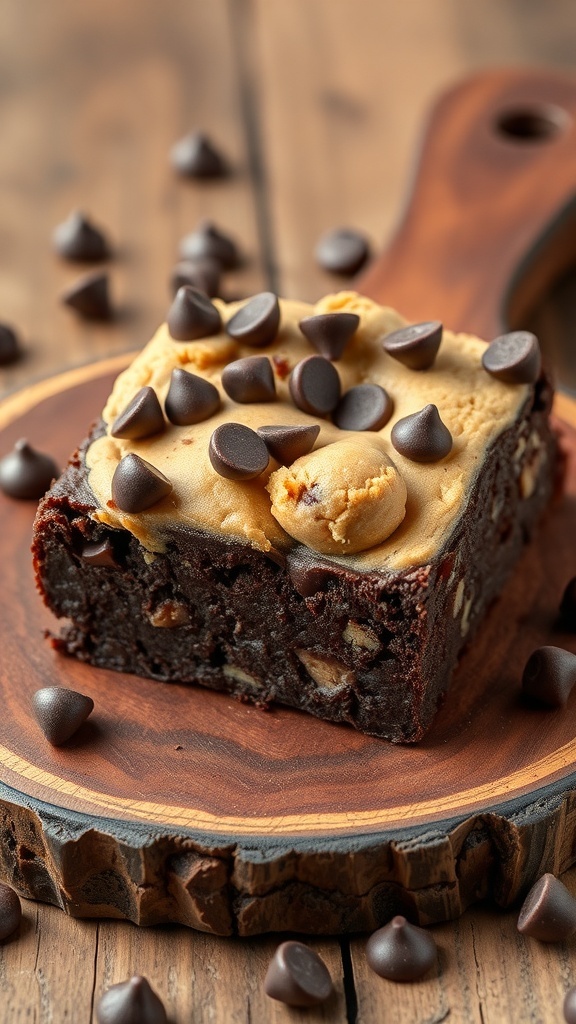
Chocolate Chip Cookie Dough Brownies are a delightful treat that combines two favorites into one delicious dessert. The rich, fudgy brownie base is topped with a layer of edible cookie dough, making it a perfect indulgence for any sweet tooth.
The image showcases a beautifully cut brownie, with a generous layer of cookie dough on top, sprinkled with chocolate chips. The contrast of the dark brownie and the light cookie dough creates an inviting look that makes it hard to resist.
These brownies are not just a feast for the eyes; they are also easy to make. Gather your ingredients and get ready to whip up a batch that will impress friends and family alike!
Ingredients
- 1 cup unsalted butter, melted
- 2 cups granulated sugar
- 4 large eggs
- 1 teaspoon vanilla extract
- 1 cup all-purpose flour
- 1 cup unsweetened cocoa powder
- 1/2 teaspoon salt
- 1 cup chocolate chips
- 1/2 cup brown sugar
- 1 cup all-purpose flour (for cookie dough)
- 1/4 cup milk
- 1 teaspoon vanilla extract (for cookie dough)
- 1/2 cup chocolate chips (for cookie dough)
Instructions
- Preheat the oven to 350°F (175°C). Grease a 9×13 inch baking pan.
- In a large bowl, mix melted butter and granulated sugar until smooth. Add eggs and vanilla, mixing well.
- In another bowl, whisk together flour, cocoa powder, and salt. Gradually add this dry mixture to the wet ingredients, stirring until combined. Fold in chocolate chips.
- Pour the brownie batter into the prepared pan, spreading it evenly.
- In a separate bowl, combine brown sugar, flour, milk, and vanilla for the cookie dough. Mix until smooth, then fold in chocolate chips.
- Drop spoonfuls of cookie dough over the brownie batter. Use a knife to swirl the cookie dough slightly into the brownie batter.
- Bake for 25-30 minutes, or until a toothpick inserted comes out with a few moist crumbs.
- Let cool before cutting into squares. Enjoy your Chocolate Chip Cookie Dough Brownies!
Nutella Swirl Brownies
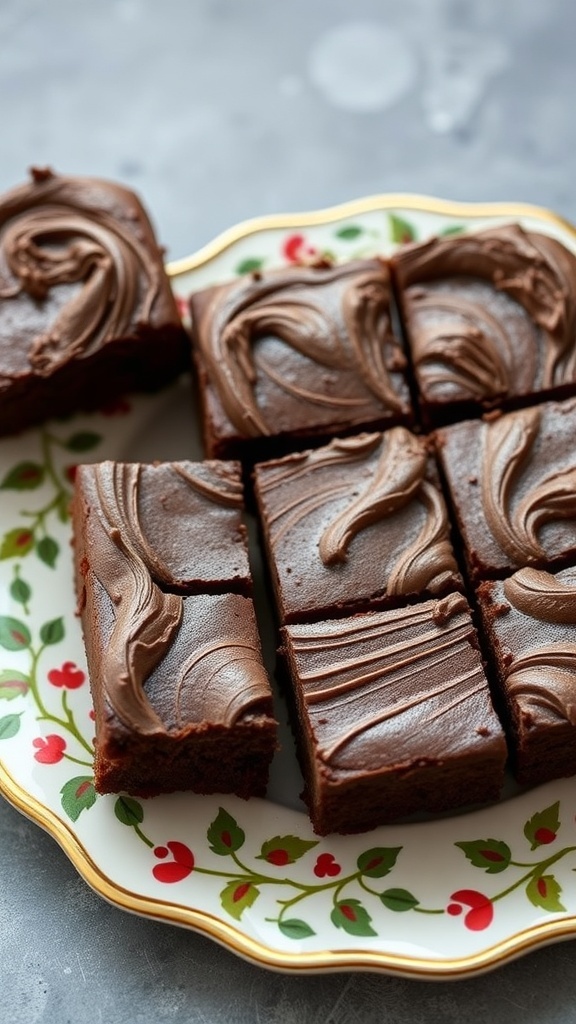
Nutella Swirl Brownies are a delightful treat that combines rich chocolate flavor with the creamy goodness of Nutella. The image shows a plate of brownies, beautifully cut into squares, with a glossy Nutella swirl on top. Each piece looks moist and inviting, making it hard to resist grabbing one!
These brownies are perfect for any occasion, whether it’s a casual get-together or a cozy night in. The combination of fudgy chocolate and the hazelnut spread creates a unique taste that everyone will love. Plus, they are super easy to make!
Let’s get into the recipe so you can whip up a batch of these delicious brownies!
Ingredients
- 1/2 cup unsalted butter
- 1 cup granulated sugar
- 2 large eggs
- 1 teaspoon vanilla extract
- 1/3 cup unsweetened cocoa powder
- 1/2 cup all-purpose flour
- 1/4 teaspoon salt
- 1/4 teaspoon baking powder
- 1/2 cup Nutella
Instructions
- Preheat your oven to 350°F (175°C). Grease an 8×8 inch baking dish.
- In a medium saucepan, melt the butter over low heat. Remove from heat and stir in sugar, eggs, and vanilla.
- Mix in cocoa, flour, salt, and baking powder until just combined.
- Pour half of the brownie batter into the prepared baking dish. Spread Nutella over the batter, then top with the remaining brownie batter.
- Use a knife to swirl the Nutella into the top layer of batter.
- Bake for 20-25 minutes, or until a toothpick inserted comes out with a few moist crumbs.
- Let cool before cutting into squares and serving. Enjoy!
Almond Joy Cheesecake Bars
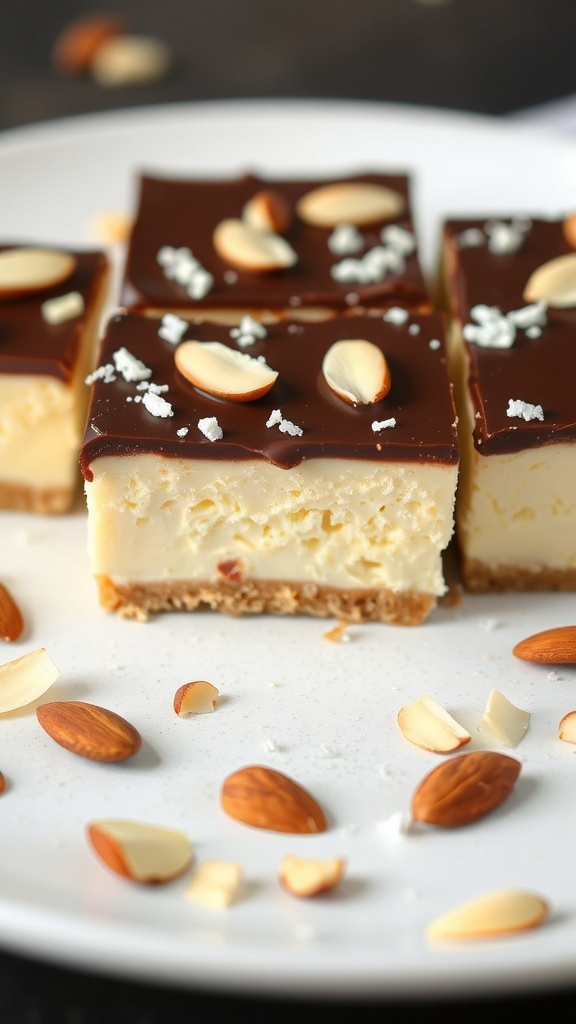
These Almond Joy Cheesecake Bars are a delightful treat that brings together the flavors of chocolate, coconut, and almonds. The creamy cheesecake layer sits on a crunchy crust, topped with a rich chocolate ganache and sprinkled with sliced almonds. They look so tempting on the plate, and the combination of textures makes each bite a joy.
Making these bars is easy and fun. You’ll start with a simple crust made from crushed cookies. Then, whip up a smooth cheesecake filling that’s both rich and light. Once baked, a glossy chocolate layer finishes them off perfectly. These bars are great for parties or just a cozy night in.
Ingredients
- 1 ½ cups crushed graham crackers
- 1/3 cup granulated sugar
- 1/2 cup unsalted butter, melted
- 2 (8 oz) packages cream cheese, softened
- 1 cup powdered sugar
- 1 teaspoon vanilla extract
- 2 large eggs
- 1 cup sweetened shredded coconut
- 1 cup chocolate chips
- 1/2 cup sliced almonds
Instructions
- Preheat the oven to 325°F (160°C). Grease a 9×9 inch baking pan.
- Make the Crust: In a bowl, combine crushed graham crackers, sugar, and melted butter. Press the mixture firmly into the bottom of the prepared pan.
- Prepare the Cheesecake Filling: In a large bowl, beat the cream cheese until smooth. Add powdered sugar and vanilla, mixing until well combined. Beat in the eggs one at a time, then fold in the shredded coconut.
- Pour the filling over the crust and spread evenly. Bake for 25-30 minutes until set. Let it cool completely.
- Make the Chocolate Topping: Melt the chocolate chips in a microwave or double boiler. Spread the melted chocolate over the cooled cheesecake layer. Sprinkle sliced almonds on top.
- Chill in the refrigerator for at least 2 hours before cutting into bars. Enjoy your delicious Almond Joy Cheesecake Bars!
Strawberry Shortcake with Fresh Whipped Cream
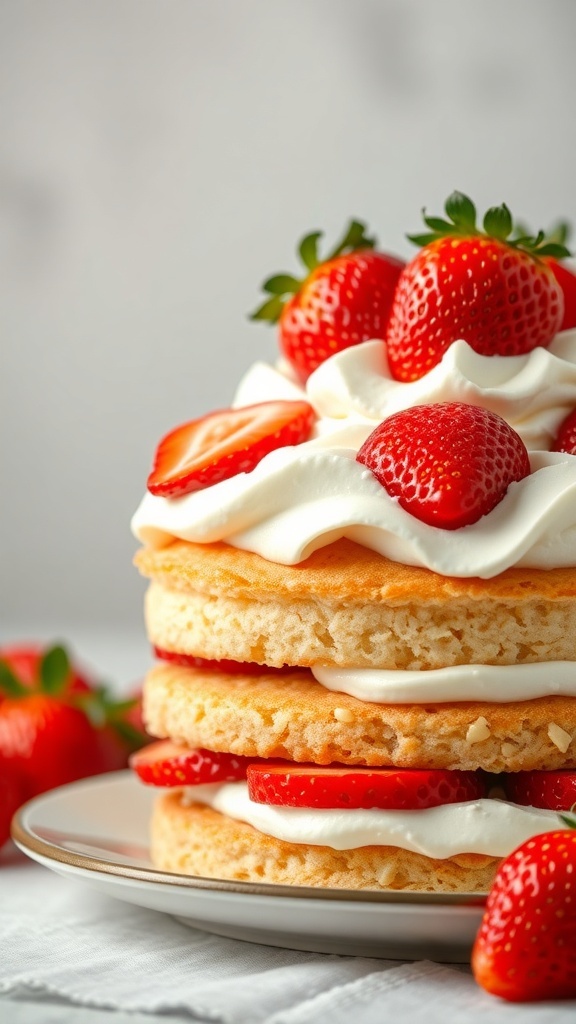
Strawberry shortcake is a classic dessert that brings a smile to anyone’s face. The image shows a beautifully layered cake, featuring fluffy sponge layers filled with fresh strawberries and topped with a generous dollop of whipped cream. The vibrant red strawberries pop against the soft, creamy backdrop, making it not just delicious but also visually appealing.
This dessert is perfect for warm weather gatherings or any celebration. The combination of sweet strawberries, light cake, and airy whipped cream creates a delightful treat that’s hard to resist. It’s simple to make, and you can even get the kids involved in the process!
Now, let’s get into the details of how to whip up this delightful strawberry shortcake at home.
Ingredients
- 2 cups all-purpose flour
- 1/4 cup granulated sugar
- 1 tablespoon baking powder
- 1/2 teaspoon salt
- 1/2 cup unsalted butter, softened
- 1 cup milk
- 2 large eggs
- 2 cups fresh strawberries, sliced
- 1 cup heavy whipping cream
- 1/4 cup powdered sugar
Instructions
- Preheat the oven to 350°F (175°C). Grease and flour two 9-inch round cake pans.
- In a large bowl, mix flour, sugar, baking powder, and salt. Add softened butter and mix until crumbly.
- In another bowl, whisk together milk and eggs. Gradually add this mixture to the dry ingredients, stirring until just combined.
- Divide the batter evenly between the prepared pans. Bake for 25-30 minutes, or until a toothpick comes out clean.
- While the cakes cool, prepare the whipped cream. In a mixing bowl, beat the heavy cream and powdered sugar until soft peaks form.
- Once the cakes are cool, slice each cake in half horizontally. Layer the bottom half with whipped cream and sliced strawberries. Repeat with the next layer, then place the top layer on.
- Finish by topping the cake with more whipped cream and fresh strawberries. Serve immediately and enjoy!
Mango Sticky Rice with Coconut Cream
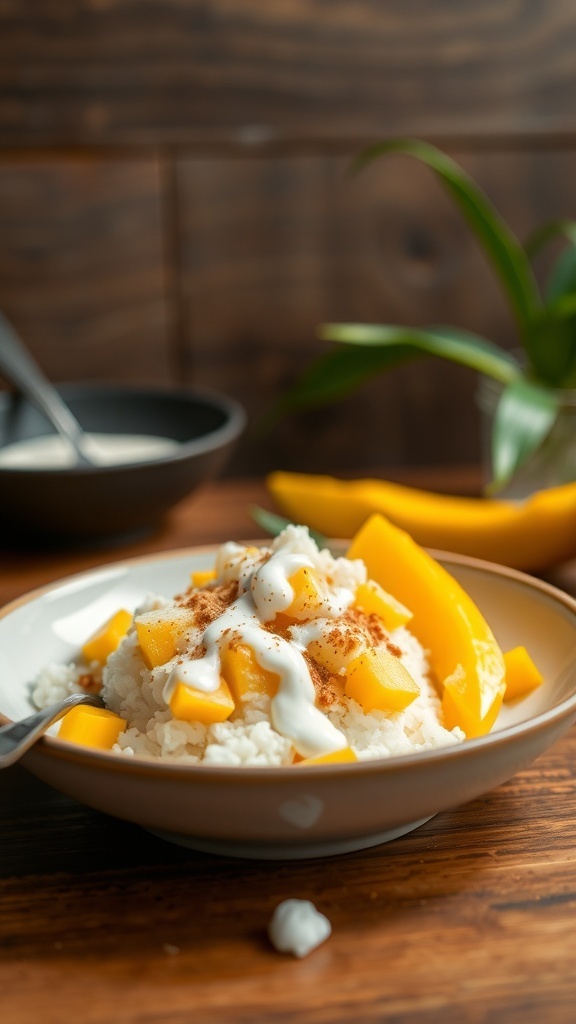
Mango Sticky Rice is a delightful dessert that brings together sweet mangoes and creamy coconut. This dish is popular in many Southeast Asian countries, especially Thailand. The combination of flavors and textures makes it a favorite among dessert lovers.
In the image, you can see a bowl of sticky rice topped with fresh mango slices and drizzled with coconut cream. The rice is soft and slightly chewy, while the mango adds a burst of sweetness. A sprinkle of coconut cream on top enhances the richness of the dish. It’s a simple yet satisfying treat that can be enjoyed any time of the year.
Making Mango Sticky Rice at home is easy and fun. You’ll need just a few ingredients, and the steps are straightforward. Let’s get into the recipe!
Ingredients
- 1 cup glutinous rice
- 1 1/2 cups coconut milk
- 1/2 cup sugar
- 1/4 teaspoon salt
- 2 ripe mangoes, peeled and sliced
- Sesame seeds or mung beans for garnish (optional)
Instructions
- Soak the Rice: Rinse the glutinous rice under cold water until the water runs clear. Soak it in water for at least 4 hours or overnight.
- Steam the Rice: Drain the soaked rice and place it in a steamer basket lined with cheesecloth. Steam for about 25-30 minutes until the rice is tender.
- Prepare the Coconut Sauce: In a saucepan, combine coconut milk, sugar, and salt. Heat over medium heat until the sugar dissolves. Do not boil.
- Mix the Rice: Once the rice is cooked, transfer it to a bowl. Pour half of the coconut sauce over the rice and mix well. Let it sit for about 15 minutes to absorb the flavors.
- Serve: To serve, place a portion of sticky rice on a plate, top with mango slices, and drizzle with the remaining coconut sauce. Garnish with sesame seeds or mung beans if desired.