
Christmas finger foods are perfect for adding a fun and festive touch to your holiday gatherings. These bite-sized treats are easy to prepare and even simpler to enjoy, making them ideal for parties where mingling is key. From savory to sweet, there’s a little something for everyone, ensuring that your holiday spread is both tasty and memorable!
Mini Caprese Skewers
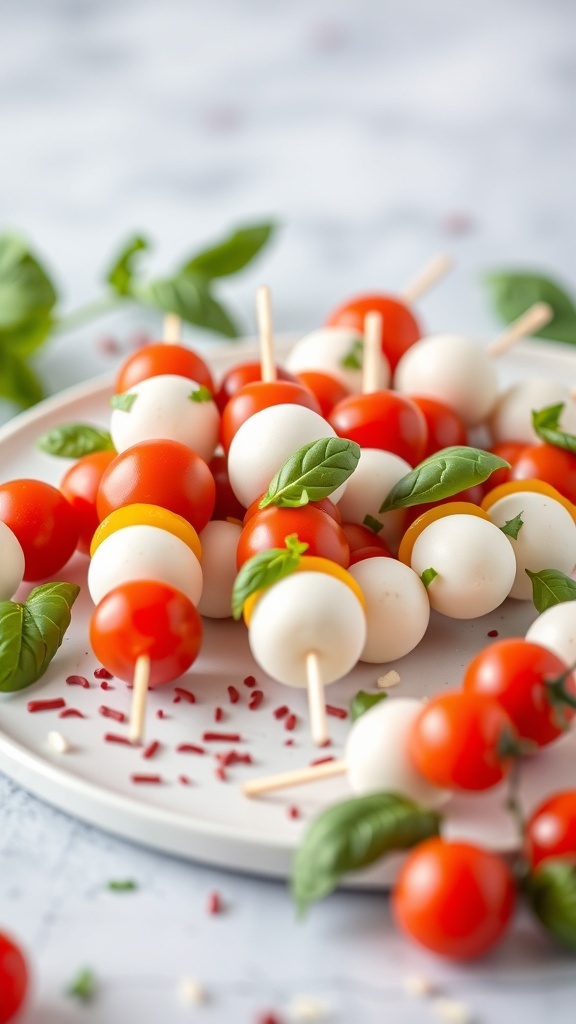
Mini Caprese skewers are a delightful addition to any holiday spread. These colorful bites combine fresh cherry tomatoes, creamy mozzarella balls, and fragrant basil leaves. They are not only easy to make but also look stunning on a platter, making them perfect for festive gatherings.
The vibrant red and white colors of the ingredients create a festive look that fits right in with Christmas celebrations. Plus, they are light and refreshing, which is a nice contrast to heavier holiday foods.
To make these skewers, all you need are some simple ingredients and a few minutes of your time. They are great for serving as finger foods, allowing guests to enjoy them without the need for utensils. Let’s get into the recipe!
Ingredients
- 1 pint cherry tomatoes
- 8 ounces mozzarella balls (bocconcini)
- Fresh basil leaves
- 1 tablespoon balsamic glaze (optional)
- Salt and pepper to taste
- Skewers or toothpicks
Instructions
- Prepare the Skewers: Take a skewer or toothpick and start by threading a cherry tomato onto it.
- Add Mozzarella: Follow the tomato with a mozzarella ball, then a basil leaf.
- Repeat: Continue alternating between tomatoes, mozzarella, and basil until the skewer is filled, leaving some space at the end for handling.
- Season: Drizzle with balsamic glaze if desired, and sprinkle with salt and pepper to taste.
- Serve: Arrange the skewers on a platter and enjoy!
Savory Stuffed Mushrooms

Stuffed mushrooms are a fantastic finger food for any holiday gathering. These little bites are not only easy to make but also packed with flavor. The image shows a plate of perfectly baked mushrooms filled with a creamy, cheesy mixture that looks irresistible. Topped with fresh herbs, they add a pop of color and freshness to your spread.
To make these savory treats, you’ll need some basic ingredients like mushrooms, cheese, and spices. They’re perfect for sharing and can be made ahead of time, so you can enjoy the festivities without being stuck in the kitchen.
Ingredients
- 16 large mushrooms, stems removed
- 1 cup cream cheese, softened
- 1/2 cup shredded cheddar cheese
- 1/4 cup grated Parmesan cheese
- 1/4 cup cooked bacon, crumbled (optional)
- 2 tablespoons fresh parsley, chopped
- 1 teaspoon garlic powder
- Salt and pepper to taste
Instructions
- Preheat your oven to 375°F (190°C).
- In a bowl, mix together the cream cheese, cheddar cheese, Parmesan cheese, bacon (if using), parsley, garlic powder, salt, and pepper until well combined.
- Stuff each mushroom cap with the cheese mixture, pressing it in gently.
- Place the stuffed mushrooms on a baking sheet lined with parchment paper.
- Bake for 20-25 minutes, or until the mushrooms are tender and the tops are golden.
- Remove from the oven and let them cool slightly before serving.
Sweet Potato Bites with Avocado
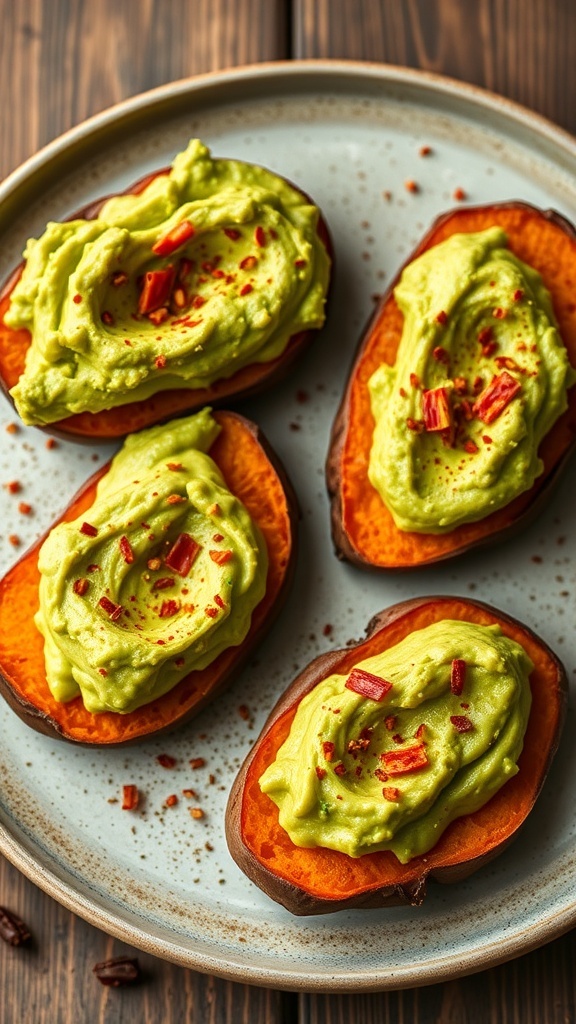
Sweet potato bites topped with creamy avocado make for a delightful finger food at any gathering. The vibrant orange of the sweet potato contrasts beautifully with the bright green avocado, creating an eye-catching dish. Each bite is not only visually appealing but also packed with flavor and nutrition.
These bites are simple to prepare and perfect for holiday parties. The sweetness of the roasted sweet potatoes pairs wonderfully with the rich, creamy avocado. A sprinkle of red pepper flakes adds a touch of heat, making these bites a hit with everyone.
They are a great option for those looking for a healthy yet delicious snack. Plus, they are gluten-free and vegan, making them suitable for various dietary preferences. Serve them warm or at room temperature for a tasty treat that will impress your guests.
Ingredients
- 2 medium sweet potatoes
- 2 ripe avocados
- 1 tablespoon lime juice
- Salt and pepper to taste
- Red pepper flakes for garnish
Instructions
- Preheat your oven to 400°F (200°C). Cut the sweet potatoes in half lengthwise and place them cut side down on a baking sheet. Roast for about 25-30 minutes until tender.
- While the sweet potatoes are roasting, scoop the avocado flesh into a bowl. Add lime juice, salt, and pepper, and mash until smooth.
- Once the sweet potatoes are done, let them cool slightly. Flip them over and scoop out a little of the flesh to create a small well.
- Fill each sweet potato half with the avocado mixture. Sprinkle with red pepper flakes for an extra kick.
- Serve immediately or let them cool and enjoy later!
Spicy Meatball Sliders

Spicy meatball sliders are perfect finger foods for any holiday gathering. These little sandwiches pack a punch with juicy meatballs nestled in soft buns, topped with zesty ketchup and fresh basil. They’re easy to grab and eat, making them a hit at parties.
The image shows two sliders on a wooden board, each with a meatball, a drizzle of ketchup, and a sprig of basil for that fresh touch. The warm colors of the buns and the vibrant red of the ketchup create an inviting look. These sliders not only taste great but also look fantastic on your holiday table.
Ingredients
- 1 pound ground beef
- 1/2 cup breadcrumbs
- 1/4 cup grated Parmesan cheese
- 1 large egg
- 2 cloves garlic, minced
- 1 teaspoon red pepper flakes
- 1 teaspoon Italian seasoning
- Salt and pepper to taste
- 12 slider buns
- Ketchup for topping
- Fresh basil leaves for garnish
Instructions
- Preheat your oven to 400°F (200°C).
- In a bowl, mix together ground beef, breadcrumbs, Parmesan, egg, garlic, red pepper flakes, Italian seasoning, salt, and pepper until well combined.
- Form the mixture into small meatballs, about 1 inch in diameter.
- Place the meatballs on a baking sheet and bake for 15-20 minutes, or until cooked through.
- While the meatballs are baking, prepare the slider buns by slicing them in half.
- Once the meatballs are done, place one meatball on each bun half, drizzle with ketchup, and add a basil leaf on top.
- Top with the other half of the bun and serve warm.
Prosciutto-Wrapped Asparagus
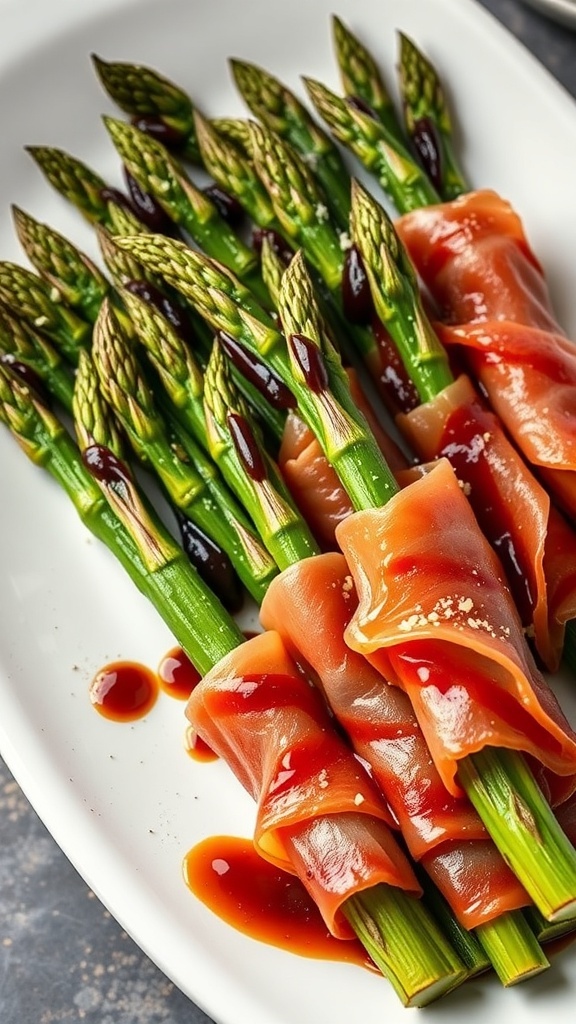
Prosciutto-wrapped asparagus is a delightful finger food that adds a touch of elegance to any holiday gathering. The combination of salty prosciutto and fresh asparagus creates a perfect balance of flavors. This dish is not only tasty but also visually appealing, making it a great addition to your Christmas spread.
To make these tasty bites, start by selecting fresh asparagus spears. The vibrant green color and crisp texture are essential for this recipe. Wrap each spear with a slice of prosciutto, ensuring it covers most of the asparagus. This not only adds flavor but also helps to keep the asparagus tender during cooking.
Once wrapped, you can choose to bake or grill the asparagus. Baking gives it a nice crispness, while grilling adds a smoky flavor. Serve these wrapped spears with a drizzle of balsamic glaze for an extra touch of sweetness. They make for a perfect appetizer or a side dish that everyone will enjoy!
Ingredients
- 1 pound fresh asparagus
- 8 ounces prosciutto, thinly sliced
- 2 tablespoons olive oil
- Salt and pepper to taste
- Balsamic glaze for drizzling (optional)
Instructions
- Preheat your oven to 400°F (200°C).
- Wash and trim the asparagus, removing the tough ends.
- Wrap each asparagus spear with a slice of prosciutto, starting from the bottom and spiraling up to the tip.
- Place the wrapped asparagus on a baking sheet lined with parchment paper.
- Drizzle with olive oil and season with salt and pepper.
- Bake for 12-15 minutes, or until the prosciutto is crispy and the asparagus is tender.
- Remove from the oven and drizzle with balsamic glaze if desired. Serve warm.
Stuffed Mini Peppers
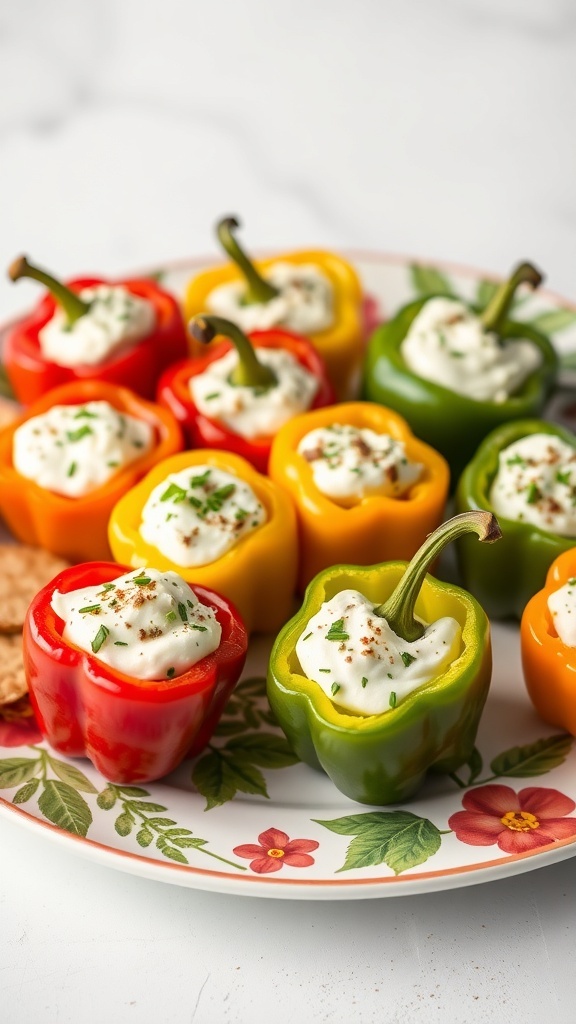
Stuffed mini peppers are a colorful and tasty addition to any holiday spread. These bite-sized treats are not only visually appealing but also packed with flavor. The vibrant red, yellow, and green peppers create a festive look that’s perfect for Christmas gatherings.
Each pepper is filled with a creamy mixture that can include cheese, herbs, and spices. This combination makes them a delightful finger food that guests can easily enjoy while mingling. Plus, they are simple to prepare, making them a great choice for busy holiday hosts.
To make these stuffed mini peppers, you’ll need a few basic ingredients and some easy steps. They can be served warm or cold, allowing for flexibility in your serving style. Whether you’re hosting a party or just looking for a fun snack, these peppers are sure to impress!
Cranberry Brie Bites
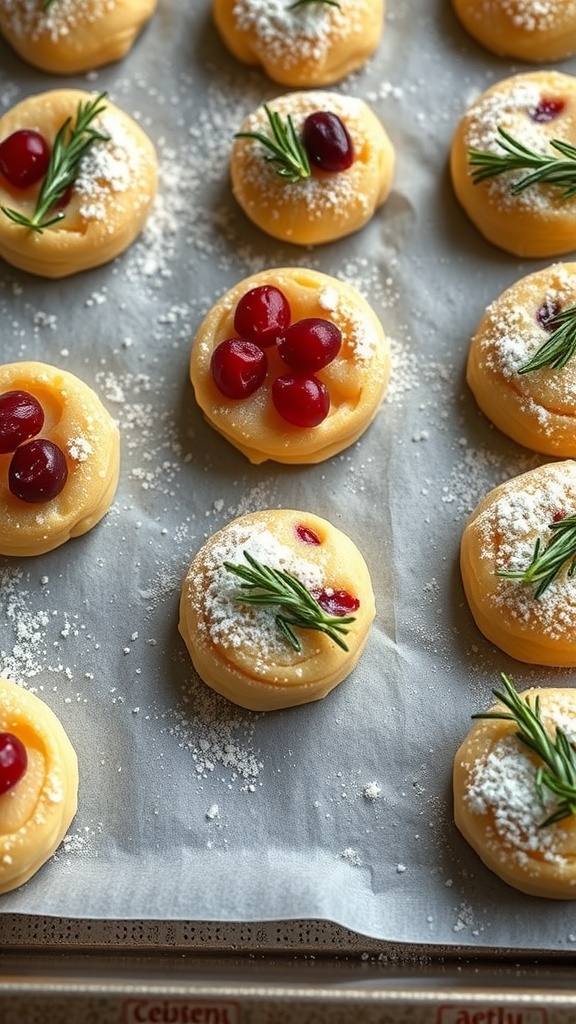
Cranberry Brie Bites are a delightful treat perfect for holiday gatherings. These little bites combine creamy brie cheese with the tartness of cranberries, all wrapped in a flaky pastry. They are not just tasty but also visually appealing, making them a hit at any festive table.
The image shows these bites beautifully arranged on a baking sheet, topped with fresh cranberries and sprigs of rosemary. The golden pastry is sprinkled with powdered sugar, adding a touch of sweetness and charm. The contrast of colors makes these bites irresistible!
Making Cranberry Brie Bites is simple and fun. They can be prepared ahead of time and baked just before serving, ensuring they are warm and gooey when enjoyed. These bites are a great way to impress your guests without spending hours in the kitchen.
Ingredients
- 1 sheet of puff pastry, thawed
- 1 cup brie cheese, cut into small pieces
- 1/2 cup cranberry sauce
- 1 egg, beaten (for egg wash)
- Fresh rosemary sprigs (for garnish)
- Powdered sugar (for dusting)
Instructions
- Preheat your oven to 375°F (190°C).
- Roll out the puff pastry on a floured surface and cut it into squares, about 3×3 inches.
- Place a piece of brie in the center of each square, followed by a spoonful of cranberry sauce.
- Fold the corners of the pastry over the filling and pinch to seal.
- Brush the tops with the beaten egg for a golden finish.
- Place the bites on a baking sheet lined with parchment paper.
- Bake for 15-20 minutes or until golden brown.
- Remove from the oven and let cool slightly. Garnish with fresh rosemary and dust with powdered sugar before serving.
Cheese and Charcuterie Board

Cheese and charcuterie boards are a festive way to celebrate the holiday season. They offer a delightful mix of flavors and textures that everyone can enjoy. Picture a beautiful wooden board filled with various cheeses, cured meats, nuts, and fresh fruits. This colorful spread not only looks appealing but also invites guests to nibble and mingle.
Start with a selection of cheeses. A creamy brie, a sharp cheddar, and a blue cheese can create a nice contrast. Add some thinly sliced prosciutto or salami for a savory touch. Nuts like almonds and walnuts provide a satisfying crunch, while fresh fruits like grapes and berries add a pop of color and sweetness.
Don’t forget the accompaniments! A small bowl of honey or a tangy chutney can enhance the flavors of the cheeses. Crackers or slices of baguette are perfect for building little bites. This board is not just food; it’s a centerpiece that encourages conversation and enjoyment.
Now, let’s make your own cheese and charcuterie board!
Ingredients
- 1 cup brie cheese
- 1 cup cheddar cheese
- 1 cup blue cheese
- 4 oz prosciutto
- 4 oz salami
- 1 cup mixed nuts (almonds, walnuts)
- 1 cup fresh grapes
- 1 cup mixed berries (blackberries, strawberries)
- 1/2 cup honey
- 1 box of assorted crackers
- 1 baguette, sliced
Instructions
- Prepare the Board: Start by selecting a large wooden board or platter. Arrange the cheeses in different sections, allowing space for the meats and other items.
- Add Meats: Fold the prosciutto and salami and place them next to the cheeses.
- Fill in with Nuts: Scatter the mixed nuts around the cheeses and meats for a crunchy element.
- Incorporate Fruits: Add grapes and berries to fill in gaps and add color.
- Include Accompaniments: Place a small bowl of honey on the board and arrange the crackers and baguette slices nearby.
- Serve: Invite your guests to dig in and enjoy the variety of flavors!
Bacon-Wrapped Dates

Bacon-wrapped dates are a fantastic finger food for any holiday gathering. These little bites pack a punch with their sweet and savory flavors. The crispy bacon pairs perfectly with the rich, chewy dates, making them a crowd favorite.
To make these treats, start by selecting pitted dates. The sweetness of the dates contrasts beautifully with the salty bacon. Wrapping each date in bacon and securing it with a toothpick is simple and fun. Once baked, the bacon becomes crispy, adding a delightful texture.
These bites can be served warm or at room temperature, making them versatile for any party. Drizzling a bit of honey or balsamic glaze on top adds an extra layer of flavor that guests will love.
Ingredients
- 20 pitted dates
- 10 slices of bacon, cut in half
- Honey or balsamic glaze (optional)
- Toothpicks
Instructions
- Preheat your oven to 400°F (200°C).
- Wrap each date with half a slice of bacon and secure it with a toothpick.
- Place the wrapped dates on a baking sheet lined with parchment paper.
- Bake for 15-20 minutes, or until the bacon is crispy.
- Drizzle with honey or balsamic glaze before serving, if desired.
Savory Palmiers with Pesto
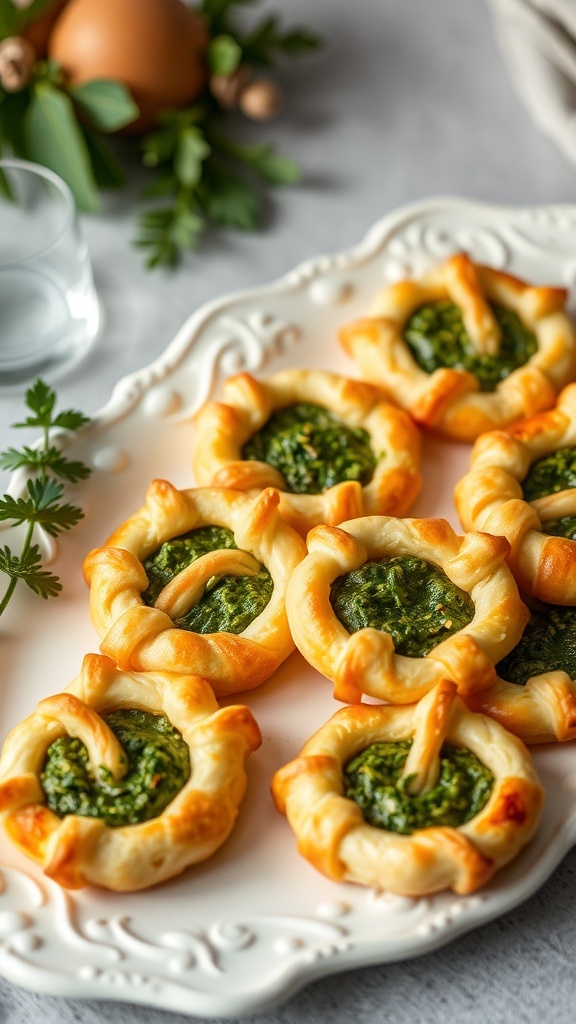
These savory palmiers with pesto are a delightful addition to any holiday spread. They look stunning on a platter, showcasing a golden, flaky pastry wrapped around rich, green pesto. Each bite is a burst of flavor, making them perfect for festive gatherings.
To make these tasty treats, you’ll need some puff pastry, pesto, and a few simple ingredients. They’re easy to prepare and will impress your guests without requiring hours in the kitchen.
Ingredients
- 1 sheet of puff pastry (thawed)
- 1/2 cup pesto (store-bought or homemade)
- 1/4 cup grated Parmesan cheese
- 1 egg (beaten, for egg wash)
- Salt and pepper to taste
Instructions
- Preheat your oven to 400°F (200°C).
- Roll out the puff pastry on a lightly floured surface to smooth it out.
- Spread the pesto evenly over the pastry, leaving a small border around the edges.
- Sprinkle the grated Parmesan cheese over the pesto. Season with salt and pepper.
- Starting from one edge, roll the pastry tightly towards the center until you reach the middle. Repeat with the other side, creating a double roll.
- Slice the rolled pastry into 1/2-inch thick pieces and place them on a baking sheet lined with parchment paper.
- Brush the tops with the beaten egg for a golden finish.
- Bake for 15-20 minutes or until golden brown and puffed up.
- Allow to cool slightly before serving. Enjoy your savory palmiers!
Bruschetta with Tomato and Basil
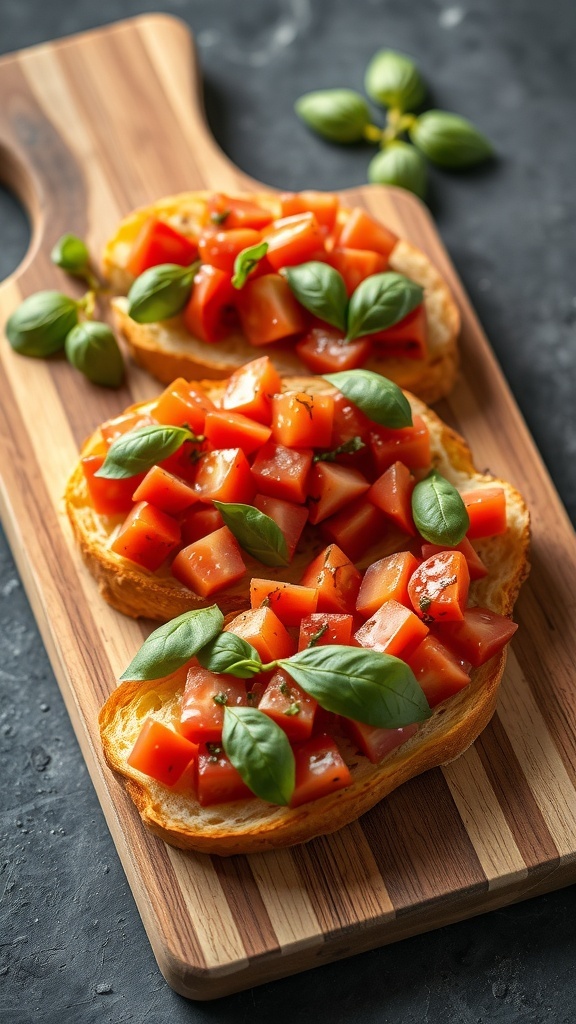
Bruschetta with tomato and basil is a classic finger food that shines at any gathering. The image shows beautifully toasted slices of bread topped with vibrant diced tomatoes and fresh basil leaves. This dish is not only colorful but also packed with flavor, making it a perfect appetizer for the holiday season.
The combination of juicy tomatoes and aromatic basil creates a refreshing bite. The crunch of the bread adds texture, while a drizzle of olive oil enhances the overall taste. This dish is simple to prepare, allowing you to spend more time enjoying the festivities with your guests.
To make this delicious bruschetta, you’ll need fresh ingredients and a few easy steps. It’s a great way to showcase seasonal produce and impress your friends and family.
Ingredients
- 1 baguette or crusty bread
- 4 ripe tomatoes, diced
- 1/4 cup fresh basil leaves, chopped
- 2 cloves garlic, minced
- 3 tablespoons olive oil
- Salt and pepper to taste
Instructions
- Preheat your oven to 400°F (200°C).
- Slice the baguette into 1/2-inch thick pieces and arrange them on a baking sheet.
- Brush each slice with olive oil and toast in the oven for about 5-7 minutes until golden brown.
- In a bowl, mix the diced tomatoes, minced garlic, chopped basil, olive oil, salt, and pepper.
- Once the bread is toasted, remove it from the oven and let it cool slightly.
- Spoon the tomato mixture onto each slice of bread just before serving to keep it crisp.
Garlic Parmesan Roasted Chickpeas
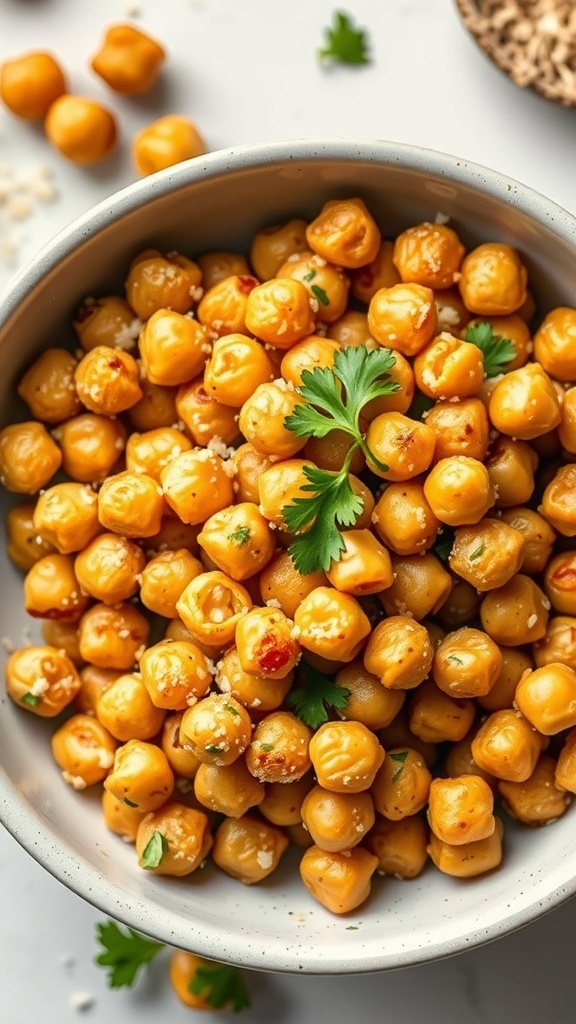
Garlic Parmesan roasted chickpeas are a fantastic finger food for any holiday gathering. They are crunchy, savory, and packed with flavor. These little bites are not only delicious but also healthy, making them a great alternative to traditional snacks.
To make these tasty treats, you start with canned chickpeas. After rinsing and drying them, toss them with olive oil, garlic powder, and grated Parmesan cheese. The combination of garlic and cheese gives them a rich flavor that pairs perfectly with the chickpeas’ natural nuttiness.
Once seasoned, roast them in the oven until they are crispy. The result is a snack that is hard to resist. You can serve them warm or at room temperature, making them perfect for holiday parties.
These chickpeas also make a great topping for salads or soups, adding a delightful crunch. So, whether you’re hosting a festive gathering or just looking for a healthy snack, garlic Parmesan roasted chickpeas are a winner!
Ingredients
- 1 can (15 oz) chickpeas, drained and rinsed
- 2 tablespoons olive oil
- 1 teaspoon garlic powder
- 1/4 cup grated Parmesan cheese
- 1/2 teaspoon salt
- 1/4 teaspoon black pepper
- 1/2 teaspoon smoked paprika (optional)
Instructions
- Preheat your oven to 400°F (200°C).
- Spread the rinsed chickpeas on a clean kitchen towel and pat them dry.
- In a bowl, mix the chickpeas with olive oil, garlic powder, Parmesan cheese, salt, pepper, and smoked paprika if using.
- Spread the seasoned chickpeas in a single layer on a baking sheet.
- Roast in the oven for 25-30 minutes, shaking the pan halfway through, until they are golden and crispy.
- Let them cool slightly before serving. Enjoy!
Mini Taco Cups

Mini taco cups are a fun and tasty finger food perfect for any holiday gathering. These little delights are not only easy to make but also packed with flavor. Imagine crispy taco shells filled with seasoned meat, cheese, and fresh toppings. They look great on a platter and are sure to be a hit with guests!
To make mini taco cups, you can use small tortillas or wonton wrappers. Simply shape them into cups and bake until crispy. Fill them with your choice of seasoned ground beef, chicken, or even beans for a vegetarian option. Top with cheese, diced tomatoes, and a sprinkle of cilantro for that festive touch.
These mini taco cups are versatile. You can customize them with various toppings like guacamole, sour cream, or jalapeños. They are perfect for snacking while mingling, making them a great addition to your Christmas finger foods spread.
Ingredients
- 12 small tortillas or wonton wrappers
- 1 pound ground beef or chicken
- 1 packet taco seasoning
- 1 cup shredded cheese (cheddar or Mexican blend)
- 1 cup diced tomatoes
- 1/4 cup chopped cilantro
- Optional toppings: guacamole, sour cream, jalapeños
Instructions
- Preheat your oven to 375°F (190°C).
- If using tortillas, cut them into smaller circles and press them into a muffin tin to form cups. If using wonton wrappers, simply place them in the muffin tin.
- In a skillet, cook the ground beef or chicken over medium heat. Add the taco seasoning and follow package instructions to mix.
- Fill each tortilla or wonton cup with the cooked meat mixture.
- Top with shredded cheese and bake for about 10-12 minutes until the cheese is melted and the cups are crispy.
- Once out of the oven, add diced tomatoes and cilantro on top. Serve warm with optional toppings.
Buffalo Cauliflower Bites
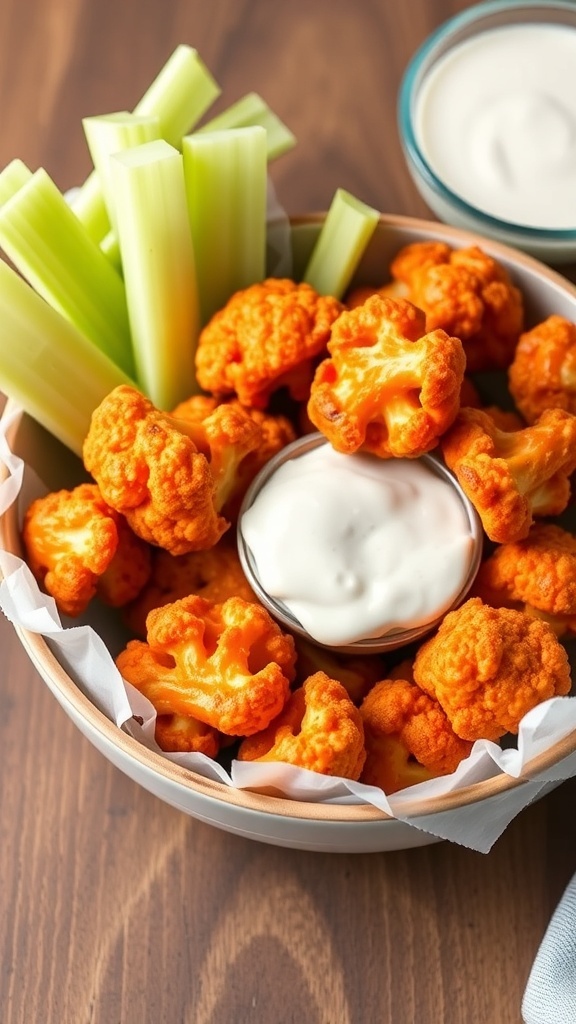
Buffalo Cauliflower Bites are a fun twist on traditional buffalo wings. They bring the same spicy kick but are made with cauliflower, making them a lighter option. Perfect for holiday gatherings, these bites are sure to impress your guests. The bright orange color and crispy texture make them visually appealing and delicious.
To make these bites, you’ll need fresh cauliflower, some spices, and a few simple ingredients. They are easy to prepare and can be served with a side of ranch or blue cheese dressing for dipping. Plus, they’re vegan-friendly!
Ingredients
- 1 head of cauliflower, cut into bite-sized florets
- 1 cup all-purpose flour
- 1 cup water
- 1 teaspoon garlic powder
- 1 teaspoon onion powder
- 1 teaspoon smoked paprika
- 1/2 teaspoon salt
- 1 cup buffalo sauce
- 2 tablespoons olive oil
- Celery sticks, for serving
- Ranch or blue cheese dressing, for dipping
Instructions
- Preheat your oven to 450°F (230°C) and line a baking sheet with parchment paper.
- In a bowl, whisk together flour, water, garlic powder, onion powder, smoked paprika, and salt until smooth.
- Dip each cauliflower floret into the batter, allowing excess to drip off, then place on the baking sheet.
- Bake for 20-25 minutes until golden and crispy.
- In a separate bowl, mix the baked cauliflower with buffalo sauce and olive oil until well coated.
- Return the cauliflower to the oven for another 10 minutes to crisp up.
- Serve hot with celery sticks and your choice of dressing.
Mini Quiches with Spinach and Feta

Mini quiches are a fantastic finger food option for any holiday gathering. They are bite-sized, easy to serve, and packed with flavor. The image shows a tray filled with golden-brown mini quiches, each nestled in a crispy pastry shell. These little delights are topped with vibrant spinach and creamy feta cheese, making them both visually appealing and delicious.
These mini quiches are perfect for Christmas parties. They can be made ahead of time and simply popped in the oven before serving. Guests will love the combination of flavors, and they are sure to be a hit at any festive table.
Here’s how to make your own mini quiches with spinach and feta:
Ingredients
- 1 package of pre-made pastry shells
- 1 cup fresh spinach, chopped
- 1/2 cup feta cheese, crumbled
- 4 large eggs
- 1 cup milk
- 1/2 teaspoon salt
- 1/4 teaspoon black pepper
- 1/4 teaspoon garlic powder
- 1 tablespoon fresh parsley, chopped (optional)
Instructions
- Preheat your oven to 375°F (190°C).
- In a mixing bowl, whisk together the eggs, milk, salt, pepper, and garlic powder until well combined.
- Add the chopped spinach and crumbled feta to the egg mixture, stirring gently to combine.
- Place the pastry shells on a baking sheet. Carefully fill each shell with the egg mixture, being careful not to overfill.
- Bake for 20-25 minutes or until the egg is set and the tops are lightly golden.
- Remove from the oven and let cool slightly before serving. Garnish with fresh parsley if desired.
Enjoy these mini quiches warm or at room temperature. They are sure to be a crowd-pleaser!
Spinach and Artichoke Dip Cups

Spinach and artichoke dip cups are a fantastic finger food for any holiday gathering. These little bites are not only tasty but also easy to make. The crispy, golden cups hold a creamy filling that combines the rich flavors of spinach and artichokes. They are perfect for sharing and will surely impress your guests.
The cups are made from wonton wrappers, which are baked until crispy. This gives them a delightful crunch that pairs perfectly with the smooth dip. The filling is a blend of cream cheese, sour cream, and mozzarella, making it rich and satisfying. A sprinkle of paprika on top adds a pop of color and a hint of spice.
These dip cups are versatile too! You can serve them warm or at room temperature, making them ideal for any party setup. Plus, they can be prepped ahead of time, so you can enjoy the festivities without being stuck in the kitchen.
Ingredients
- 24 wonton wrappers
- 1 cup fresh spinach, chopped
- 1 cup canned artichoke hearts, drained and chopped
- 1 cup cream cheese, softened
- 1/2 cup sour cream
- 1 cup shredded mozzarella cheese
- 1/4 cup grated Parmesan cheese
- 1 teaspoon garlic powder
- Salt and pepper to taste
- Paprika for garnish
Instructions
- Preheat the oven to 350°F (175°C).
- Lightly grease a muffin tin. Press each wonton wrapper into the cups of the muffin tin to form little cups.
- Bake the wonton wrappers for about 8-10 minutes or until they are golden brown and crispy.
- In a mixing bowl, combine the chopped spinach, artichoke hearts, cream cheese, sour cream, mozzarella, Parmesan, garlic powder, salt, and pepper. Mix until well combined.
- Once the wonton cups are baked, remove them from the oven and fill each cup with the spinach and artichoke mixture.
- Return the filled cups to the oven and bake for an additional 10-12 minutes until the filling is hot and bubbly.
- Garnish with a sprinkle of paprika before serving. Enjoy your delicious spinach and artichoke dip cups!
Cheesy Garlic Breadsticks

Cheesy garlic breadsticks are a delightful treat that everyone loves, especially during the festive season. These golden, crispy sticks are topped with melted cheese and a sprinkle of fresh herbs, making them irresistible. The warm aroma of garlic fills the air, inviting everyone to grab a piece.
These breadsticks are perfect for holiday gatherings. They pair wonderfully with marinara sauce for dipping, adding a tangy contrast to the cheesy goodness. Whether served as an appetizer or a side dish, they are sure to be a hit at any Christmas party.
Making cheesy garlic breadsticks at home is simple and fun. Gather your ingredients, and let’s get started!
Ingredients
- 1 package of pizza dough
- 1 cup shredded mozzarella cheese
- 2 tablespoons unsalted butter, melted
- 2 cloves garlic, minced
- 1 teaspoon dried parsley
- 1/2 teaspoon salt
- 1/4 teaspoon black pepper
- Marinara sauce for dipping
Instructions
- Preheat your oven to 400°F (200°C).
- Roll out the pizza dough on a floured surface to your desired thickness.
- In a small bowl, mix melted butter, minced garlic, parsley, salt, and pepper.
- Brush the garlic butter mixture over the rolled-out dough.
- Sprinkle shredded mozzarella cheese evenly on top.
- Cut the dough into sticks using a pizza cutter.
- Place the breadsticks on a baking sheet lined with parchment paper.
- Bake for 12-15 minutes or until golden brown and the cheese is bubbly.
- Remove from the oven and let cool slightly before serving with marinara sauce.
Sweet and Spicy Bacon-Wrapped Pineapple
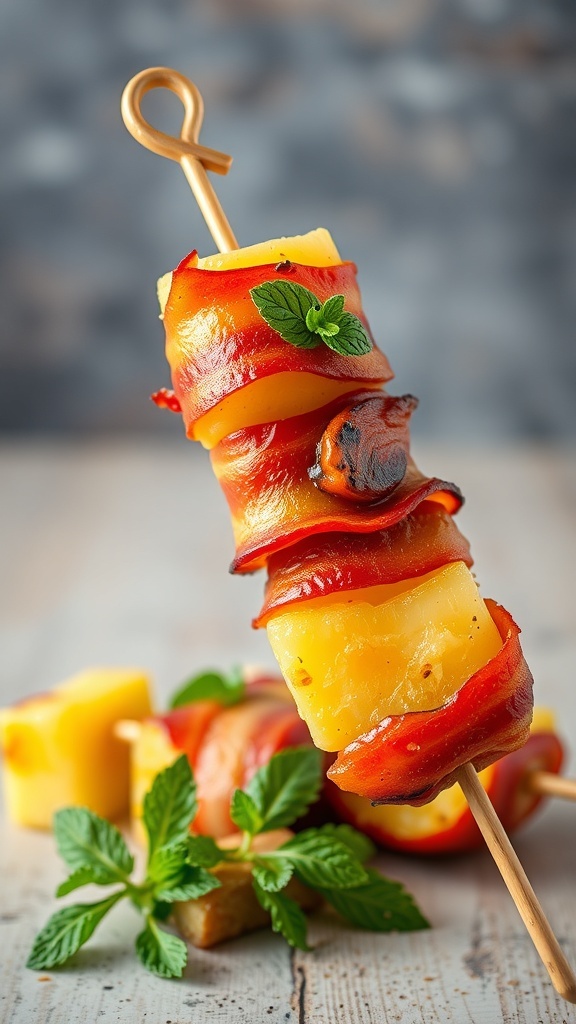
Sweet and spicy bacon-wrapped pineapple is a delightful treat that combines the juicy sweetness of pineapple with the savory crunch of bacon. This dish is perfect for holiday gatherings, bringing a burst of flavor that everyone will love. The vibrant colors of the pineapple and crispy bacon create an inviting presentation that makes it hard to resist.
To make these tasty bites, start by cutting fresh pineapple into bite-sized chunks. Wrap each piece with a slice of bacon, securing it with a toothpick. The combination of sweet pineapple and salty bacon creates a perfect balance that will have your guests reaching for more.
Grilling or baking these skewers enhances the flavors even more, allowing the bacon to crisp up while the pineapple caramelizes slightly. Serve them warm, and watch as they disappear from the platter!
Ingredients
- 1 fresh pineapple, cut into chunks
- 12 slices of bacon
- 1/4 cup brown sugar
- 1 teaspoon cayenne pepper (optional for heat)
- Fresh mint leaves for garnish
Instructions
- Preheat your oven to 400°F (200°C) or prepare a grill.
- Wrap each pineapple chunk with a slice of bacon and secure with a toothpick.
- In a small bowl, mix brown sugar and cayenne pepper. Sprinkle this mixture over the bacon-wrapped pineapple.
- Place the skewers on a baking sheet or grill. Bake for 20-25 minutes or grill until the bacon is crispy.
- Remove from heat and let cool slightly. Garnish with fresh mint leaves before serving.
Fruit and Nut Energy Bites
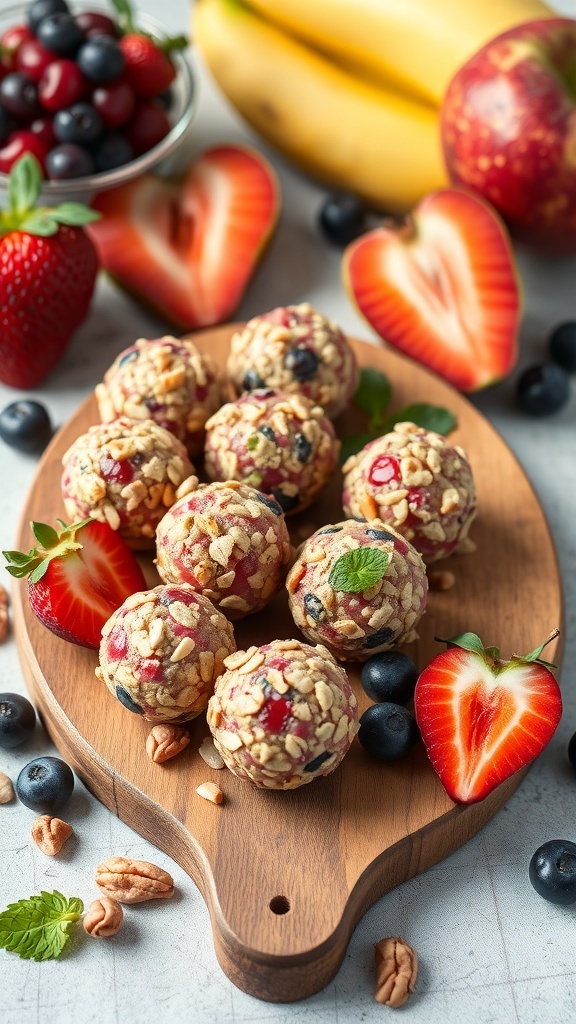
Fruit and nut energy bites are a fantastic addition to your holiday spread. These little snacks are not only tasty but also packed with nutrients. They look colorful and inviting, making them perfect for festive gatherings. The combination of fruits and nuts gives a delightful crunch and sweetness that everyone will enjoy.
In the image, you can see a beautiful arrangement of energy bites made from oats, nuts, and dried fruits. They are round and have a lovely texture, coated with oats and bits of fruit. Surrounding them are fresh strawberries, blueberries, and bananas, which add a pop of color and freshness to the presentation.
These bites are easy to make and can be customized with your favorite ingredients. They are great for a quick snack or a healthy dessert option. Plus, they are perfect for sharing with friends and family during the holiday season!
Ingredients
- 1 cup rolled oats
- 1/2 cup almond butter
- 1/4 cup honey or maple syrup
- 1/2 cup mixed dried fruits (like cranberries, raisins, or apricots)
- 1/4 cup chopped nuts (such as pecans or walnuts)
- 1/4 cup mini chocolate chips (optional)
- 1/2 teaspoon vanilla extract
- Pinch of salt
Instructions
- Mix Ingredients: In a large bowl, combine rolled oats, almond butter, honey, dried fruits, chopped nuts, chocolate chips (if using), vanilla extract, and salt. Stir until everything is well combined.
- Form Bites: Using your hands, take small portions of the mixture and roll them into bite-sized balls. Place them on a baking sheet lined with parchment paper.
- Chill: Refrigerate the energy bites for at least 30 minutes to help them firm up.
- Serve: Once chilled, serve them on a platter with fresh fruits for a festive touch. Enjoy!
Pesto and Goat Cheese Stuffed Cherry Tomatoes
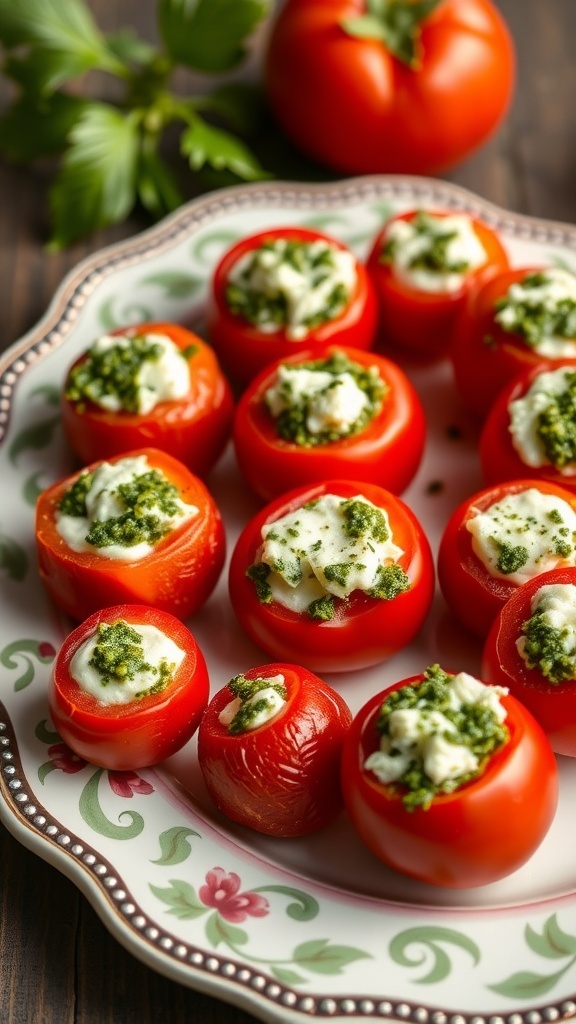
Pesto and goat cheese stuffed cherry tomatoes are a delightful addition to any holiday spread. These bite-sized treats are not only colorful but also packed with flavor. The vibrant red of the cherry tomatoes contrasts beautifully with the creamy white goat cheese and the rich green of the pesto. They make for a perfect finger food that guests can easily pop into their mouths while mingling.
Making these stuffed tomatoes is simple and fun. Start by hollowing out the cherry tomatoes, which creates a little cup for the filling. The combination of creamy goat cheese and zesty pesto brings a unique taste that pairs wonderfully with the fresh tomato. These little bites are sure to impress your friends and family!
Ingredients
- 20 cherry tomatoes
- 4 oz goat cheese, softened
- 1/4 cup pesto
- Salt and pepper to taste
- Fresh basil leaves for garnish (optional)
Instructions
- Prepare the Tomatoes: Cut the tops off the cherry tomatoes and scoop out the insides using a small spoon or a melon baller.
- Make the Filling: In a bowl, mix the softened goat cheese and pesto until well combined. Season with salt and pepper to taste.
- Stuff the Tomatoes: Using a small spoon, fill each hollowed cherry tomato with the goat cheese and pesto mixture.
- Garnish: If desired, top each stuffed tomato with a small basil leaf for added flavor and presentation.
- Chill and Serve: Place the stuffed tomatoes on a serving platter and refrigerate for about 30 minutes before serving to let the flavors meld.
Caramelized Onion Tartlets
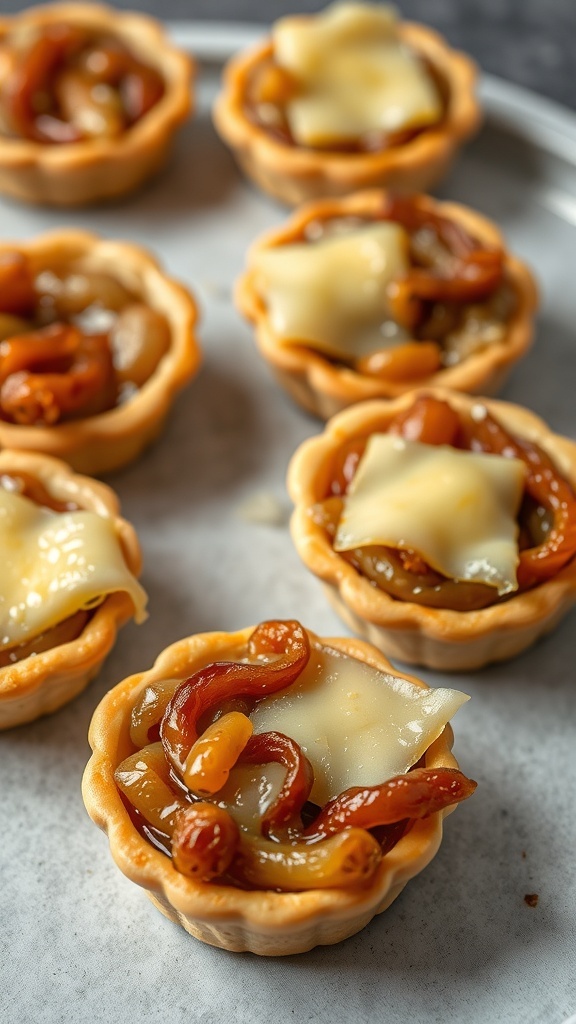
Caramelized onion tartlets are a delightful finger food perfect for holiday gatherings. These bite-sized treats feature a crispy pastry shell filled with sweet, golden caramelized onions. Topped with a slice of cheese, they bring together rich flavors that everyone will love.
The tartlets are easy to prepare and can be made ahead of time, making them a great choice for busy hosts. The combination of the flaky crust and the savory filling creates a satisfying snack that pairs well with festive drinks.
To make these tartlets, you’ll need a few simple ingredients. Gather some puff pastry, onions, cheese, and a touch of balsamic vinegar for added depth. The process is straightforward, and the results are sure to impress your guests.
Ingredients
- 1 sheet of puff pastry, thawed
- 2 large onions, thinly sliced
- 2 tablespoons olive oil
- 1 tablespoon balsamic vinegar
- Salt and pepper to taste
- 8 ounces cheese (like Gruyère or mozzarella), sliced
Instructions
- Preheat the oven to 400°F (200°C).
- In a skillet, heat olive oil over medium heat. Add the sliced onions and cook for about 15-20 minutes, stirring occasionally, until they are golden brown.
- Stir in the balsamic vinegar, salt, and pepper. Cook for another 2-3 minutes, then remove from heat.
- Roll out the puff pastry on a floured surface and cut it into circles to fit your tartlet pans.
- Place the pastry circles into the pans and fill each with the caramelized onion mixture.
- Top each tartlet with a slice of cheese.
- Bake in the preheated oven for 15-20 minutes, or until the pastry is golden and the cheese is melted.
- Let cool slightly before serving. Enjoy your delicious caramelized onion tartlets!
Coconut Shrimp with Mango Sauce

Coconut shrimp is a fun and tasty finger food that brings a tropical vibe to any holiday gathering. The crispy, golden exterior pairs perfectly with the sweet and tangy mango sauce, making it a hit at parties. These bite-sized delights are easy to make and will impress your guests.
The shrimp are coated in a mixture of coconut and breadcrumbs, giving them a crunchy texture. When you dip them into the mango sauce, the flavors blend beautifully. This dish is not just delicious; it also looks great on a festive platter.
To make coconut shrimp, you’ll need fresh shrimp, shredded coconut, and a few pantry staples. The mango sauce is simple to whip up and adds a vibrant color to your plate. Serve these shrimp warm, and watch them disappear!
Ingredients
- 1 pound large shrimp, peeled and deveined
- 1 cup shredded coconut
- 1 cup breadcrumbs
- 2 eggs, beaten
- 1/2 cup all-purpose flour
- 1 teaspoon salt
- 1/2 teaspoon pepper
- Oil for frying
- 1 ripe mango, peeled and diced
- 1 tablespoon lime juice
- 1 tablespoon honey
- 1/4 teaspoon salt
Instructions
- Prepare the Shrimp: In a bowl, mix flour, salt, and pepper. In another bowl, beat the eggs. In a third bowl, combine shredded coconut and breadcrumbs.
- Coat the Shrimp: Dip each shrimp in the flour mixture, then in the egg, and finally in the coconut-breadcrumb mixture. Make sure they are well coated.
- Fry the Shrimp: Heat oil in a frying pan over medium heat. Fry the shrimp in batches until golden brown, about 2-3 minutes per side. Drain on paper towels.
- Make the Mango Sauce: In a blender, combine diced mango, lime juice, honey, and salt. Blend until smooth.
- Serve: Arrange the coconut shrimp on a platter with the mango sauce in the center for dipping. Enjoy!
Zucchini Fritters with Tzatziki

These zucchini fritters are a fantastic finger food for your holiday gatherings. They’re crispy on the outside and soft on the inside, making them a delightful treat. The vibrant colors and golden-brown edges make them visually appealing, perfect for impressing your guests.
Served alongside a creamy tzatziki sauce, these fritters offer a refreshing contrast. The coolness of the tzatziki complements the warm, savory fritters beautifully. This combination is sure to be a hit at any festive gathering.
Ingredients
- 2 medium zucchinis, grated
- 1 teaspoon salt
- 1/2 cup all-purpose flour
- 1/4 cup grated Parmesan cheese
- 1 large egg
- 1/4 teaspoon black pepper
- 1/4 teaspoon garlic powder
- 1 tablespoon chopped fresh parsley
- Oil for frying
Instructions
- Prepare the Zucchini: Grate the zucchinis and sprinkle with salt. Let them sit for about 10 minutes to draw out moisture. Squeeze out excess water using a clean kitchen towel.
- Mix Ingredients: In a bowl, combine the grated zucchini, flour, Parmesan cheese, egg, black pepper, garlic powder, and parsley. Mix until well combined.
- Heat Oil: In a large skillet, heat oil over medium heat. You want enough oil to cover the bottom of the pan.
- Fry Fritters: Drop spoonfuls of the zucchini mixture into the hot oil. Flatten them slightly with the back of the spoon. Cook for about 3-4 minutes on each side until golden brown.
- Drain and Serve: Remove the fritters from the skillet and place them on paper towels to drain excess oil. Serve warm with tzatziki sauce on the side.
Ham and Cheese Puff Pastry Bites

Ham and cheese puff pastry bites are a delightful addition to any holiday gathering. These little treats are not only easy to make, but they also pack a punch of flavor. The golden, flaky pastry wraps around savory ham and melted cheese, making them a hit with guests of all ages.
These bites are perfect for snacking while mingling or as part of a festive spread. They look great on a platter and are sure to impress. Plus, they can be made ahead of time, so you can enjoy the party without being stuck in the kitchen.
To make these tasty bites, you’ll need a few simple ingredients. Gather some puff pastry, diced ham, shredded cheese, and a bit of mustard for an extra kick. With just a few steps, you’ll have a delicious finger food that everyone will love.
Ingredients
- 1 sheet of puff pastry, thawed
- 1 cup diced ham
- 1 cup shredded cheese (cheddar or your choice)
- 1 tablespoon Dijon mustard
- 1 egg, beaten (for egg wash)
Instructions
- Preheat the oven to 400°F (200°C).
- Roll out the puff pastry on a floured surface and cut it into squares, about 3×3 inches.
- In a bowl, mix the diced ham, shredded cheese, and mustard until well combined.
- Place a spoonful of the ham and cheese mixture in the center of each pastry square.
- Fold the corners of the pastry over the filling and pinch to seal.
- Brush the tops with the beaten egg for a golden finish.
- Arrange the bites on a baking sheet lined with parchment paper and bake for 15-20 minutes, or until golden brown.
- Let them cool slightly before serving. Enjoy!
Herbed Goat Cheese and Fig Crostini
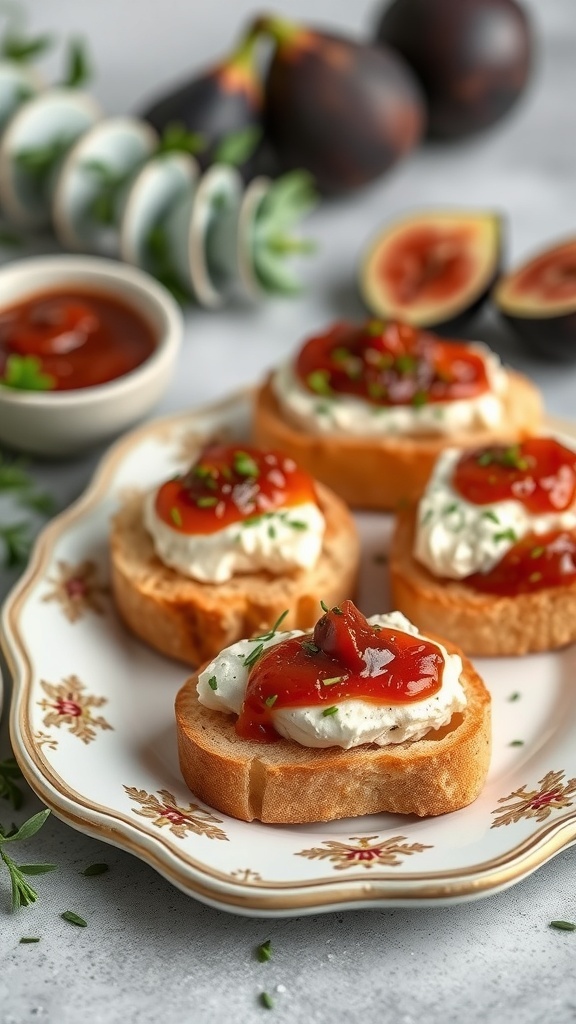
Herbed goat cheese and fig crostini make a delightful addition to any holiday gathering. The combination of creamy goat cheese and sweet figs on crispy bread creates a perfect balance of flavors. Topped with a drizzle of tangy sauce, these bites are sure to impress your guests.
To make these crostini, start by toasting slices of baguette until golden. Spread a generous layer of herbed goat cheese on each slice. Then, add sliced fresh figs on top. A sprinkle of fresh herbs adds a pop of color and flavor. Finally, drizzle with a tangy sauce for that extra zing.
Ingredients
- 1 baguette, sliced
- 8 oz goat cheese, softened
- 1/4 cup fresh herbs (like thyme and parsley), chopped
- 4-5 fresh figs, sliced
- 1/4 cup balsamic glaze
- Olive oil for drizzling
Instructions
- Preheat your oven to 400°F (200°C).
- Arrange the baguette slices on a baking sheet and drizzle with olive oil. Toast in the oven for about 5-7 minutes until golden brown.
- In a bowl, mix the softened goat cheese with the chopped herbs until well combined.
- Spread the herbed goat cheese on each toasted baguette slice.
- Top with sliced figs and drizzle with balsamic glaze.
- Serve immediately and enjoy the festive flavors!
Savory Cheese Straws

Cheese straws are a delightful treat that can elevate any holiday gathering. These crispy, cheesy snacks are perfect for nibbling while mingling. The image shows a tall glass filled with golden-brown cheese straws, standing proudly against a dark backdrop. The straws have a lovely texture, with a hint of crunch that promises a satisfying bite.
Making cheese straws is simple and fun. You can customize them with your favorite cheeses and spices. They are great for parties, as they are easy to grab and enjoy. Plus, they pair wonderfully with dips or can be enjoyed on their own.
Ingredients
- 1 cup all-purpose flour
- 1/2 teaspoon salt
- 1/4 teaspoon cayenne pepper (optional)
- 1/2 cup unsalted butter, softened
- 1 cup shredded cheese (cheddar or your choice)
- 1 large egg yolk
- 2 tablespoons cold water
Instructions
- Preheat your oven to 375°F (190°C) and line a baking sheet with parchment paper.
- In a bowl, mix flour, salt, and cayenne pepper. In another bowl, cream the softened butter and cheese until smooth.
- Add the flour mixture to the cheese mixture. Stir in the egg yolk and cold water until a dough forms.
- Roll out the dough on a floured surface to about 1/4 inch thick. Cut into strips or shapes using a knife or cookie cutter.
- Place the strips on the prepared baking sheet and bake for 12-15 minutes until golden brown.
- Let cool slightly before serving. Enjoy your cheese straws warm or at room temperature!