
If you’re looking for some fun and simple ways to whip up sweet treats this holiday season, these easy Christmas candy recipes are just the ticket! Perfect for gifting or enjoying at home, these deliciously straightforward recipes make candy-making a breeze, even for those without a lot of experience in the kitchen. Dive right in and get ready to spread some holiday cheer with your homemade goodies!
Chocolate-Covered Pretzels
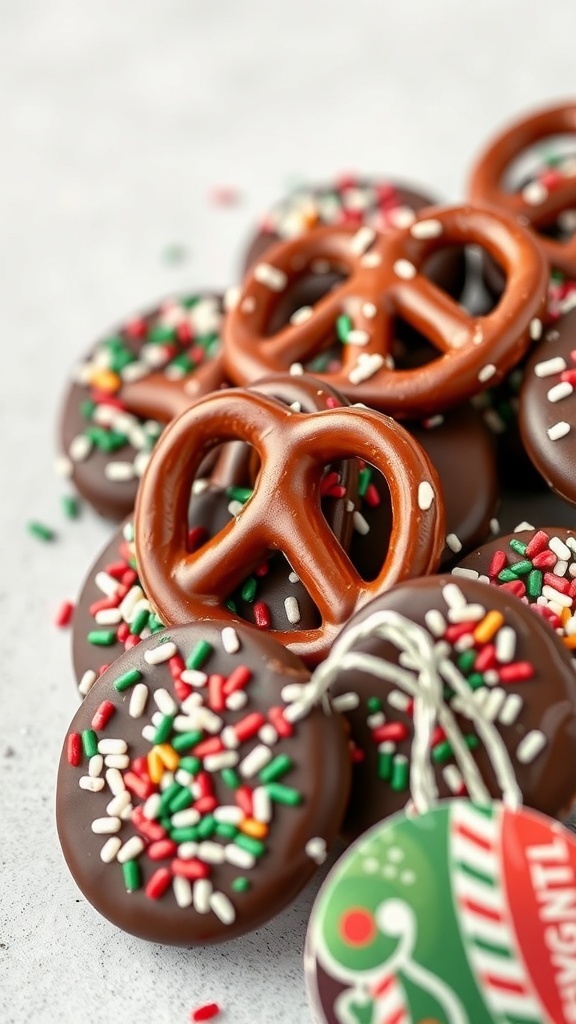
Chocolate-covered pretzels are a fun and tasty treat for the holiday season. They combine the crunch of pretzels with the sweetness of chocolate, making them a perfect snack for gatherings or as gifts. The image shows a delightful mix of chocolate-dipped pretzels, sprinkled with colorful holiday sprinkles. These treats not only look festive but are also super easy to make!
To get started, you’ll need some simple ingredients. Melted chocolate is the star here, coating the pretzels and adding a rich flavor. The sprinkles add a pop of color, making these treats visually appealing. You can customize them with different types of chocolate or sprinkles to match your holiday theme.
Making chocolate-covered pretzels is a straightforward process. Simply dip each pretzel into the melted chocolate, let the excess drip off, and then sprinkle with your choice of toppings. Once they cool, you’ll have a crunchy, sweet snack that everyone will love!
Coconut Snowballs
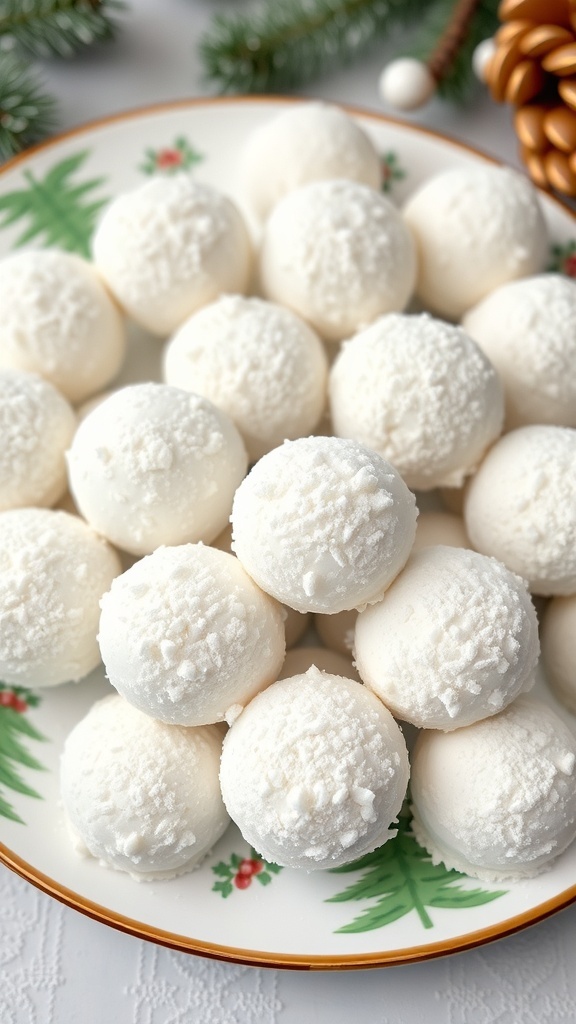
Coconut snowballs are a delightful treat that perfectly capture the spirit of the holidays. These little bites of joy are not only visually appealing but also incredibly tasty. They resemble snowballs, making them a fun addition to your festive table.
Made with shredded coconut, these treats are soft and chewy on the inside, while the outside is coated in more coconut, giving them a snowy appearance. They are easy to make and require minimal ingredients, making them a go-to recipe for anyone looking to whip up something special without too much fuss.
Gather your friends and family to help roll these into perfect little spheres. They are great for sharing and make wonderful gifts when packaged nicely. Plus, they are gluten-free, so everyone can enjoy them!
Ingredients
- 2 cups shredded coconut
- 1 cup sweetened condensed milk
- 1 teaspoon vanilla extract
- 1/4 teaspoon salt
- 1 cup powdered sugar (for rolling)
Instructions
- Mix Ingredients: In a large bowl, combine shredded coconut, sweetened condensed milk, vanilla extract, and salt. Stir until well combined.
- Chill Mixture: Cover the bowl and refrigerate for about 30 minutes. This will make it easier to handle.
- Form Balls: Once chilled, scoop out small portions of the mixture and roll them into balls, about 1 inch in diameter.
- Coat with Sugar: Roll each ball in powdered sugar until fully coated. This adds a nice sweetness and gives them a snowy look.
- Serve: Place the coconut snowballs on a serving platter and enjoy! They can be stored in an airtight container in the fridge for up to a week.
Caramel Pecan Turtle Clusters
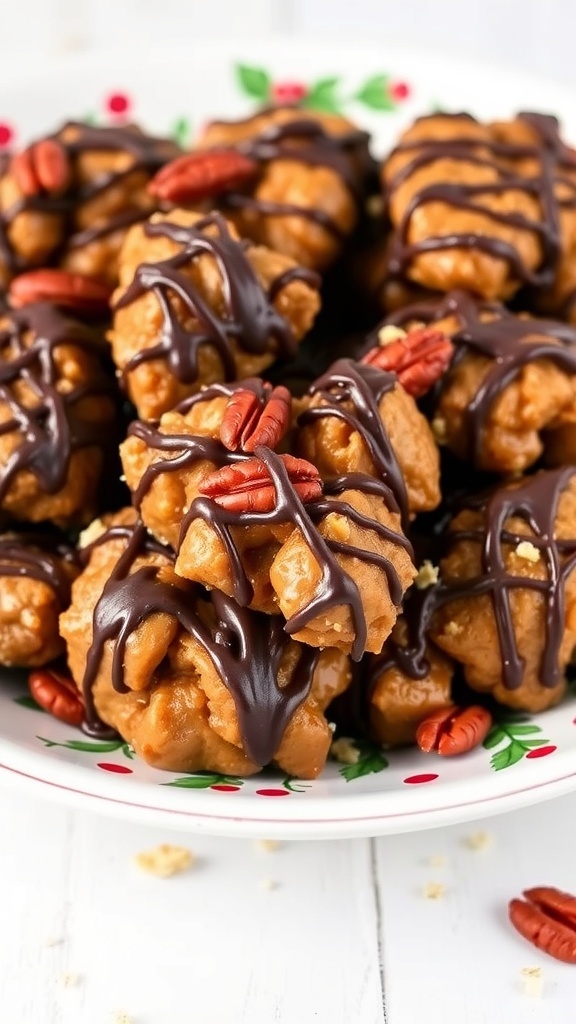
Caramel Pecan Turtle Clusters are a delightful treat that combines sweet caramel, crunchy pecans, and rich chocolate. These little bites are perfect for holiday gatherings or simply to enjoy at home. The image shows a beautiful plate filled with these clusters, showcasing their glossy chocolate drizzle and the inviting pecan halves on top.
Making these clusters is easy and fun. You can involve the whole family in the process, making it a great activity during the festive season. The combination of flavors and textures makes each bite a joy. Plus, they look impressive on any dessert table!
Here’s how to whip up your own batch of Caramel Pecan Turtle Clusters:
Ingredients
- 1 cup pecan halves
- 1 cup caramels, unwrapped
- 2 tablespoons heavy cream
- 1 cup chocolate chips
- 1 teaspoon vanilla extract
Instructions
- Prepare the Pecan Base: On a baking sheet lined with parchment paper, arrange the pecan halves in clusters, about 2-3 per cluster.
- Make the Caramel: In a small saucepan, melt the caramels with heavy cream over low heat, stirring until smooth.
- Form the Clusters: Spoon the melted caramel over each pecan cluster, ensuring they are well-coated.
- Chill: Place the baking sheet in the refrigerator for about 30 minutes to allow the caramel to set.
- Melt the Chocolate: In a microwave-safe bowl, melt the chocolate chips in 30-second intervals, stirring until smooth. Add vanilla extract and mix well.
- Drizzle Chocolate: Remove the clusters from the fridge and drizzle the melted chocolate over the caramel clusters.
- Set and Serve: Allow the chocolate to harden, then enjoy your delicious Caramel Pecan Turtle Clusters!
Homemade Fudge with Nuts

Homemade fudge with nuts is a delightful treat that captures the essence of the holiday season. The image shows a beautifully arranged batch of fudge, topped with crunchy nuts and colorful sprinkles. Each piece looks rich and creamy, perfect for sharing with family and friends.
This fudge is not just a sweet treat; it’s also a great way to get everyone involved in the kitchen. Kids can help mix the ingredients and sprinkle the toppings. Plus, it makes for a wonderful gift during the holidays!
Making fudge is simple and requires just a few ingredients. You can customize it by adding your favorite nuts or even some chocolate chips for extra sweetness. The result is a smooth, melt-in-your-mouth fudge that everyone will love.
Ingredients
- 2 cups granulated sugar
- 1/2 cup unsalted butter
- 2/3 cup evaporated milk
- 2 cups semi-sweet chocolate chips
- 1 cup chopped nuts (pecans or walnuts)
- 1 teaspoon vanilla extract
- 1/2 cup mini marshmallows (optional)
Instructions
- Prepare the Pan: Line an 8-inch square baking dish with parchment paper, leaving some overhang for easy removal.
- Cook the Mixture: In a medium saucepan, combine sugar, butter, and evaporated milk. Bring to a boil over medium heat, stirring constantly. Let it boil for 5 minutes without stirring.
- Add Chocolate: Remove from heat and stir in chocolate chips until melted and smooth. Add vanilla extract and mix well.
- Incorporate Nuts: Fold in the chopped nuts and mini marshmallows if using. Pour the mixture into the prepared pan and spread evenly.
- Cool and Cut: Let the fudge cool at room temperature for about 2 hours. Once set, lift it out of the pan using the parchment paper and cut into squares.
Peppermint Bark with Dark Chocolate
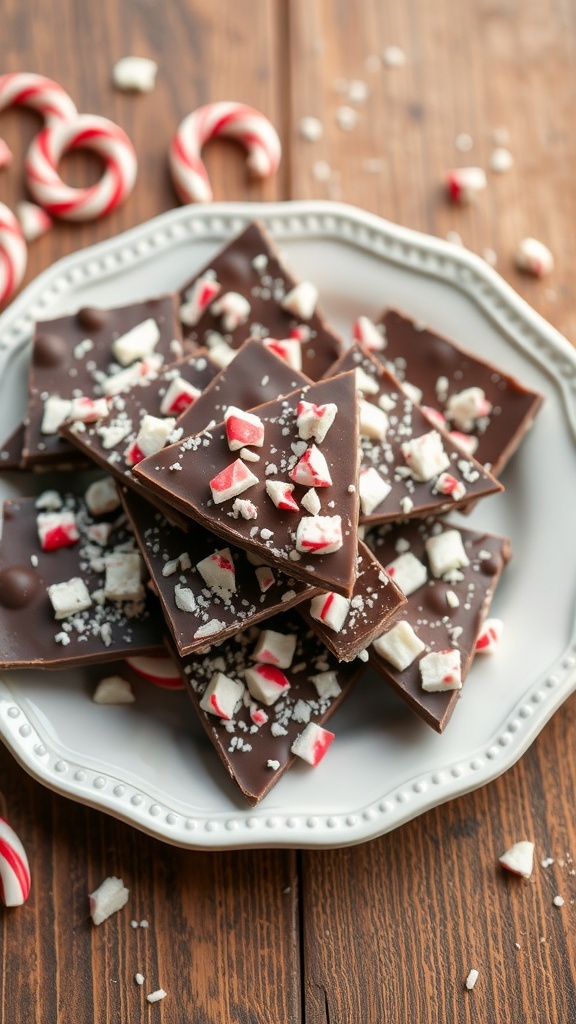
Peppermint bark is a festive treat that combines rich dark chocolate with refreshing peppermint. This delightful candy is perfect for holiday gatherings or as a sweet gift for friends and family. The image shows a beautiful plate of peppermint bark, topped with crushed candy canes, adding a pop of color and crunch.
Making peppermint bark is simple and fun. You can easily whip up a batch in no time, making it a great choice for last-minute holiday treats. The combination of smooth dark chocolate and crunchy peppermint creates a delicious contrast that everyone loves.
Let’s get started on this easy recipe!
Ingredients
- 12 ounces dark chocolate, chopped
- 1 teaspoon peppermint extract
- 1 cup crushed candy canes
- 8 ounces white chocolate, chopped
Instructions
- Melt the Dark Chocolate: In a microwave-safe bowl, melt the dark chocolate in 30-second intervals, stirring in between until smooth. Stir in the peppermint extract.
- Spread the Chocolate: Pour the melted dark chocolate onto a parchment-lined baking sheet. Spread it into an even layer, about 1/4 inch thick.
- Add the Candy Canes: Sprinkle half of the crushed candy canes over the melted chocolate while it’s still warm. Press them in gently.
- Chill: Place the baking sheet in the refrigerator for about 30 minutes, or until the chocolate is firm.
- Melt the White Chocolate: In another bowl, melt the white chocolate using the same method as the dark chocolate.
- Spread the White Chocolate: Pour the melted white chocolate over the hardened dark chocolate layer. Use a spatula to spread it evenly.
- Add More Candy Canes: Sprinkle the remaining crushed candy canes on top of the white chocolate. Press them in lightly.
- Chill Again: Return the baking sheet to the refrigerator for another 30 minutes until fully set.
- Break into Pieces: Once set, break the bark into pieces and enjoy!
Gingerbread Truffles

Gingerbread truffles are a delightful treat that captures the essence of the holiday season. These little bites are rich, creamy, and packed with warm spices that remind us of gingerbread cookies. The image shows a beautiful plate of these truffles, dusted with powdered sugar and drizzled with white chocolate. They look festive and inviting, perfect for sharing at holiday gatherings or enjoying with a cozy cup of cocoa.
Making gingerbread truffles is simple and fun. You can easily whip them up in your kitchen and impress your friends and family. The combination of ginger, cinnamon, and nutmeg creates a wonderful flavor that pairs perfectly with the chocolate coating. Plus, they make great gifts when packaged nicely!
Here’s how to make your own gingerbread truffles:
Ingredients
- 1 cup gingerbread cookies, crushed
- 8 oz cream cheese, softened
- 1 teaspoon ground cinnamon
- 1/2 teaspoon ground ginger
- 1/4 teaspoon ground nutmeg
- 1 cup chocolate chips (milk or dark)
- 1/4 cup powdered sugar (for dusting)
- Optional: white chocolate for drizzling
Instructions
- Mix the Base: In a bowl, combine the crushed gingerbread cookies and softened cream cheese. Add the cinnamon, ginger, and nutmeg. Mix until well combined.
- Form the Truffles: Scoop out small portions of the mixture and roll them into balls. Place them on a baking sheet lined with parchment paper.
- Chill: Refrigerate the truffles for about 30 minutes to firm up.
- Melt the Chocolate: While the truffles chill, melt the chocolate chips in a microwave-safe bowl, stirring every 30 seconds until smooth.
- Coat the Truffles: Dip each chilled truffle into the melted chocolate, allowing excess to drip off. Place them back on the parchment paper.
- Decorate: If desired, drizzle melted white chocolate over the coated truffles and dust with powdered sugar.
- Serve: Let the truffles set before serving. Enjoy your delicious gingerbread truffles!
Chocolate Mint Meringues
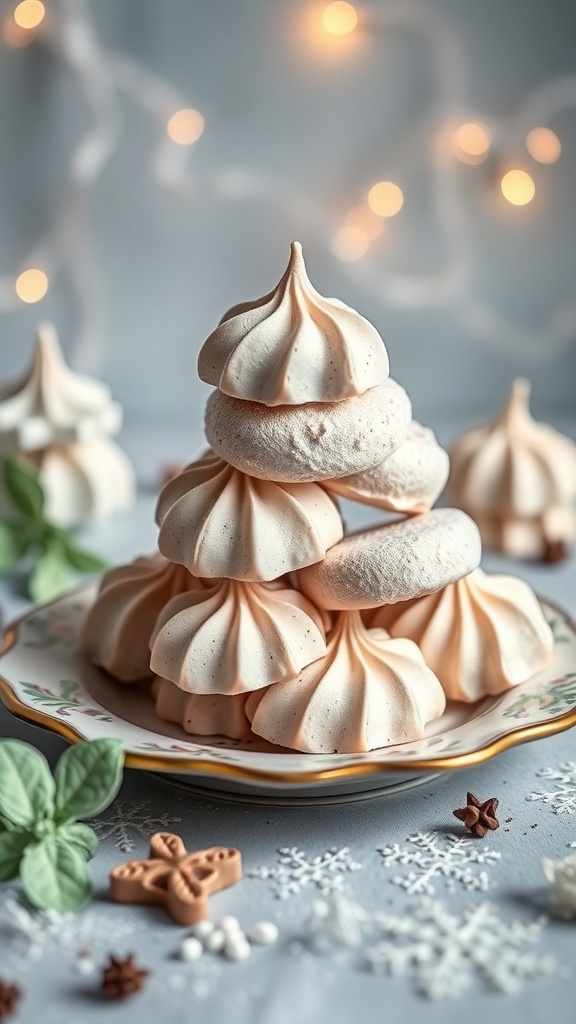
Chocolate Mint Meringues are a delightful treat that perfectly captures the spirit of the holiday season. These light and airy confections are not only visually appealing but also offer a refreshing minty flavor combined with rich chocolate. The soft peaks of the meringues create a beautiful presentation, making them a lovely addition to any festive gathering.
In the image, you can see a stack of perfectly shaped meringues, showcasing their smooth texture and delicate design. The soft pastel colors add a touch of whimsy, while the twinkling lights in the background create a cozy holiday vibe. These treats are sure to impress your guests and satisfy your sweet tooth!
Making Chocolate Mint Meringues is simple and fun. They require just a few ingredients and can be whipped up in no time. Plus, they are gluten-free, making them a great option for various dietary preferences. Let’s get started on this easy recipe!
White Chocolate Cranberry Bark

White Chocolate Cranberry Bark is a delightful treat that captures the spirit of the holidays. The image shows a beautiful arrangement of creamy white chocolate topped with vibrant cranberries and crunchy pecans. Fresh mint leaves add a pop of color, making this bark not just tasty but also visually appealing.
This recipe is simple and perfect for sharing with friends and family. The combination of sweet and tart flavors, along with the satisfying crunch, makes it a favorite during the festive season.
Let’s get started on making this delicious bark!
Ingredients
- 2 cups white chocolate chips
- 1 cup dried cranberries
- 1 cup pecans, chopped
- Fresh mint leaves for garnish
Instructions
- Melt the Chocolate: In a microwave-safe bowl, melt the white chocolate chips in 30-second intervals, stirring in between until smooth.
- Prepare the Bark: Line a baking sheet with parchment paper. Pour the melted chocolate onto the sheet and spread it evenly with a spatula.
- Add Toppings: Sprinkle the dried cranberries and chopped pecans over the melted chocolate. Press them down gently to ensure they stick.
- Chill: Place the baking sheet in the refrigerator for about 1-2 hours, or until the chocolate is fully set.
- Break into Pieces: Once set, remove the bark from the parchment paper and break it into pieces. Garnish with fresh mint leaves before serving.
Marshmallow Snowmen

Marshmallow snowmen are a fun and easy treat to make during the holiday season. These adorable little guys are perfect for parties or as a festive snack for kids. Made from fluffy marshmallows, they come together quickly and look delightful on any dessert table.
To create your snowmen, you’ll need large marshmallows for the body and smaller ones for the head. Use candy decorations like chocolate chips for eyes and buttons, and a small piece of orange candy for the nose. Add a mini scarf made from fruit leather or icing to give them a cozy look.
These snowmen not only taste great but also bring a cheerful vibe to your holiday celebrations. They’re easy to customize, so feel free to get creative with your decorations!
Ingredients
- Large marshmallows (3 per snowman)
- Small marshmallows (1 per snowman)
- Chocolate chips (for eyes and buttons)
- Orange candy (for the nose)
- Fruit leather or icing (for scarves)
- Wooden skewers or lollipop sticks
Instructions
- Stack three large marshmallows on top of each other to form the body of the snowman. Secure them with a skewer.
- Add a small marshmallow on top for the head, using a bit of icing to help it stick if needed.
- Use chocolate chips to create eyes and buttons. Place an orange candy for the nose.
- Cut a small piece of fruit leather or use icing to create a scarf around the snowman’s neck.
- Repeat the process to make as many snowmen as you like!
Rudolph Rice Krispie Treats
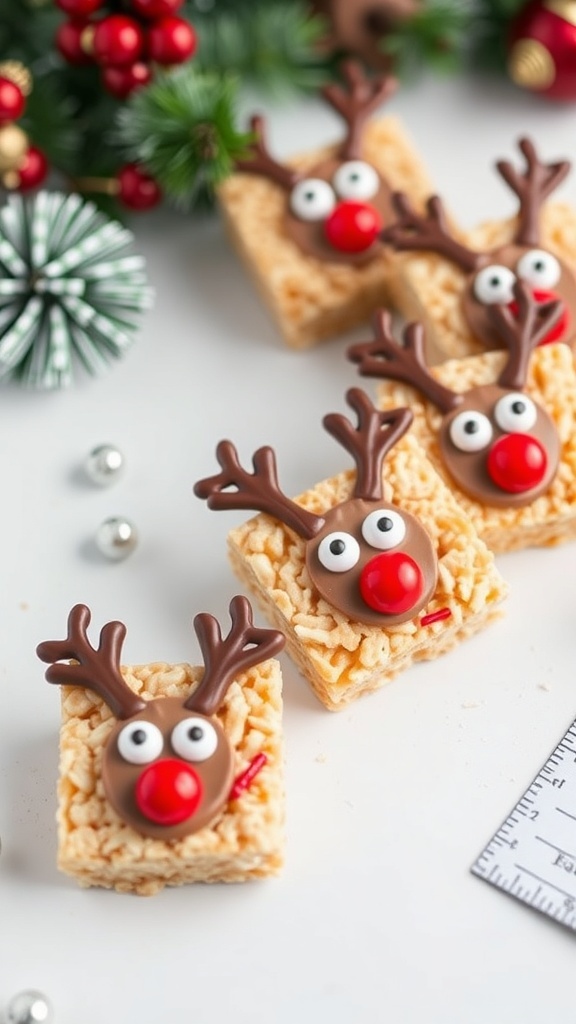
Rudolph Rice Krispie Treats are a fun and festive way to celebrate the holiday season. These adorable treats look just like Rudolph the Red-Nosed Reindeer, making them perfect for parties or family gatherings. The combination of crispy rice cereal and gooey marshmallows creates a delightful texture that everyone loves.
To make these treats, you’ll need some basic ingredients. The best part is that they are easy to assemble, so even kids can help out in the kitchen. The cute decorations, like chocolate candies for the eyes and nose, really bring these treats to life!
Gather your friends and family, and enjoy making these sweet snacks together. They’re not just tasty; they also add a cheerful touch to your holiday festivities.
Ingredients
- 6 cups Rice Krispies cereal
- 4 cups mini marshmallows
- 3 tablespoons unsalted butter
- Chocolate candies (for eyes)
- Red candy (for nose)
- Chocolate-covered pretzels (for antlers)
Instructions
- Melt the Butter: In a large saucepan, melt the butter over low heat. Add the mini marshmallows and stir until completely melted and smooth.
- Mix in Cereal: Remove from heat and add the Rice Krispies cereal. Stir until well coated.
- Shape the Treats: Press the mixture into a greased 9×13-inch pan. Let it cool for about 30 minutes.
- Cut and Decorate: Once cooled, cut into squares. Use chocolate candies for eyes, a red candy for the nose, and chocolate-covered pretzels for antlers.
- Serve and Enjoy: Arrange the treats on a festive platter and enjoy your delicious Rudolph Rice Krispie Treats!
Pecan Pie Bites

Pecan Pie Bites are a delightful twist on the classic dessert. These mini treats pack all the rich flavors of traditional pecan pie into bite-sized portions. Perfect for holiday gatherings, they are sure to impress your guests!
The image showcases these charming little bites, beautifully arranged on a platter. Each one features a golden crust filled with a gooey pecan filling, topped with a whole pecan and a touch of festive decoration. The vibrant colors of the red berries and green accents add a cheerful holiday spirit.
Making these bites is simple and fun. You can whip them up quickly, and they are great for sharing. Let’s get into the ingredients and steps to create these tasty treats!
Ingredients
- 1 package of pre-made pie crusts
- 1 cup corn syrup
- 1 cup brown sugar
- 3 large eggs
- 1 teaspoon vanilla extract
- 1 1/2 cups pecans, chopped
- 1/4 teaspoon salt
- Whipped cream for topping (optional)
Instructions
- Preheat your oven to 350°F (175°C).
- Roll out the pie crusts and cut them into small circles to fit into a mini muffin tin.
- In a bowl, mix together corn syrup, brown sugar, eggs, vanilla extract, and salt until well combined.
- Stir in the chopped pecans.
- Fill each pie crust with the pecan mixture, about 3/4 full.
- Bake for 20-25 minutes, or until the filling is set and the crust is golden brown.
- Let them cool before removing from the tin. Top with whipped cream if desired.
Candy Cane Sugar Cookies

Candy Cane Sugar Cookies are a delightful treat that captures the spirit of the holiday season. These cookies are not just tasty; they are also visually appealing, resembling classic candy canes with their red and white stripes. The festive colors make them perfect for holiday gatherings or as gifts for friends and family.
To make these cookies, you’ll need simple ingredients that you probably already have in your kitchen. The process is straightforward, making it a fun activity to do with kids or friends. Once baked, these cookies can be decorated with icing to enhance their candy cane look.
Ingredients
- 2 3/4 cups all-purpose flour
- 1 teaspoon baking soda
- 1/2 teaspoon baking powder
- 1 cup unsalted butter, softened
- 1 1/2 cups white sugar
- 1 egg
- 1 teaspoon vanilla extract
- 1/2 teaspoon peppermint extract
- 1/4 teaspoon salt
- Red food coloring
Instructions
- Preheat your oven to 375°F (190°C). Line baking sheets with parchment paper.
- In a bowl, mix flour, baking soda, baking powder, and salt. Set aside.
- In another bowl, cream together the butter and sugar until smooth. Beat in the egg, vanilla extract, and peppermint extract.
- Gradually blend in the dry ingredients. Divide the dough in half.
- Color one half of the dough with red food coloring. Roll both doughs into ropes and twist them together to form a candy cane shape.
- Place the cookies on the prepared baking sheets. Bake for 8 to 10 minutes until lightly golden. Allow them to cool on a wire rack.
Chocolate-Dipped Oreos

Chocolate-dipped Oreos are a fun and simple treat that brings a festive touch to any holiday gathering. These delightful cookies are coated in rich chocolate and topped with colorful sprinkles, making them as pleasing to the eye as they are to the taste buds. Perfect for sharing or enjoying on your own, they add a sweet crunch to your holiday festivities.
Making chocolate-dipped Oreos is straightforward. You only need a few ingredients and a little time. The combination of creamy filling and smooth chocolate creates a delicious contrast that everyone loves. Plus, the sprinkles add a pop of color, making them a hit with kids and adults alike.
Gather your friends or family to help with the dipping and decorating. It’s a great way to spend time together while creating tasty treats. These cookies are perfect for gift-giving or as a fun addition to your dessert table.
Ingredients
- 1 package of Oreo cookies
- 2 cups of chocolate chips (dark or milk chocolate)
- 1 tablespoon of coconut oil (optional, for smoother chocolate)
- Sprinkles for decoration
Instructions
- Melt the Chocolate: In a microwave-safe bowl, combine chocolate chips and coconut oil. Heat in 30-second intervals, stirring in between, until smooth.
- Dip the Oreos: Using a fork, dip each Oreo into the melted chocolate, allowing excess chocolate to drip off.
- Decorate: Place the dipped Oreos on a parchment-lined baking sheet. While the chocolate is still wet, sprinkle with colorful sprinkles.
- Set: Let the cookies sit at room temperature or refrigerate until the chocolate hardens.
- Enjoy: Once set, serve your chocolate-dipped Oreos or package them up as gifts!
Toffee Almond Crunch
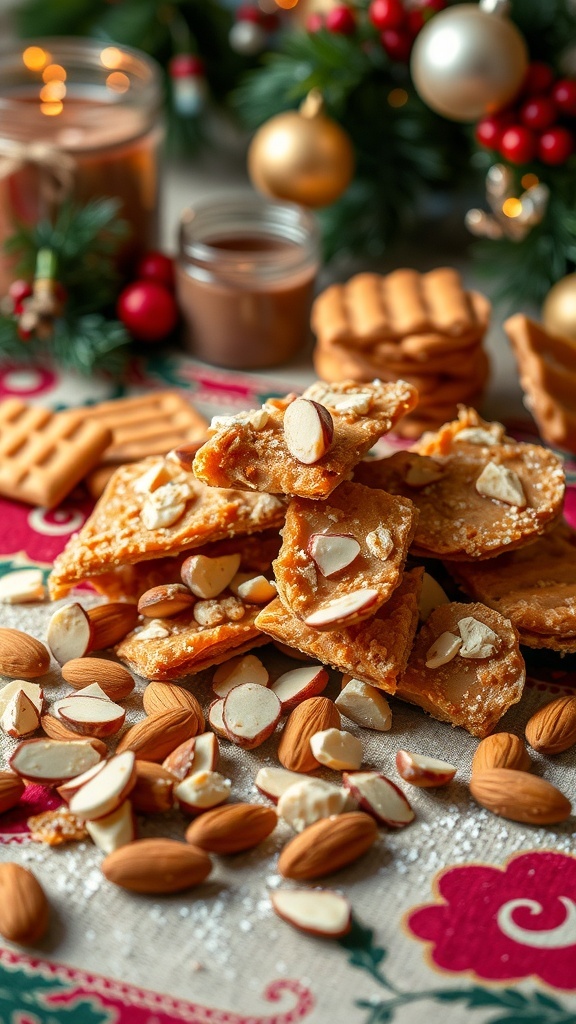
Toffee Almond Crunch is a delightful treat that brings a sweet and nutty flavor to your holiday gatherings. The image captures the essence of this crunchy candy, showcasing golden toffee pieces sprinkled with sliced almonds. The warm colors and festive decorations in the background create a cozy holiday vibe, perfect for sharing with friends and family.
This candy is not only easy to make but also a crowd-pleaser. It combines the rich taste of toffee with the satisfying crunch of almonds, making it a great addition to your Christmas candy recipes. Whether you’re enjoying it with a cup of hot cocoa or gifting it in a jar, Toffee Almond Crunch is sure to impress.
Ingredients
- 1 cup unsalted butter
- 1 cup granulated sugar
- 1/4 cup light corn syrup
- 1/4 teaspoon salt
- 1 teaspoon vanilla extract
- 2 cups sliced almonds
- 1 cup semi-sweet chocolate chips
Instructions
- Prepare the Baking Sheet: Line a baking sheet with parchment paper and set aside.
- Make the Toffee: In a medium saucepan, melt the butter over medium heat. Stir in the sugar, corn syrup, and salt. Bring to a boil, stirring constantly. Cook until the mixture reaches a deep golden color, about 5-7 minutes.
- Add Vanilla and Almonds: Remove from heat and stir in the vanilla extract and 1 cup of sliced almonds. Quickly pour the mixture onto the prepared baking sheet, spreading it evenly.
- Cool and Add Chocolate: Allow the toffee to cool for about 10 minutes. Sprinkle the chocolate chips on top and let them sit for a few minutes to melt. Spread the melted chocolate evenly over the toffee.
- Finish with More Almonds: While the chocolate is still warm, sprinkle the remaining sliced almonds on top. Let the candy cool completely before breaking it into pieces.
Enjoy your homemade Toffee Almond Crunch this holiday season!
Spiced Hot Chocolate Bombs
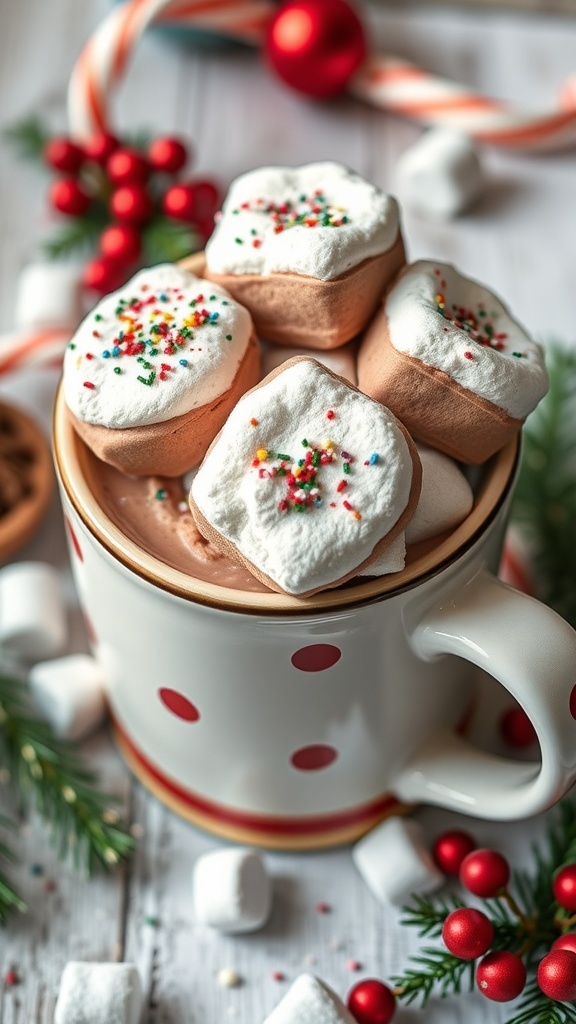
Spiced hot chocolate bombs are a fun and festive treat perfect for the holiday season. These delightful chocolate spheres are filled with cocoa mix and marshmallows, ready to melt into a warm cup of milk. The image shows a cozy mug filled with rich hot chocolate, topped with fluffy marshmallows and colorful sprinkles. It’s a sweet way to enjoy the chilly weather!
Making these hot chocolate bombs is simple and enjoyable. You can customize them with your favorite flavors and toppings. They make great gifts or a fun activity to do with family and friends during the holidays.
Ingredients
- 1 cup chocolate chips (milk or dark)
- 1/2 cup hot cocoa mix
- 1/2 cup mini marshmallows
- 1 teaspoon ground cinnamon
- 1/4 teaspoon nutmeg
- Sprinkles for decoration
Instructions
- Melt the Chocolate: In a microwave-safe bowl, melt the chocolate chips in 30-second intervals, stirring in between until smooth.
- Shape the Spheres: Using a silicone mold, coat the inside with melted chocolate. Let it set in the fridge for about 10 minutes. Repeat to create a thicker shell.
- Fill the Bombs: Once the shells are firm, remove them from the mold. Fill half of the shells with hot cocoa mix, mini marshmallows, cinnamon, and nutmeg.
- Seal the Bombs: Warm a plate in the microwave. Take the empty half of the chocolate shell and gently press it onto the warm plate to melt the edge slightly. Then, attach it to the filled half to seal the bomb.
- Decorate: Drizzle any leftover melted chocolate on top and add sprinkles for a festive touch.
- Serve: To enjoy, place a hot chocolate bomb in a mug and pour hot milk over it. Watch it melt and stir to combine!
Peanut Butter Balls
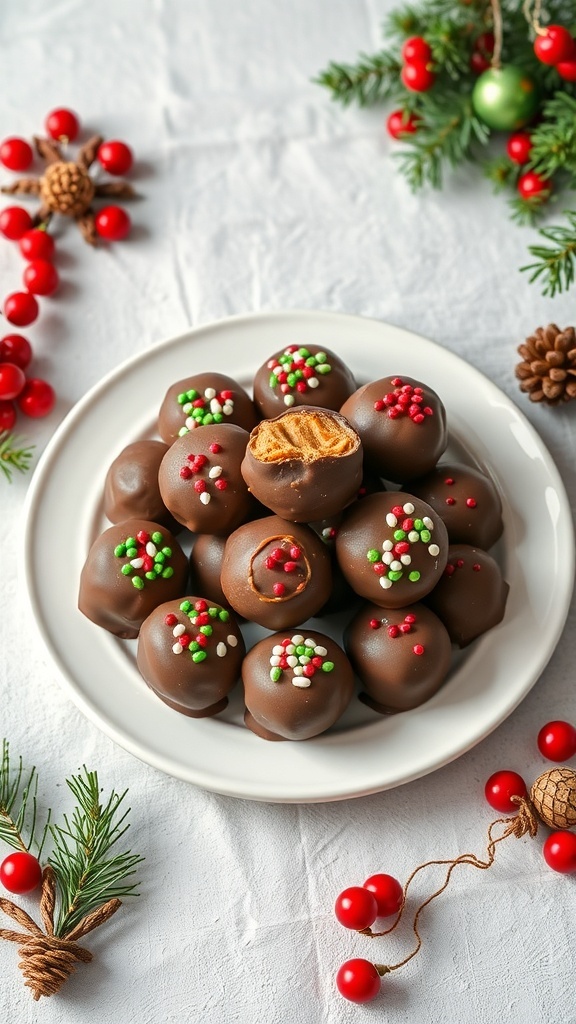
Peanut butter balls are a classic holiday treat that brings joy to any gathering. These little bites are not only delicious but also super easy to make. The image shows a delightful plate filled with chocolate-covered peanut butter balls, decorated with festive sprinkles. They look so inviting, perfect for sharing with friends and family during the holiday season.
Making peanut butter balls is a fun activity, especially with kids. The combination of creamy peanut butter and sweet chocolate is hard to resist. Plus, they require minimal ingredients and no baking, making them a go-to recipe for busy holiday schedules.
Let’s get to the good part! Here’s how to whip up these tasty treats:
Ingredients
- 1 cup creamy peanut butter
- 1/2 cup unsalted butter, softened
- 4 cups powdered sugar
- 2 cups chocolate chips
- 1 tablespoon vegetable oil
- Sprinkles for decoration
Instructions
- Mix the Peanut Butter Mixture: In a large bowl, combine the peanut butter and softened butter. Mix until smooth. Gradually add the powdered sugar, mixing until well combined.
- Form the Balls: Scoop out small portions of the mixture and roll them into balls, about 1 inch in diameter. Place them on a baking sheet lined with parchment paper.
- Chill: Refrigerate the peanut butter balls for about 30 minutes to firm them up.
- Melt the Chocolate: In a microwave-safe bowl, combine the chocolate chips and vegetable oil. Microwave in 30-second intervals, stirring in between, until melted and smooth.
- Coat the Balls: Dip each chilled peanut butter ball into the melted chocolate, ensuring they are fully coated. Return them to the baking sheet.
- Add Sprinkles: While the chocolate is still wet, sprinkle your favorite toppings on top.
- Set: Allow the chocolate to harden completely. You can speed this up by placing them back in the fridge.
Enjoy your homemade peanut butter balls! They make a wonderful addition to any holiday dessert table.
Chocolate-Covered Marshmallows
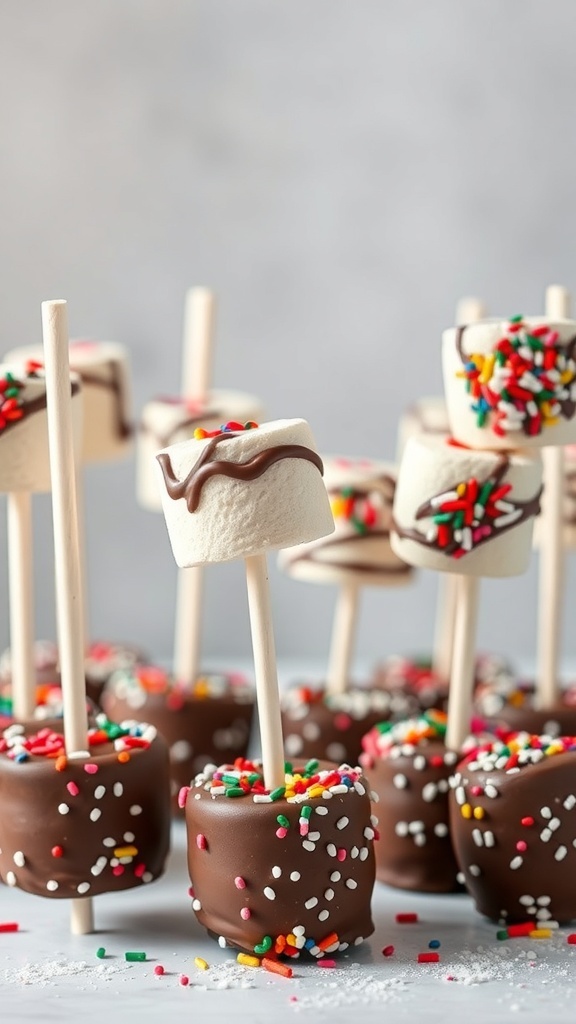
Chocolate-covered marshmallows are a fun and easy treat to make during the holiday season. They look festive with colorful sprinkles and are perfect for sharing with friends and family. You can customize them with different toppings, making them a hit at any gathering.
To start, gather your ingredients. You will need marshmallows, chocolate chips, and your choice of sprinkles or toppings. Melt the chocolate chips in a microwave-safe bowl, stirring until smooth. Dip each marshmallow into the melted chocolate, allowing the excess to drip off. Then, roll them in sprinkles or place them on a stick for easy handling.
These treats can be displayed on a platter or given as gifts. They are sure to bring smiles to everyone’s faces!
Ingredients
- 1 bag of large marshmallows
- 1 cup of chocolate chips (milk or dark)
- Sprinkles (variety of colors)
- Wooden sticks (optional)
Instructions
- Melt the chocolate chips in a microwave-safe bowl in 30-second intervals, stirring in between until smooth.
- If using sticks, insert them into the marshmallows.
- Dip each marshmallow into the melted chocolate, ensuring it’s fully coated.
- Roll the chocolate-covered marshmallow in sprinkles while the chocolate is still wet.
- Place the marshmallows on a baking sheet lined with parchment paper to set.
- Let them cool until the chocolate hardens, about 30 minutes.
No-Bake Cheesecake Bites
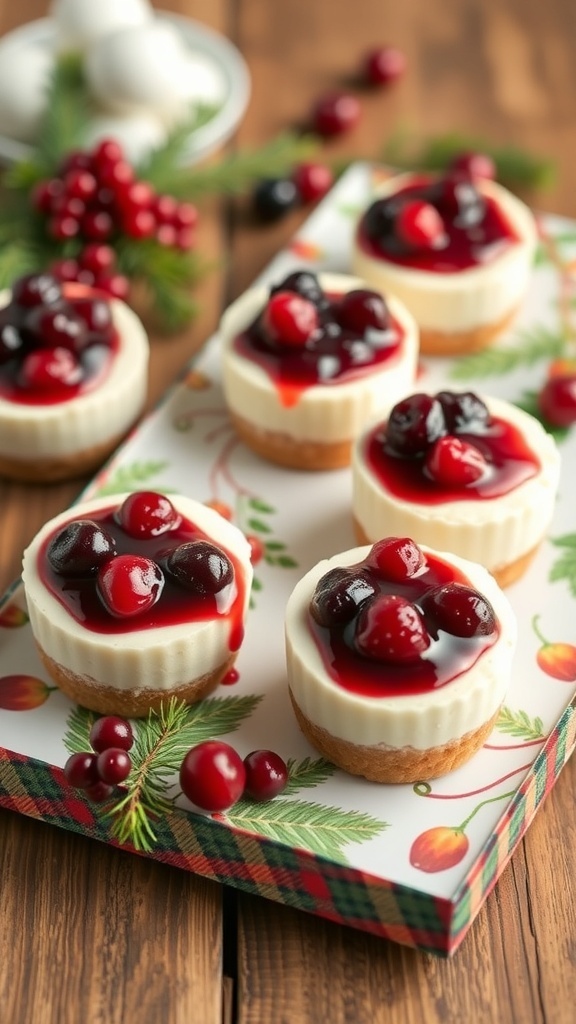
No-bake cheesecake bites are a delightful treat perfect for the holiday season. These little desserts are creamy, sweet, and topped with a vibrant cherry glaze that adds a festive touch. The combination of the smooth cheesecake filling and the crunchy graham cracker crust makes each bite a pleasure.
These cheesecake bites are not only easy to make, but they also look beautiful on any holiday dessert table. The bright red cherries on top contrast nicely with the creamy white filling, making them visually appealing. Plus, they are bite-sized, which means you can enjoy them without feeling guilty!
Ingredients
- 1 cup graham cracker crumbs
- 1/4 cup granulated sugar
- 1/2 cup unsalted butter, melted
- 2 cups cream cheese, softened
- 1 cup powdered sugar
- 1 teaspoon vanilla extract
- 1 cup cherry pie filling
Instructions
- Prepare the Crust: In a bowl, mix graham cracker crumbs, sugar, and melted butter until well combined. Press this mixture into the bottom of mini muffin tins to form a crust.
- Make the Filling: In another bowl, beat together softened cream cheese, powdered sugar, and vanilla extract until smooth and creamy.
- Fill the Tins: Spoon the cheesecake filling into the crusts, smoothing the tops with a spatula.
- Chill: Place the muffin tins in the refrigerator for at least 2 hours to set.
- Add the Topping: Once set, top each cheesecake bite with cherry pie filling before serving.
Fruitcake Truffles

Fruitcake truffles are a delightful twist on the traditional holiday treat. These little bites are rich, chocolatey, and packed with the flavors of dried fruits and nuts. The image shows a beautiful arrangement of these truffles, dusted with coconut and topped with pecans, making them look as festive as they taste. They are perfect for sharing at holiday gatherings or giving as gifts.
Making fruitcake truffles is simple and fun. You can get the kids involved in rolling the truffles and decorating them. The combination of chocolate and fruit creates a wonderful balance of sweetness and texture. Plus, they are no-bake, which means less time in the kitchen and more time enjoying the holiday spirit!
Ingredients
- 1 cup mixed dried fruits (raisins, cranberries, apricots)
- 1 cup crushed nuts (walnuts, pecans)
- 1 cup chocolate cookie crumbs
- 8 oz cream cheese, softened
- 1 cup semi-sweet chocolate chips
- 1/2 cup shredded coconut (for coating)
- Pecans (for topping)
Instructions
- Prepare the Mixture: In a large bowl, combine the dried fruits, crushed nuts, chocolate cookie crumbs, and softened cream cheese. Mix until well combined.
- Form the Truffles: Scoop out small portions of the mixture and roll them into balls, about 1 inch in diameter.
- Melt the Chocolate: In a microwave-safe bowl, melt the chocolate chips in 30-second intervals, stirring until smooth.
- Coat the Truffles: Dip each truffle into the melted chocolate, allowing excess to drip off. Roll them in shredded coconut for a festive touch.
- Add Toppings: Place a pecan on top of each truffle for decoration.
- Chill: Place the truffles on a baking sheet lined with parchment paper and refrigerate for about 30 minutes until set.
Enjoy these fruitcake truffles as a sweet treat during the holidays!
S’mores Christmas Bars
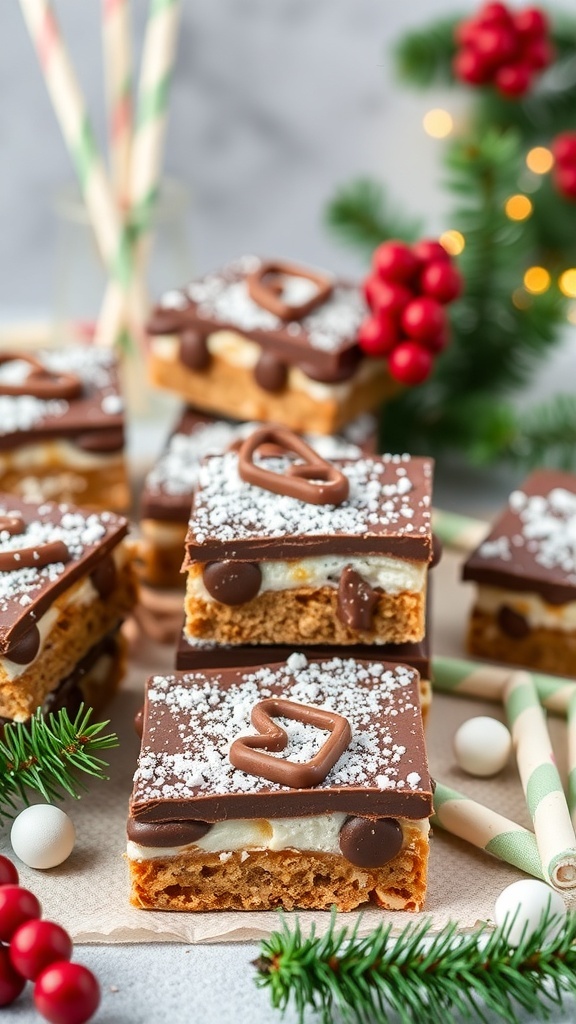
These S’mores Christmas Bars are a delightful twist on a classic treat. They combine the flavors of chocolate, marshmallow, and graham crackers, all dressed up for the holidays. The bars are layered beautifully, topped with festive decorations that make them perfect for any holiday gathering.
The image shows a tempting stack of these bars, with a glossy chocolate layer on top, sprinkled with powdered sugar to resemble snow. The cute pretzel shapes add a fun touch, making them look like little gifts. Surrounding the bars are festive decorations, including red berries and green foliage, enhancing the holiday spirit.
Making these bars is simple and fun, perfect for baking with family or friends. They’re sure to be a hit at any Christmas party!
Ingredients
- 1 cup graham cracker crumbs
- 1/2 cup unsalted butter, melted
- 1/4 cup granulated sugar
- 2 cups mini marshmallows
- 1 cup chocolate chips
- 1/2 cup heavy cream
- 1/4 cup powdered sugar
- Mini pretzels for decoration
Instructions
- Preheat your oven to 350°F (175°C). Line an 8×8 inch baking dish with parchment paper.
- In a bowl, mix graham cracker crumbs, melted butter, and granulated sugar until well combined. Press this mixture into the bottom of the prepared baking dish.
- Bake for 10 minutes, then remove from the oven and sprinkle mini marshmallows evenly over the crust. Return to the oven for another 5 minutes, until the marshmallows are puffed and slightly golden.
- In a small saucepan, heat heavy cream over medium heat until it begins to simmer. Remove from heat and add chocolate chips, stirring until melted and smooth.
- Pour the chocolate mixture over the marshmallows, spreading it evenly. Allow it to cool for about 30 minutes.
- Once cooled, dust the top with powdered sugar and decorate with mini pretzels. Cut into squares and serve!