Christmas baking brings warmth and joy to the holiday season, filling homes with delightful aromas and sweet treats. From classic cookies to festive cakes, these recipes are all about making memories and sharing love through delicious baked goods. Get your apron on and let’s spread some holiday cheer together!
Classic Sugar Cookies with Sprinkles
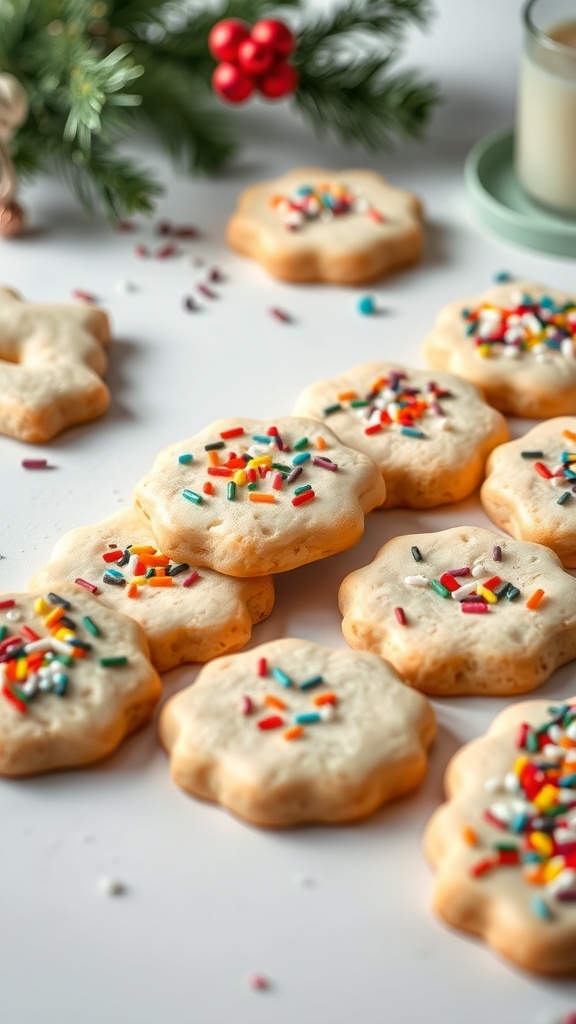
Classic sugar cookies are a holiday favorite. They are soft, sweet, and perfect for decorating. The image shows a delightful spread of sugar cookies topped with colorful sprinkles. These cookies are not only tasty but also bring a festive vibe to any gathering.
Making sugar cookies is a fun activity, especially with family and friends. You can roll out the dough, cut it into shapes, and let your creativity shine with various sprinkles. The cookies are simple to make and are sure to be a hit at your holiday parties.
Here’s how to whip up a batch of these delicious cookies:
Ingredients
- 2 3/4 cups all-purpose flour
- 1 teaspoon baking soda
- 1/2 teaspoon baking powder
- 1 cup unsalted butter, softened
- 1 1/2 cups white sugar
- 1 egg
- 1 teaspoon vanilla extract
- 1/2 teaspoon almond extract
- 3/4 cup sprinkles
Instructions
- Preheat your oven to 375°F (190°C).
- In a small bowl, stir together flour, baking soda, and baking powder. Set aside.
- In a large bowl, cream together the butter and sugar until smooth. Beat in the egg, vanilla extract, and almond extract.
- Gradually blend in the dry ingredients. Roll rounded teaspoonfuls of dough into balls, and place onto ungreased cookie sheets. Flatten each ball slightly and sprinkle with colorful sprinkles.
- Bake 8 to 10 minutes in the preheated oven, or until golden. Let cool on wire racks.
Peppermint Bark with Dark Chocolate
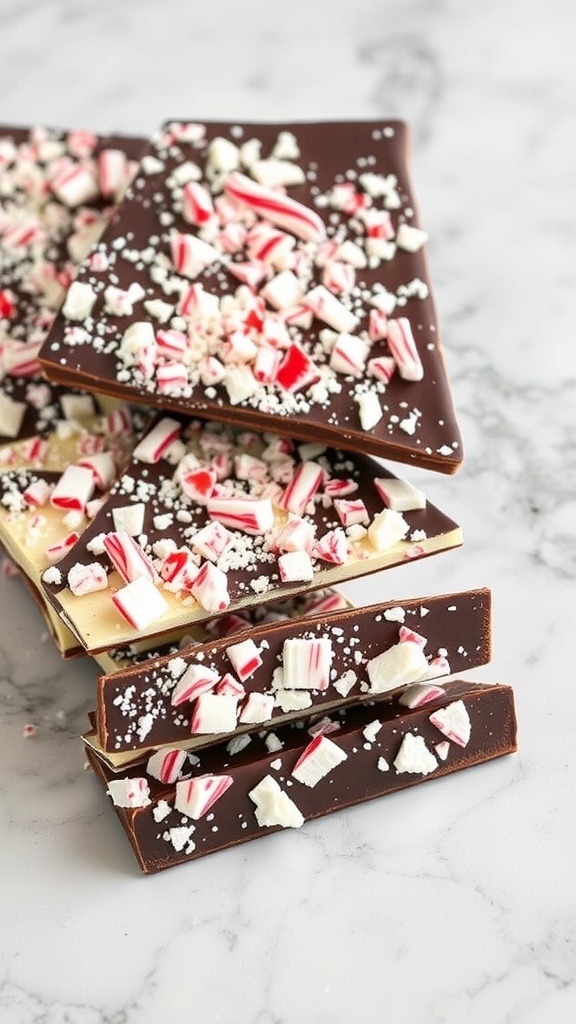
Peppermint bark is a festive treat that brings together the rich taste of dark chocolate and the refreshing crunch of peppermint. This delightful combination is perfect for holiday gatherings or as a sweet gift for friends and family. The image shows a beautiful arrangement of peppermint bark, with dark chocolate topped with crushed candy canes, making it visually appealing and inviting.
Making peppermint bark is simple and fun! You can easily whip up a batch in no time. The layers of chocolate and peppermint create a delightful contrast that everyone loves. Plus, it’s a great way to get the kids involved in the kitchen during the holiday season.
Let’s get started with the recipe!
Ingredients
- 12 ounces dark chocolate (70% cocoa or higher)
- 6 ounces white chocolate
- 1/2 cup crushed peppermint candies or candy canes
Instructions
- Melt the Dark Chocolate: In a microwave-safe bowl, melt the dark chocolate in 30-second intervals, stirring in between until smooth.
- Spread the Dark Chocolate: Pour the melted dark chocolate onto a parchment-lined baking sheet. Spread it evenly with a spatula and let it cool for about 10 minutes.
- Melt the White Chocolate: In another bowl, melt the white chocolate using the same method as the dark chocolate.
- Add the White Chocolate Layer: Once the dark chocolate has cooled, pour the melted white chocolate over the dark layer. Use a spatula to spread it evenly.
- Sprinkle Peppermint: While the white chocolate is still warm, sprinkle the crushed peppermint candies on top. Press them down gently to ensure they stick.
- Chill: Place the baking sheet in the refrigerator for about 30 minutes or until the bark is completely set.
- Break into Pieces: Once set, remove the bark from the parchment and break it into pieces. Enjoy your homemade peppermint bark!
Eggnog Cheesecake with Nutmeg
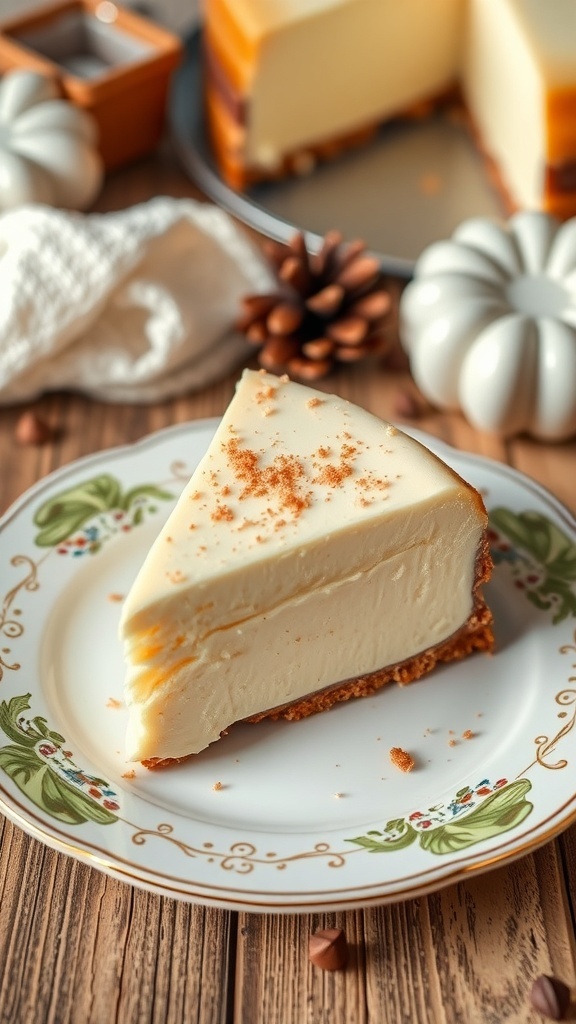
Eggnog cheesecake is a delightful twist on a classic dessert. This creamy treat captures the festive spirit of the holiday season. The rich, smooth texture pairs perfectly with the warm flavors of nutmeg and eggnog. Imagine serving this at your holiday gathering, where everyone can enjoy a slice of this seasonal delight.
The cheesecake sits on a buttery graham cracker crust, adding a crunchy contrast to the creamy filling. Topped with a sprinkle of nutmeg, it looks as festive as it tastes. This dessert is sure to impress your guests and become a holiday favorite.
Ingredients
- 1 ½ cups graham cracker crumbs
- ½ cup unsalted butter, melted
- 2 cups cream cheese, softened
- 1 cup granulated sugar
- 3 large eggs
- 1 cup eggnog
- 2 teaspoons vanilla extract
- 1 teaspoon ground nutmeg
- 1 tablespoon all-purpose flour
Instructions
- Preheat your oven to 325°F (160°C). Grease a 9-inch springform pan.
- Make the crust: In a bowl, combine graham cracker crumbs and melted butter. Press this mixture into the bottom of the springform pan. Bake for 10 minutes, then let it cool.
- Prepare the filling: In a large mixing bowl, beat the cream cheese and sugar until smooth. Add eggs one at a time, mixing well after each addition. Stir in eggnog, vanilla extract, nutmeg, and flour until fully combined.
- Pour the filling over the cooled crust. Bake for 50-60 minutes, or until the center is set but still slightly jiggly.
- Turn off the oven and crack the door, letting the cheesecake cool in the oven for an hour. This helps prevent cracks.
- Remove from the oven and refrigerate for at least 4 hours, preferably overnight. Serve chilled, garnished with a sprinkle of nutmeg.
Chocolate Chip Cranberry Oatmeal Cookies
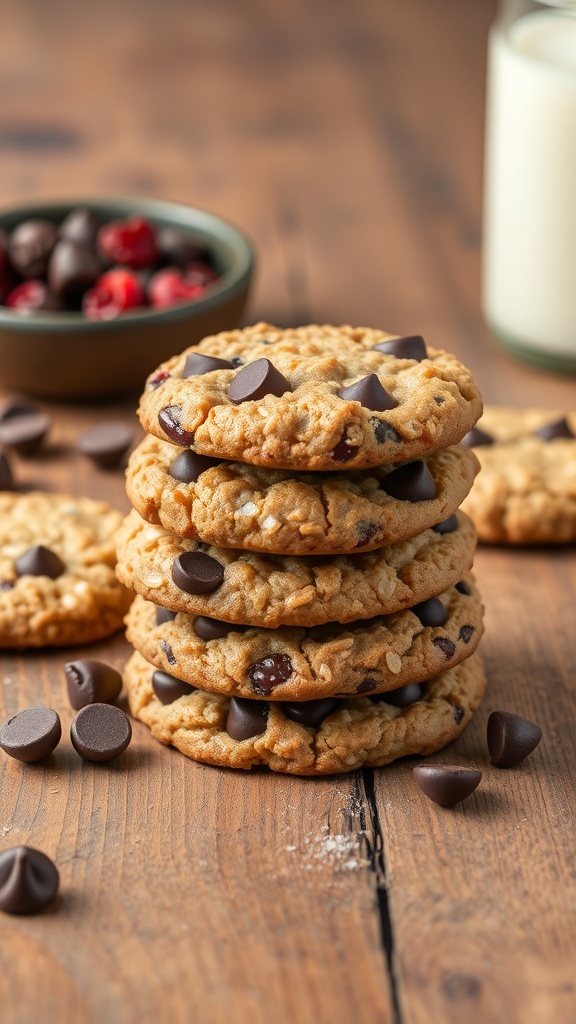
These Chocolate Chip Cranberry Oatmeal Cookies are a delightful treat for the holiday season. The combination of chewy oats, sweet chocolate chips, and tart cranberries makes them a perfect snack. They look inviting, stacked high on a wooden surface, with chocolate chips scattered around. A bowl of fresh cranberries adds a pop of color, and a glass of milk nearby completes the cozy scene.
Making these cookies is simple and fun. Start by gathering your ingredients and mixing them together. The aroma of baking cookies will fill your kitchen, making it feel festive. These cookies are perfect for sharing with friends and family or enjoying with a warm cup of cocoa.
Ingredients
- 1 cup unsalted butter, softened
- 1 cup brown sugar, packed
- 1/2 cup granulated sugar
- 2 large eggs
- 1 teaspoon vanilla extract
- 1 1/2 cups all-purpose flour
- 1 teaspoon baking soda
- 1/2 teaspoon salt
- 3 cups rolled oats
- 1 cup chocolate chips
- 1 cup dried cranberries
Instructions
- Preheat your oven to 350°F (175°C). Line a baking sheet with parchment paper.
- In a large bowl, cream together the softened butter, brown sugar, and granulated sugar until smooth.
- Add the eggs and vanilla extract, mixing until well combined.
- In another bowl, whisk together the flour, baking soda, and salt. Gradually add this to the wet mixture.
- Stir in the rolled oats, chocolate chips, and dried cranberries until evenly distributed.
- Drop spoonfuls of the dough onto the prepared baking sheet, spacing them about 2 inches apart.
- Bake for 10-12 minutes, or until the edges are golden brown. Let them cool on the baking sheet for a few minutes before transferring to a wire rack.
Pumpkin Spice Muffins with Cream Cheese Frosting
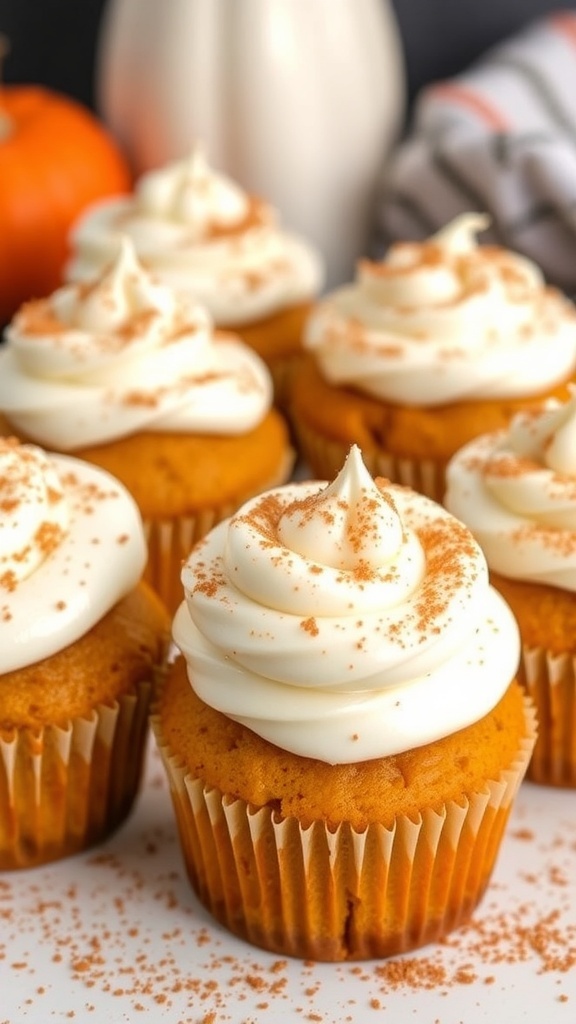
These pumpkin spice muffins are a delightful treat for the holiday season. They are soft, moist, and packed with warm spices that fill your kitchen with a cozy aroma. Topped with a rich cream cheese frosting, they make for a perfect dessert or snack. The combination of pumpkin and spices creates a comforting flavor that everyone loves.
To make these muffins, you’ll need simple ingredients that you probably already have in your pantry. The muffins are easy to whip up, making them a great choice for holiday baking. Whether you’re hosting a gathering or just want a sweet treat at home, these muffins are sure to impress.
Ingredients
- 1 ½ cups all-purpose flour
- 1 teaspoon baking powder
- 1 teaspoon baking soda
- 1 teaspoon ground cinnamon
- ½ teaspoon ground nutmeg
- ¼ teaspoon ground ginger
- ¼ teaspoon salt
- 1 cup pumpkin puree
- ¾ cup granulated sugar
- ½ cup brown sugar, packed
- ½ cup vegetable oil
- 2 large eggs
- 1 teaspoon vanilla extract
- 1 cup cream cheese, softened
- 2 cups powdered sugar
- 1 teaspoon vanilla extract (for frosting)
Instructions
- Preheat the oven to 350°F (175°C). Line a muffin tin with paper liners.
- In a bowl, whisk together flour, baking powder, baking soda, cinnamon, nutmeg, ginger, and salt.
- In another bowl, mix pumpkin puree, granulated sugar, brown sugar, oil, eggs, and vanilla until smooth.
- Gradually add the dry ingredients to the wet ingredients, mixing until just combined.
- Pour the batter into the prepared muffin tin, filling each cup about two-thirds full.
- Bake for 18-20 minutes, or until a toothpick inserted in the center comes out clean. Let them cool in the pan for a few minutes before transferring to a wire rack.
- For the frosting, beat together cream cheese, powdered sugar, and vanilla until smooth. Spread the frosting over the cooled muffins.
- Sprinkle a little cinnamon on top for an extra touch. Enjoy your delicious pumpkin spice muffins!
Cinnamon Roll Christmas Tree
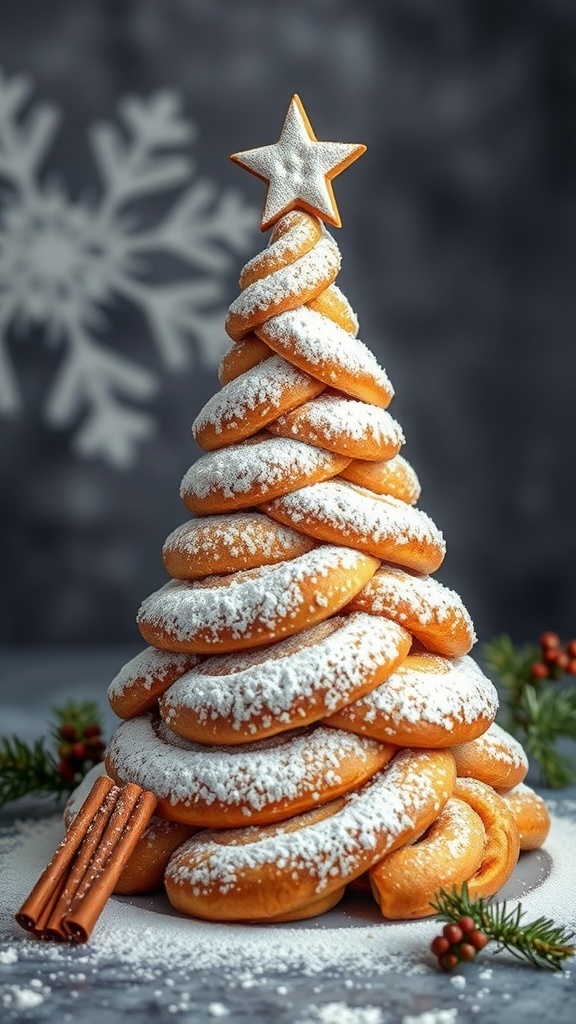
The Cinnamon Roll Christmas Tree is a delightful treat that captures the spirit of the holidays. This festive dessert not only looks stunning but also tastes amazing. Imagine a tree made of fluffy cinnamon rolls, dusted with powdered sugar and topped with a star. It’s perfect for gatherings and will surely impress your guests.
To make this sweet creation, you’ll need simple ingredients that you might already have in your kitchen. The process is fun and allows for creativity in shaping the rolls into a tree. Whether you’re baking with family or surprising friends, this recipe is sure to spread joy.
Ingredients
- 4 cups all-purpose flour
- 1/4 cup granulated sugar
- 2 1/4 teaspoons active dry yeast
- 1 teaspoon salt
- 1/4 cup unsalted butter, melted
- 1 cup milk, warmed
- 2 large eggs
- 1/2 cup brown sugar, packed
- 2 tablespoons ground cinnamon
- 1/4 teaspoon ground nutmeg
- 1/4 cup unsalted butter, softened
- 1 cup cream cheese, softened
- 2 cups powdered sugar
- 1 teaspoon vanilla extract
Instructions
- Prepare the Dough: In a large bowl, combine warmed milk, sugar, and yeast. Let it sit for about 5 minutes until foamy. Stir in melted butter, eggs, and salt. Gradually add flour, mixing until a soft dough forms.
- Knead the Dough: Turn the dough onto a floured surface and knead for about 5-7 minutes until smooth and elastic. Place in a greased bowl, cover, and let rise in a warm place until doubled in size, about 1 hour.
- Make the Filling: In a small bowl, mix brown sugar, cinnamon, and nutmeg. Roll out the dough into a rectangle, spread softened butter over the surface, and sprinkle the cinnamon mixture evenly. Roll tightly and slice into individual rolls.
- Bake the Rolls: Place the rolls in a greased baking dish and let rise for another 30 minutes. Preheat the oven to 350°F (175°C). Bake for 25-30 minutes until golden brown.
- Prepare the Frosting: While the rolls are baking, beat together cream cheese, powdered sugar, and vanilla until smooth. Spread the frosting over warm rolls before serving.
Stollen Bread with Almonds and Dried Fruit
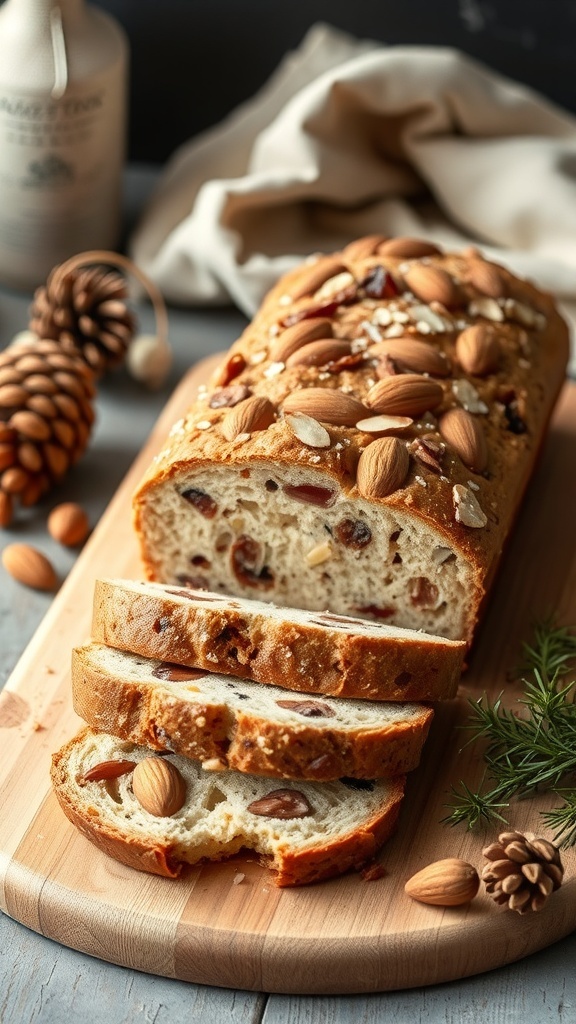
Stollen bread is a delightful holiday treat that brings warmth and joy to any festive gathering. This loaf is packed with almonds and dried fruits, making it both flavorful and visually appealing. The golden crust and the soft, moist interior create a perfect balance that everyone will love.
When you slice into the stollen, you’ll see the beautiful mix of fruits and nuts. The almonds add a nice crunch, while the dried fruits provide sweetness. This bread is not just a treat; it’s a lovely centerpiece for your holiday table.
Making stollen is easier than you might think! With just a few simple ingredients, you can create this traditional German bread right in your kitchen. It’s perfect for sharing with family and friends or enjoying with a cup of tea on a chilly afternoon.
Ingredients
- 4 cups all-purpose flour
- 1/2 cup granulated sugar
- 1 packet (2 1/4 teaspoons) active dry yeast
- 1 teaspoon salt
- 1/2 cup unsalted butter, melted
- 1 cup milk, warmed
- 2 large eggs
- 1 cup mixed dried fruits (like raisins, apricots, and cranberries)
- 1/2 cup almonds, chopped
- 1 teaspoon ground cinnamon
- 1/4 teaspoon ground nutmeg
- Powdered sugar for dusting
Instructions
- Prepare the Dough: In a large bowl, combine the warmed milk, sugar, and yeast. Let it sit for about 5 minutes until it becomes foamy. Stir in the melted butter, eggs, and salt. Gradually add the flour, mixing until a soft dough forms.
- Knead the Dough: Turn the dough onto a floured surface and knead for about 5-7 minutes until smooth and elastic. Place it in a greased bowl, cover, and let it rise in a warm place until doubled in size, about 1 hour.
- Add the Fruits and Nuts: Once the dough has risen, gently fold in the dried fruits, chopped almonds, cinnamon, and nutmeg.
- Shape the Loaf: Roll the dough into a rectangle, then fold it over itself to form a loaf shape. Place it on a greased baking sheet.
- Second Rise: Cover the loaf and let it rise for another 30 minutes. Preheat the oven to 350°F (175°C).
- Bake: Bake the loaf for 30-35 minutes until golden brown. Let it cool slightly before dusting with powdered sugar.
Enjoy your homemade stollen bread with family and friends this holiday season!
Gingerbread Cookies with Royal Icing
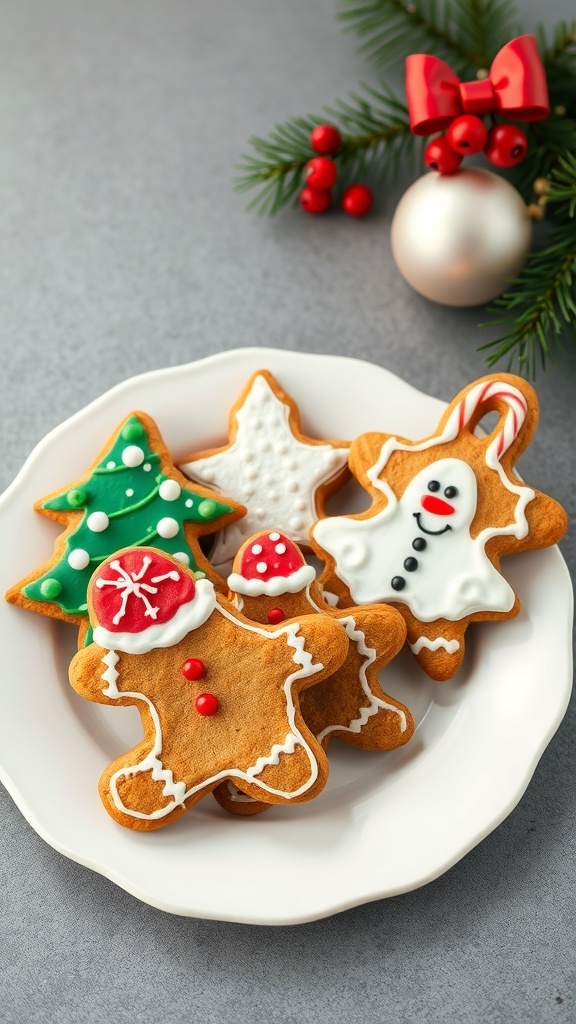
Gingerbread cookies are a classic treat during the holiday season. They bring warmth and joy, making them perfect for sharing with family and friends. The image shows beautifully decorated gingerbread cookies shaped like festive figures and trees, all adorned with colorful royal icing. These cookies not only taste great but also make for delightful decorations.
Making gingerbread cookies is a fun activity, especially when you can get creative with the icing. Kids and adults alike enjoy decorating these cookies, turning them into little works of art. The sweet and spicy aroma of gingerbread baking fills the home, creating a cozy holiday atmosphere.
Let’s get started on making your own batch of gingerbread cookies with royal icing!
Ingredients
- 3 cups all-purpose flour
- 1 tablespoon ground ginger
- 1 tablespoon ground cinnamon
- 1/2 teaspoon ground cloves
- 1 teaspoon baking soda
- 1/2 teaspoon salt
- 3/4 cup unsalted butter, softened
- 3/4 cup brown sugar, packed
- 1 large egg
- 1/2 cup molasses
- 2 cups powdered sugar
- 2 tablespoons meringue powder
- 1/4 cup water
- Food coloring (optional)
Instructions
- Mix Dry Ingredients: In a bowl, whisk together flour, ginger, cinnamon, cloves, baking soda, and salt.
- Make the Dough: In another bowl, cream the softened butter and brown sugar until fluffy. Beat in the egg and molasses. Gradually add the dry ingredients, mixing until combined.
- Chill the Dough: Wrap the dough in plastic wrap and refrigerate for at least 2 hours or overnight.
- Preheat Oven: When ready to bake, preheat your oven to 350°F (175°C).
- Roll and Cut: On a floured surface, roll out the dough to about 1/4 inch thick. Use cookie cutters to cut out shapes and place them on a baking sheet lined with parchment paper.
- Bake: Bake for 8-10 minutes until the edges are firm. Let them cool completely on a wire rack.
- Make Royal Icing: In a bowl, beat together powdered sugar, meringue powder, and water until smooth. If desired, divide and add food coloring.
- Decorate: Use piping bags to decorate the cooled cookies with royal icing. Let the icing dry completely before storing.
Vanilla Bean Snowball Cookies
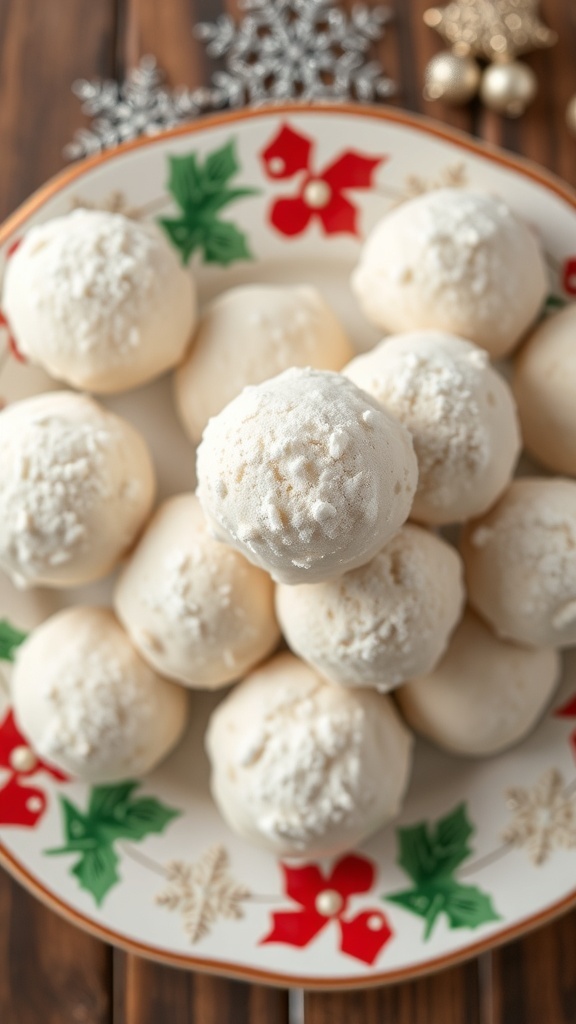
Vanilla Bean Snowball Cookies are a delightful treat that perfectly capture the spirit of the holiday season. These cookies are soft, buttery, and coated in a generous layer of powdered sugar, making them look like little snowballs. The image showcases a beautiful plate filled with these snowy delights, adorned with festive decorations that add to the holiday cheer.
These cookies are not only tasty but also easy to make. They are perfect for sharing with family and friends or leaving out for Santa. The combination of vanilla bean and buttery goodness makes each bite a little piece of heaven.
Ingredients
- 1 cup unsalted butter, softened
- 1/2 cup powdered sugar, plus more for dusting
- 1 teaspoon vanilla bean paste
- 2 cups all-purpose flour
- 1/4 teaspoon salt
- 1 cup chopped nuts (optional)
Instructions
- Preheat your oven to 350°F (175°C) and line a baking sheet with parchment paper.
- In a large bowl, cream together the softened butter and powdered sugar until light and fluffy.
- Add the vanilla bean paste and mix until well combined.
- Gradually add the flour and salt, mixing until a soft dough forms. If using nuts, fold them in at this stage.
- Shape the dough into small balls, about 1 inch in diameter, and place them on the prepared baking sheet.
- Bake for 10-12 minutes, or until the bottoms are lightly golden. The tops should remain pale.
- Once out of the oven, let the cookies cool for a few minutes before rolling them in powdered sugar. Allow them to cool completely before dusting them again for that snowy finish.
Maple Pecan Shortbread Cookies
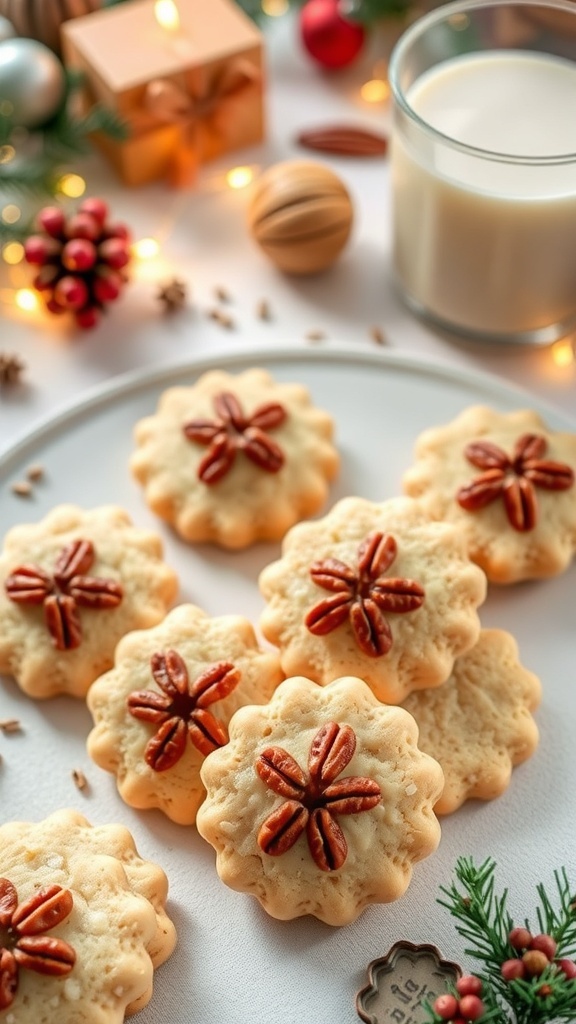
Maple Pecan Shortbread Cookies are a delightful treat that perfectly captures the essence of the holiday season. These cookies are buttery, crumbly, and have a hint of maple flavor that pairs wonderfully with the crunch of pecans. The festive presentation, with their lovely flower shape and pecan centers, makes them a great addition to any holiday cookie platter.
Imagine enjoying these cookies with a glass of milk, surrounded by twinkling lights and the warmth of the season. They’re not just tasty; they also bring a cozy vibe to your holiday gatherings. Baking these cookies is a simple way to fill your home with delicious aromas and create sweet memories with family and friends.
Ingredients
- 1 cup unsalted butter, softened
- 1/2 cup powdered sugar
- 1/4 cup maple syrup
- 2 cups all-purpose flour
- 1/2 cup chopped pecans
- 1/4 teaspoon salt
- Pecan halves for decoration
Instructions
- Preheat your oven to 350°F (175°C) and line a baking sheet with parchment paper.
- In a large bowl, cream together the softened butter and powdered sugar until light and fluffy.
- Mix in the maple syrup until well combined.
- Gradually add the flour and salt, mixing until a dough forms. Stir in the chopped pecans.
- Roll the dough into small balls and flatten them slightly. Place them on the prepared baking sheet.
- Press a pecan half into the center of each cookie.
- Bake for 12-15 minutes, or until the edges are lightly golden. Let them cool on a wire rack.
Pecan Pie Bars with Caramel Drizzle
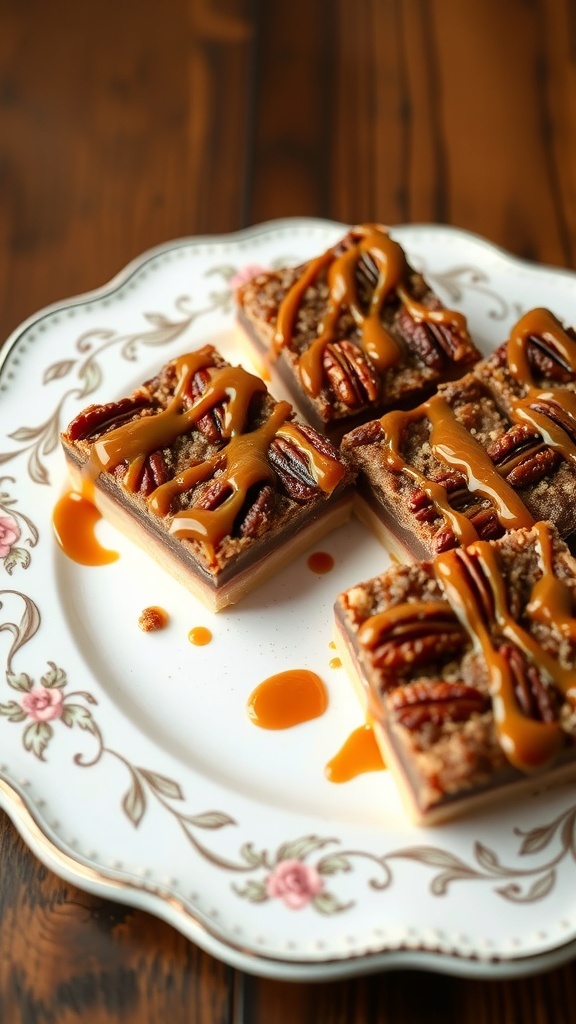
Pecan pie bars are a delightful twist on the classic pecan pie. These bars are easy to make and perfect for sharing during the holiday season. The image shows beautifully arranged bars topped with crunchy pecans and a luscious caramel drizzle, making them look irresistible.
The base is buttery and crumbly, giving way to a rich filling that combines the sweetness of brown sugar and the nuttiness of pecans. The caramel drizzle adds an extra layer of flavor that takes these bars to the next level. They are not just a treat; they are a festive addition to any holiday dessert table.
Gather your friends and family to enjoy these delicious treats. They are sure to be a hit!
Ingredients
- 1 cup all-purpose flour
- 1/2 cup unsalted butter, softened
- 1/4 cup granulated sugar
- 1/4 teaspoon salt
- 1 cup packed brown sugar
- 1/2 cup corn syrup
- 2 large eggs
- 1 teaspoon vanilla extract
- 1 cup chopped pecans
- 1/2 cup caramel sauce
Instructions
- Preheat your oven to 350°F (175°C). Grease an 8×8-inch baking dish.
- In a bowl, mix the flour, softened butter, granulated sugar, and salt until crumbly. Press this mixture into the bottom of the prepared dish.
- Bake the crust for about 15 minutes until lightly golden.
- In another bowl, whisk together brown sugar, corn syrup, eggs, and vanilla until smooth. Stir in the chopped pecans.
- Pour the pecan mixture over the baked crust and spread evenly.
- Bake for an additional 25-30 minutes until the filling is set. Let it cool completely before cutting into bars.
- Drizzle with caramel sauce before serving. Enjoy!
Chocolate Peppermint Cupcakes
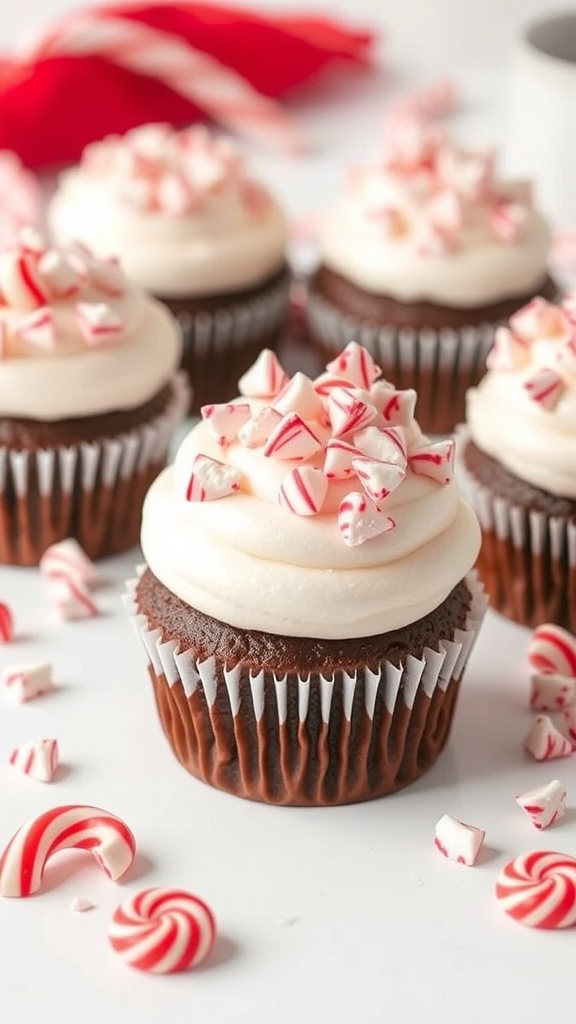
These Chocolate Peppermint Cupcakes are a festive treat that brings joy to any holiday gathering. The rich chocolate flavor pairs perfectly with the refreshing taste of peppermint. Topped with fluffy white frosting and sprinkled with crushed peppermint candies, they look as delightful as they taste.
Making these cupcakes is a fun way to get into the holiday spirit. The combination of chocolate and peppermint creates a classic flavor that everyone loves. Whether you’re baking for a party or just for yourself, these cupcakes are sure to impress.
Ingredients
- 1 cup all-purpose flour
- 1 cup granulated sugar
- 1/2 cup unsweetened cocoa powder
- 1 teaspoon baking powder
- 1/2 teaspoon baking soda
- 1/4 teaspoon salt
- 1/2 cup unsalted butter, softened
- 2 large eggs
- 1 teaspoon vanilla extract
- 1/2 cup milk
- 1/2 teaspoon peppermint extract
- 1 cup powdered sugar
- 1/4 cup heavy cream
- Crushed peppermint candies for topping
Instructions
- Preheat the oven to 350°F (175°C) and line a cupcake pan with liners.
- In a large bowl, mix flour, sugar, cocoa powder, baking powder, baking soda, and salt.
- Add softened butter, eggs, vanilla extract, milk, and peppermint extract. Beat until smooth.
- Fill each cupcake liner about 2/3 full with batter. Bake for 18-20 minutes or until a toothpick comes out clean.
- Let the cupcakes cool completely on a wire rack.
- For the frosting, beat powdered sugar and heavy cream together until fluffy.
- Frost the cooled cupcakes and sprinkle with crushed peppermint candies.
Enjoy these delightful Chocolate Peppermint Cupcakes during the holiday season!
Mincemeat Tarts with Sweet Pastry Crust
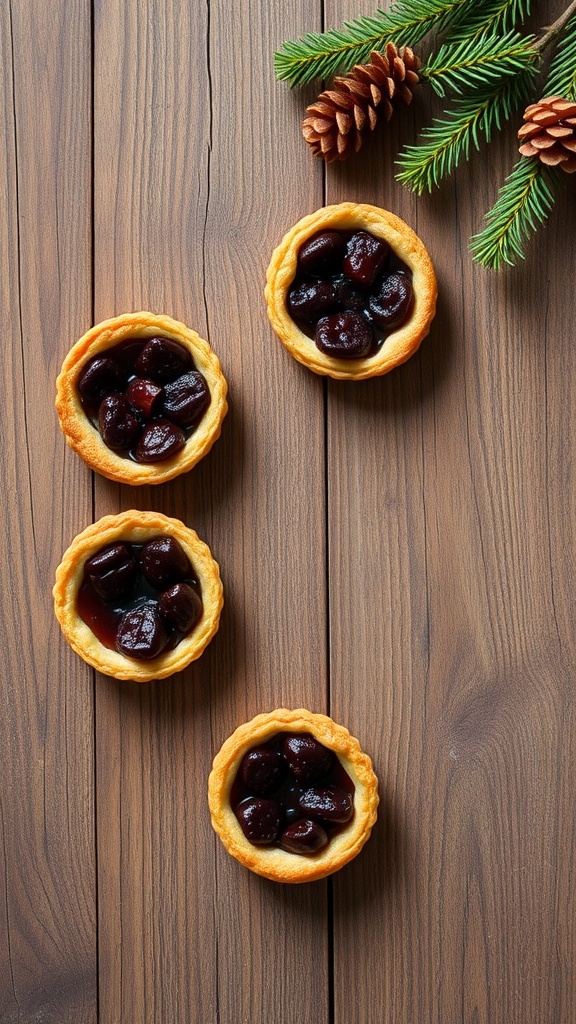
Mincemeat tarts are a classic holiday treat that brings warmth and joy to any festive gathering. These little pastry cups are filled with a rich, spiced mixture that often includes dried fruits, nuts, and spices. The sweet pastry crust adds a delightful crunch, making each bite a perfect balance of flavors and textures.
The image showcases beautifully baked mincemeat tarts, each with a golden crust and a glossy filling. They are arranged on a rustic wooden surface, accompanied by pinecones and greenery, setting a cozy, holiday vibe. These tarts are not just delicious; they also look stunning on any dessert table, making them a must-have for Christmas baking.
Ingredients
- 1 1/4 cups all-purpose flour
- 1/4 cup powdered sugar
- 1/2 cup unsalted butter, chilled and cubed
- 1 large egg yolk
- 2 tablespoons cold water
- 1 cup mincemeat filling
Instructions
- Make the Pastry: In a bowl, mix flour and powdered sugar. Add the chilled butter and mix until crumbly. Stir in the egg yolk and cold water until the dough forms. Wrap in plastic and chill for 30 minutes.
- Preheat the Oven: Preheat your oven to 375°F (190°C).
- Roll Out the Dough: On a floured surface, roll out the chilled dough to about 1/8 inch thick. Cut out circles to fit into a muffin tin.
- Fill the Tarts: Press the dough circles into the muffin tin. Fill each with a spoonful of mincemeat filling.
- Bake: Bake for 20-25 minutes or until the crust is golden brown. Let them cool before removing from the tin.
Red Velvet Cake with Cream Cheese Frosting
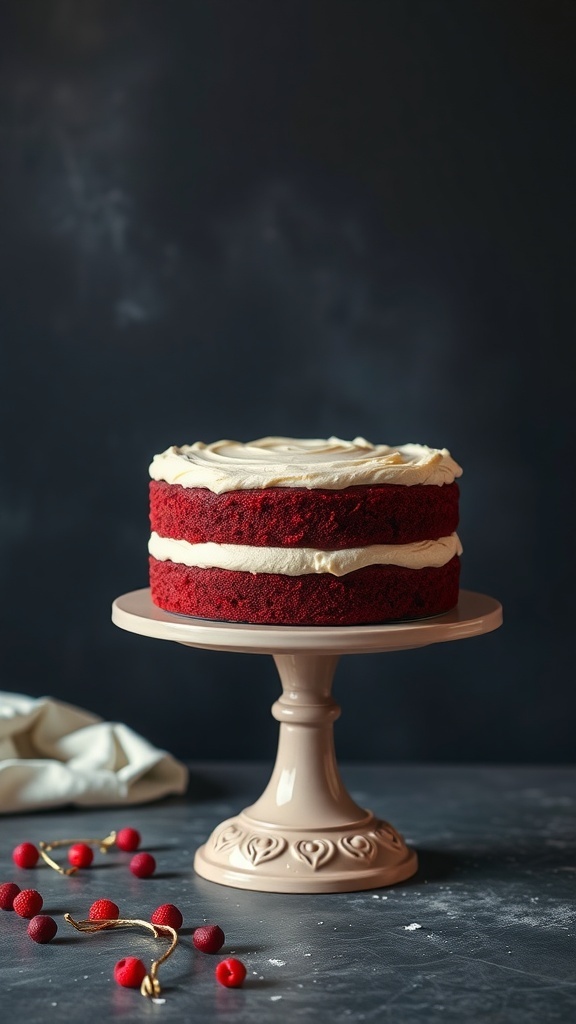
Red velvet cake is a classic treat that brings a touch of elegance to any holiday gathering. Its vibrant red color and soft texture make it a favorite during Christmas. The cake is layered with a rich cream cheese frosting that perfectly balances the sweetness.
To make this delightful cake, you’ll need some basic ingredients. The key to that signature red hue is food coloring, which gives the cake its festive look. The cream cheese frosting adds a creamy, tangy flavor that pairs wonderfully with the cake.
Gather your friends and family to help with the baking. It’s a fun way to bond during the holiday season. Plus, everyone loves a slice of this beautiful cake!
Ingredients
- 2 1/2 cups all-purpose flour
- 1 1/2 cups granulated sugar
- 1 teaspoon baking soda
- 1 teaspoon salt
- 1 teaspoon cocoa powder
- 1 1/2 cups vegetable oil
- 1 cup buttermilk, room temperature
- 2 large eggs, room temperature
- 2 tablespoons red food coloring
- 1 teaspoon vanilla extract
- 1 teaspoon white vinegar
- 8 oz cream cheese, softened
- 1/2 cup unsalted butter, softened
- 4 cups powdered sugar
- 1 teaspoon vanilla extract (for frosting)
Instructions
- Preheat your oven to 350°F (175°C). Grease and flour two 9-inch round cake pans.
- In a large bowl, mix flour, sugar, baking soda, salt, and cocoa powder.
- In another bowl, combine oil, buttermilk, eggs, food coloring, vanilla, and vinegar. Mix well.
- Gradually add the wet ingredients to the dry ingredients, stirring until just combined.
- Divide the batter evenly between the prepared pans. Bake for 25-30 minutes, or until a toothpick comes out clean.
- Let the cakes cool in the pans for 10 minutes, then transfer to wire racks to cool completely.
- For the frosting, beat together cream cheese and butter until smooth. Gradually add powdered sugar and vanilla, mixing until creamy.
- Once the cakes are cool, spread frosting between the layers and over the top and sides of the cake.
- Decorate as desired and enjoy your festive red velvet cake!
Caramel Apple Pie with Lattice Crust
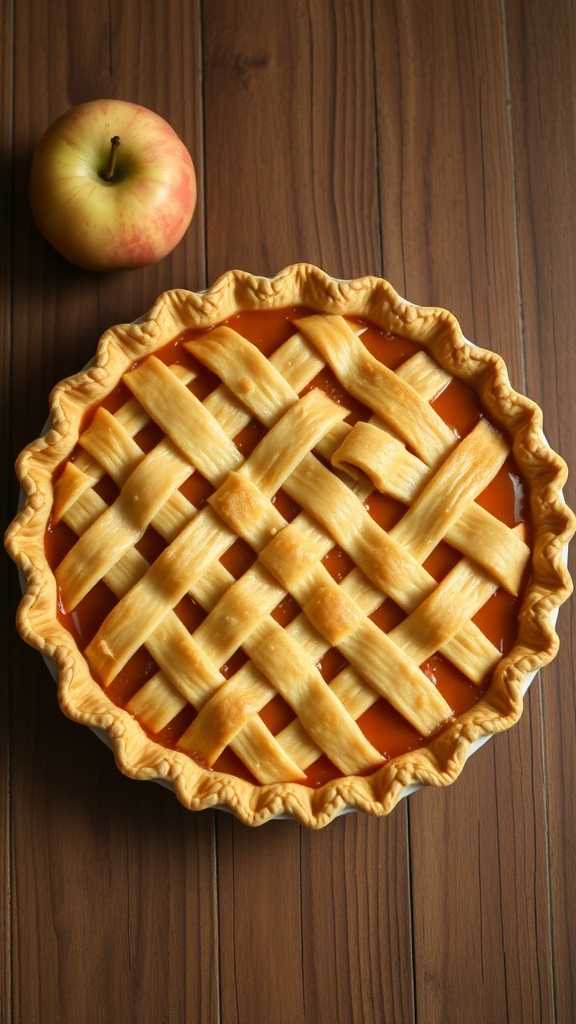
Caramel apple pie is a delightful twist on the classic dessert. The image shows a beautifully crafted pie with a golden lattice crust, inviting you to take a slice. The warm, rich colors of the caramel filling peek through the crust, hinting at the sweet and tangy apple flavor inside.
This pie is perfect for holiday gatherings or cozy family dinners. The combination of caramel and apples creates a comforting taste that everyone loves. Plus, the lattice crust adds a touch of elegance, making it a showstopper on any dessert table.
Making this pie is easier than you might think. With a few simple ingredients and steps, you can create a dessert that will impress your friends and family. Let’s get started!
Ingredients
- 2 ½ cups all-purpose flour
- 1 teaspoon salt
- 1 tablespoon granulated sugar
- 1 cup unsalted butter, chilled and diced
- 6 to 8 tablespoons ice water
- 6 cups sliced apples (Granny Smith or Honeycrisp)
- 1 cup granulated sugar
- 1 tablespoon lemon juice
- 1 teaspoon cinnamon
- ½ teaspoon nutmeg
- ¼ cup caramel sauce
- 1 egg (for egg wash)
Instructions
- Make the Pie Crust: In a bowl, mix flour, salt, and sugar. Cut in butter until the mixture resembles coarse crumbs. Stir in ice water, a tablespoon at a time, until dough forms. Divide into two balls, wrap in plastic, and refrigerate for at least 1 hour.
- Prepare the Filling: In a large bowl, combine sliced apples, sugar, lemon juice, cinnamon, nutmeg, and caramel sauce. Toss until apples are well coated.
- Roll Out the Dough: On a floured surface, roll out one dough ball to fit your pie pan. Place it in the pan and fill with the apple mixture.
- Make the Lattice Top: Roll out the second dough ball and cut into strips. Weave the strips over the filling to create a lattice pattern. Trim and crimp the edges to seal.
- Brush the Crust: Beat the egg and brush it over the lattice crust for a golden finish.
- Bake: Preheat the oven to 425°F (220°C). Bake for 15 minutes, then reduce the temperature to 350°F (175°C) and bake for an additional 35-40 minutes until the apples are tender and the crust is golden brown.
- Cool and Serve: Let the pie cool for at least 2 hours before slicing. Serve with extra caramel sauce or a scoop of vanilla ice cream.
Chocolate Hazelnut Biscotti
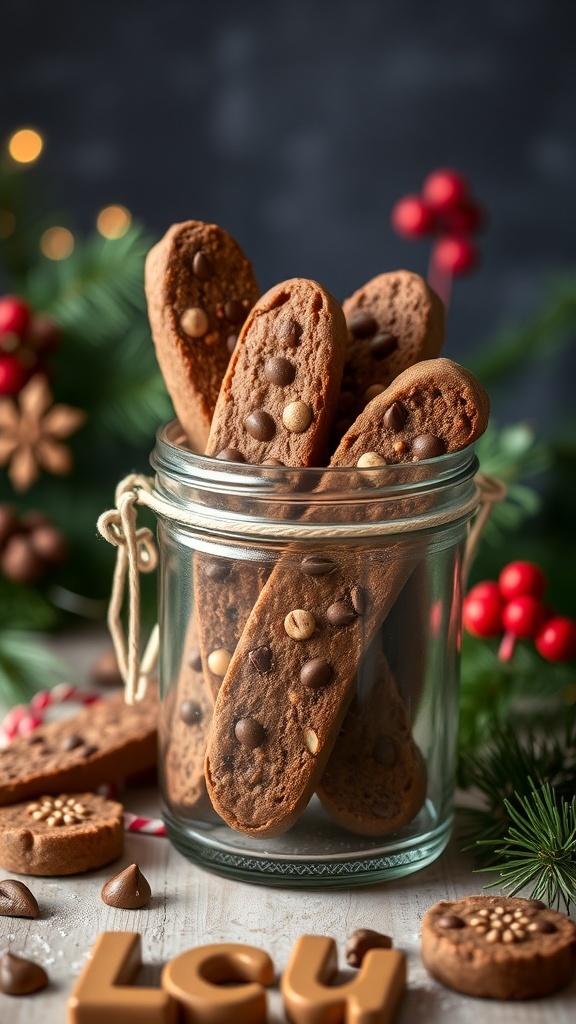
Chocolate Hazelnut Biscotti are a delightful treat for the holiday season. These crunchy cookies are perfect for dipping in coffee or hot chocolate. The combination of chocolate and hazelnuts creates a rich flavor that warms the heart. The image shows a jar filled with beautifully baked biscotti, showcasing their inviting texture and chocolate chips. Surrounding the jar are festive decorations, adding to the holiday spirit.
Making these biscotti is simple and fun. You’ll enjoy the process as much as the delicious results. They’re great for sharing with friends and family or for enjoying during cozy evenings at home.
Ingredients
- 2 cups all-purpose flour
- 1 cup granulated sugar
- 1/2 cup unsweetened cocoa powder
- 1 teaspoon baking powder
- 1/2 teaspoon salt
- 3 large eggs
- 1 teaspoon vanilla extract
- 1 cup chopped hazelnuts
- 1/2 cup chocolate chips
Instructions
- Preheat the oven to 350°F (175°C). Line a baking sheet with parchment paper.
- In a large bowl, mix flour, sugar, cocoa powder, baking powder, and salt.
- In another bowl, whisk together eggs and vanilla. Add to the dry ingredients and mix until a dough forms.
- Fold in hazelnuts and chocolate chips.
- Divide the dough in half and shape each half into a log about 12 inches long. Place on the baking sheet.
- Bake for 25-30 minutes until firm. Let cool for 10 minutes, then slice into 1-inch pieces.
- Arrange the slices cut side down on the baking sheet and bake for an additional 10-15 minutes until crisp.
- Cool completely before serving. Enjoy your homemade Chocolate Hazelnut Biscotti!
Chocolate Dipped Pretzel Rods
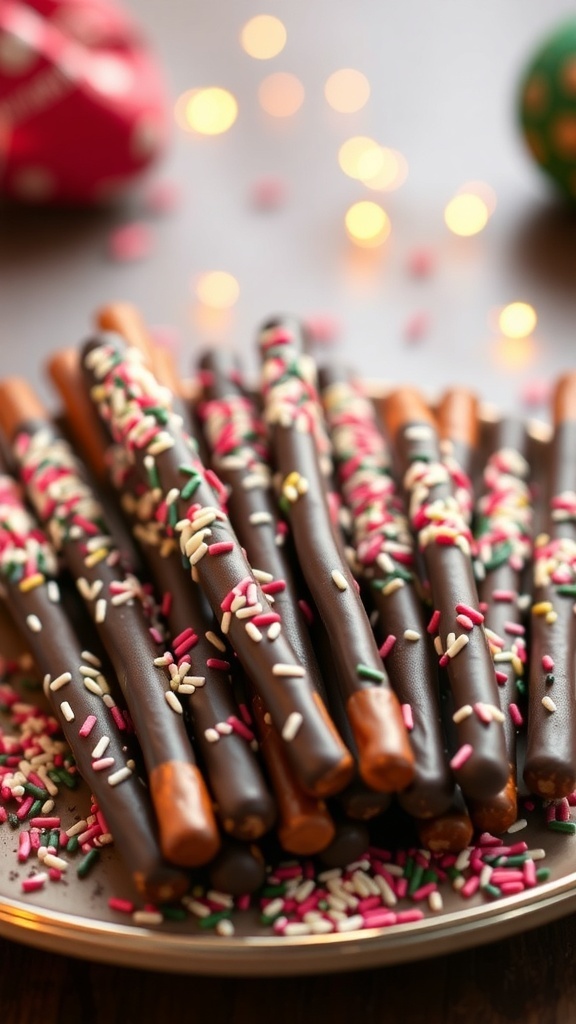
Chocolate dipped pretzel rods are a fun and festive treat for the holiday season. They combine the crunch of pretzels with the sweetness of chocolate, making them a perfect snack for gatherings or a delightful gift for friends and family.
In the image, you can see beautifully coated pretzel rods, dipped in rich chocolate and sprinkled with colorful holiday sprinkles. The vibrant colors and textures make them visually appealing and inviting. These treats are easy to make and can be customized with different toppings.
Gather your ingredients and let’s get started on this simple recipe!
Ingredients
- 1 cup chocolate chips (milk or dark)
- 12 pretzel rods
- 1/2 cup holiday sprinkles
- Parchment paper
Instructions
- Melt the Chocolate: In a microwave-safe bowl, melt the chocolate chips in 30-second intervals, stirring in between until smooth.
- Dip the Pretzels: Hold each pretzel rod by one end and dip it into the melted chocolate, covering about two-thirds of the rod.
- Add Sprinkles: Immediately sprinkle the holiday sprinkles over the chocolate-covered portion before it sets.
- Set to Cool: Place the dipped pretzel rods on a sheet of parchment paper and let them cool until the chocolate hardens.
- Enjoy: Once set, serve them on a platter or package them up for gifts!
Honey Gingerbread Loaf
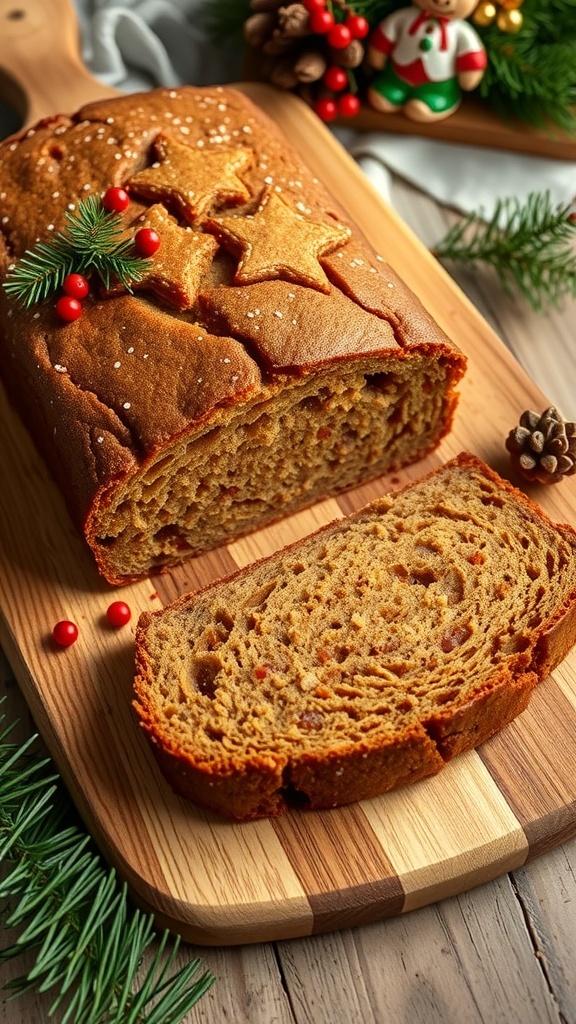
The Honey Gingerbread Loaf is a festive treat that brings warmth to any holiday gathering. This loaf is beautifully baked, featuring a golden-brown crust with charming star shapes on top. It’s perfect for sharing with friends and family during the holiday season.
As you slice into the loaf, the rich aroma of ginger and honey fills the air, making it hard to resist. The texture is soft and moist, ideal for enjoying with a cup of tea or coffee. This loaf not only tastes great but also looks lovely on any dessert table, adorned with festive decorations like pine sprigs and red berries.
Making this Honey Gingerbread Loaf is simple and fun. Gather your ingredients, and let’s get started on this delightful recipe!
Ingredients
- 1 ½ cups all-purpose flour
- 1 teaspoon baking soda
- 1 teaspoon ground ginger
- 1 teaspoon ground cinnamon
- ½ teaspoon ground nutmeg
- ¼ teaspoon salt
- ½ cup unsalted butter, softened
- ½ cup granulated sugar
- ½ cup honey
- 2 large eggs
- ½ cup milk
- 1 teaspoon vanilla extract
Instructions
- Preheat your oven to 350°F (175°C). Grease a loaf pan and set it aside.
- In a bowl, whisk together the flour, baking soda, ginger, cinnamon, nutmeg, and salt.
- In another bowl, cream the softened butter and sugar until light and fluffy. Add the honey and mix well.
- Beat in the eggs one at a time, then stir in the milk and vanilla extract.
- Gradually add the dry ingredients to the wet mixture, mixing until just combined.
- Pour the batter into the prepared loaf pan and smooth the top.
- Bake for 50-60 minutes, or until a toothpick inserted in the center comes out clean.
- Let the loaf cool in the pan for 10 minutes, then transfer it to a wire rack to cool completely.
Almond Joy Cookies with Coconut
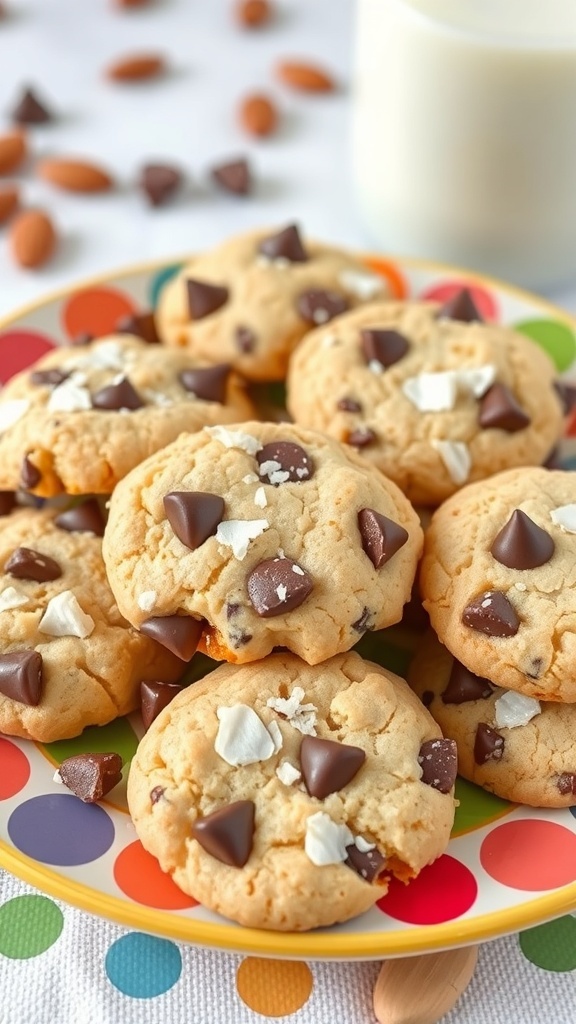
These Almond Joy Cookies are a delightful treat that brings together the flavors of chocolate, coconut, and almonds. The image shows a colorful plate filled with golden-brown cookies, each topped with chocolate chips and bits of coconut. They look inviting and perfect for sharing during the holiday season.
Making these cookies is a fun and easy process. Start by gathering your ingredients, which include flour, sugar, butter, chocolate chips, and shredded coconut. The combination of these ingredients creates a chewy and satisfying cookie that everyone will love.
These cookies are not just tasty; they also add a festive touch to your holiday baking. Whether you’re making them for a party or just for yourself, they are sure to impress. Pair them with a glass of milk for the ultimate treat!
Ingredients
- 1 cup all-purpose flour
- 1/2 cup granulated sugar
- 1/2 cup brown sugar, packed
- 1/2 cup unsalted butter, softened
- 1 large egg
- 1 teaspoon vanilla extract
- 1/2 teaspoon baking soda
- 1/4 teaspoon salt
- 1 cup shredded coconut
- 1/2 cup chocolate chips
- 1/2 cup chopped almonds
Instructions
- Preheat your oven to 350°F (175°C) and line a baking sheet with parchment paper.
- In a large bowl, cream together the softened butter, granulated sugar, and brown sugar until smooth.
- Add the egg and vanilla extract, mixing until well combined.
- In another bowl, whisk together the flour, baking soda, and salt. Gradually add this to the wet mixture, stirring until just combined.
- Fold in the shredded coconut, chocolate chips, and chopped almonds.
- Drop spoonfuls of dough onto the prepared baking sheet, spacing them about 2 inches apart.
- Bake for 10-12 minutes, or until the edges are lightly golden. Let them cool on the baking sheet for a few minutes before transferring to a wire rack.
Chocolate Mint Whoopie Pies
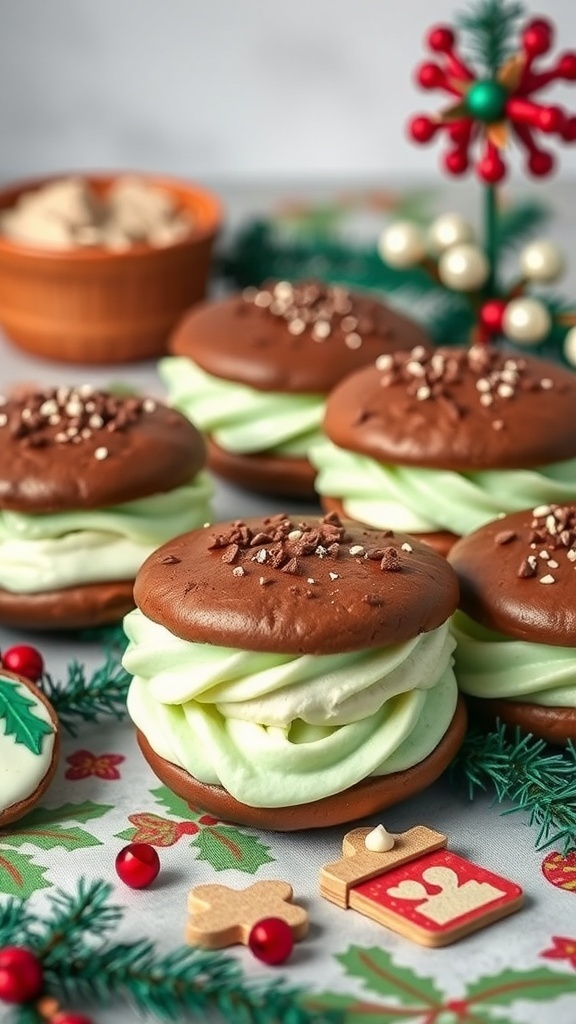
Chocolate Mint Whoopie Pies are a festive treat that perfectly captures the spirit of the holiday season. These delightful desserts feature soft, chocolatey cookies filled with a creamy mint frosting. The combination of rich chocolate and refreshing mint is simply irresistible.
In the image, you can see these whoopie pies stacked together, showcasing their fluffy green filling peeking out between two chocolate cookies. The festive decorations around them, like the red beads and pine branches, add to the holiday cheer. They are not just a treat for the taste buds but also a feast for the eyes!
Making these whoopie pies is a fun activity for the whole family. They are perfect for holiday gatherings or as a sweet gift for friends and neighbors. Let’s get into the ingredients and steps to whip up these delicious treats!
Ingredients
- 1 cup all-purpose flour
- 1/2 cup unsweetened cocoa powder
- 1 teaspoon baking soda
- 1/4 teaspoon salt
- 1/2 cup unsalted butter, softened
- 1 cup granulated sugar
- 1 large egg
- 1 teaspoon vanilla extract
- 1/2 cup milk
- 1 cup powdered sugar
- 1/4 cup unsalted butter, softened
- 1/2 teaspoon peppermint extract
- 2 tablespoons milk (for frosting)
- Green food coloring (optional)
Instructions
- Preheat the oven to 350°F (175°C). Line a baking sheet with parchment paper.
- In a bowl, mix together flour, cocoa powder, baking soda, and salt. Set aside.
- In another bowl, cream together the softened butter and granulated sugar until light and fluffy. Add the egg and vanilla, mixing well.
- Gradually add the dry ingredients to the wet mixture, alternating with the milk. Mix until just combined.
- Drop tablespoons of batter onto the prepared baking sheet, spacing them about 2 inches apart.
- Bake for 10-12 minutes, or until the cookies are set. Let them cool on a wire rack.
- For the filling, beat together the powdered sugar, softened butter, peppermint extract, and milk until smooth. Add green food coloring if desired.
- Once the cookies are cool, spread the mint filling on the flat side of one cookie and top with another cookie, flat side down.
- Enjoy your Chocolate Mint Whoopie Pies with family and friends!
Cranberry Orange Scones with Glaze
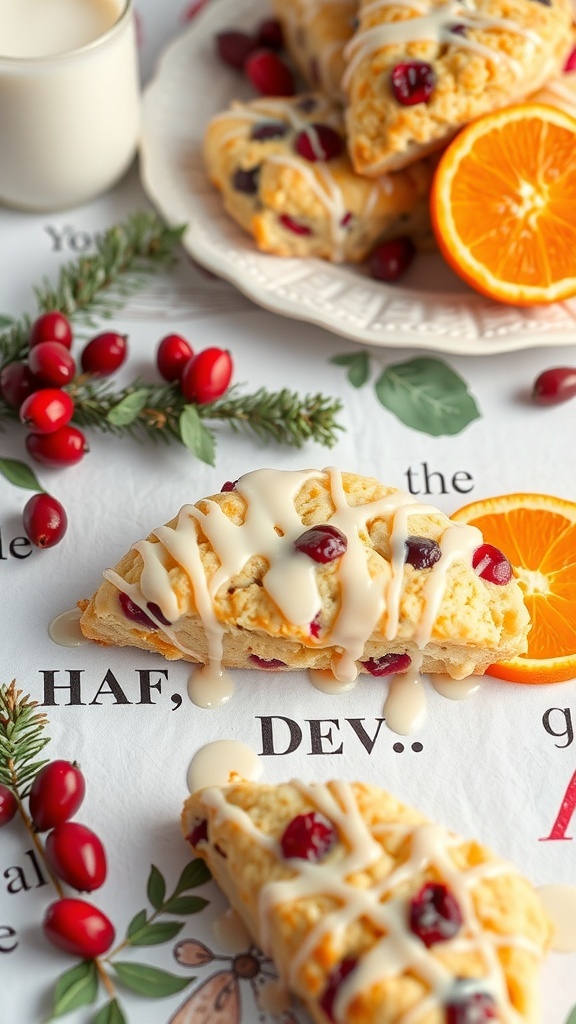
Cranberry orange scones are a delightful treat that perfectly captures the spirit of the holiday season. The combination of tart cranberries and zesty orange creates a refreshing flavor that pairs wonderfully with a warm cup of tea or coffee. These scones are not only easy to make, but they also fill your kitchen with a lovely aroma that will have everyone asking what’s baking.
The scones are golden brown and have a light, flaky texture. Drizzled with a sweet glaze, they look as good as they taste. The bright colors of the cranberries and orange slices make them visually appealing, adding a festive touch to your holiday table.
Making these scones is a fun activity to share with family and friends. Gather your ingredients and enjoy the process of mixing, shaping, and baking. Soon enough, you’ll have a batch of delicious scones ready to enjoy!
Ingredients
- 2 cups all-purpose flour
- 1/4 cup granulated sugar
- 1 tablespoon baking powder
- 1/2 teaspoon salt
- 1/2 cup unsalted butter, cold and cubed
- 1 cup fresh cranberries, chopped
- 1 tablespoon orange zest
- 1/2 cup heavy cream
- 1 large egg
- 1 teaspoon vanilla extract
- 1 cup powdered sugar (for glaze)
- 2 tablespoons orange juice (for glaze)
Instructions
- Preheat the oven to 400°F (200°C). Line a baking sheet with parchment paper.
- In a large bowl, mix flour, sugar, baking powder, and salt. Add the cold butter and mix until the mixture resembles coarse crumbs.
- Stir in the chopped cranberries and orange zest.
- In another bowl, whisk together the cream, egg, and vanilla. Pour this mixture into the dry ingredients and stir until just combined.
- Turn the dough onto a floured surface and gently knead it a few times. Pat it into a circle about 1 inch thick. Cut into wedges and place on the prepared baking sheet.
- Bake for 15-20 minutes or until golden brown. Let them cool slightly.
- For the glaze, mix powdered sugar and orange juice until smooth. Drizzle over the warm scones before serving.
Eggnog Snickerdoodles with Nutmeg
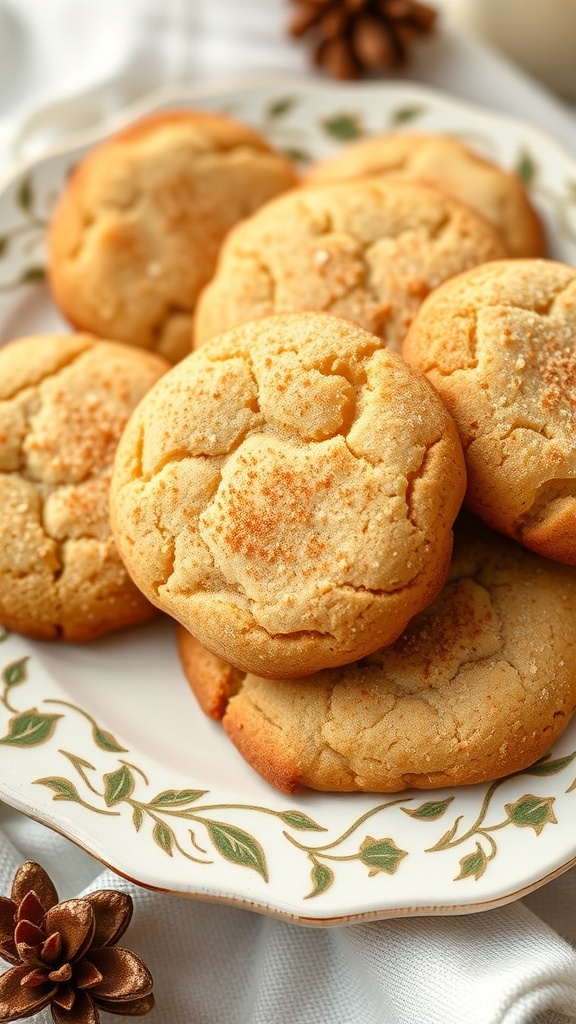
Eggnog Snickerdoodles are a delightful twist on the classic cookie. These treats bring the warm flavors of eggnog and nutmeg into every bite. Imagine soft, chewy cookies with a hint of holiday spice, perfect for sharing with friends and family.
The cookies in the image look inviting, with their golden edges and slightly cracked tops. They are dusted with sugar, giving them a sweet sparkle. The plate adds a festive touch, making them a great addition to any holiday gathering.
Making these cookies is simple and fun. You’ll enjoy the process of mixing the ingredients and rolling the dough in sugar. The aroma that fills your kitchen while they bake is simply irresistible!
Ingredients
- 1 cup unsalted butter, softened
- 1 cup granulated sugar
- 1/2 cup brown sugar, packed
- 2 large eggs
- 1 teaspoon vanilla extract
- 3 cups all-purpose flour
- 2 teaspoons cream of tartar
- 1 teaspoon baking soda
- 1/2 teaspoon salt
- 1 teaspoon ground nutmeg
- 1/4 cup granulated sugar (for rolling)
- 1 teaspoon ground cinnamon (for rolling)
Instructions
- Preheat the oven to 350°F (175°C). Line a baking sheet with parchment paper.
- In a large bowl, cream together the softened butter, granulated sugar, and brown sugar until light and fluffy.
- Add the eggs and vanilla extract, mixing until well combined.
- In another bowl, whisk together the flour, cream of tartar, baking soda, salt, and nutmeg.
- Gradually add the dry ingredients to the wet mixture, stirring until just combined.
- In a small bowl, mix the 1/4 cup sugar and cinnamon for rolling.
- Roll the dough into balls, then roll each ball in the sugar-cinnamon mixture.
- Place the dough balls on the prepared baking sheet, spacing them about 2 inches apart.
- Bake for 10-12 minutes, or until the edges are lightly golden. Let them cool on the baking sheet for a few minutes before transferring to a wire rack.
Raspberry Linzer Cookies with Jam

Raspberry Linzer cookies are a delightful treat that brings a touch of sweetness to your holiday baking. These cookies are not only beautiful with their heart shapes and vibrant jam centers, but they also offer a wonderful blend of flavors. The buttery, almond-infused dough pairs perfectly with the tart raspberry jam, making each bite a joy.
The cookies are typically dusted with powdered sugar, giving them a snowy appearance that fits right in with the festive season. They are perfect for sharing with loved ones or enjoying with a warm cup of tea. Plus, they make a lovely addition to any holiday cookie platter!
Ingredients
- 2 cups all-purpose flour
- 1/2 cup almond flour
- 1/2 cup powdered sugar
- 1 teaspoon ground cinnamon
- 1/4 teaspoon salt
- 1 cup unsalted butter, softened
- 1 teaspoon vanilla extract
- 1/2 cup raspberry jam
- Powdered sugar for dusting
Instructions
- Make the Dough: In a bowl, mix the all-purpose flour, almond flour, powdered sugar, cinnamon, and salt. In another bowl, cream the softened butter and vanilla until light and fluffy. Gradually add the dry ingredients to the butter mixture, mixing until combined.
- Chill the Dough: Divide the dough into two portions, wrap in plastic wrap, and refrigerate for at least 1 hour.
- Roll and Cut: Preheat the oven to 350°F (175°C). Roll out one portion of the dough on a floured surface to about 1/4 inch thick. Use a heart-shaped cookie cutter to cut out shapes. For half of the cookies, cut out a smaller heart in the center.
- Bake the Cookies: Place the cookies on a baking sheet lined with parchment paper. Bake for 10-12 minutes until lightly golden. Let them cool completely.
- Assemble: Spread raspberry jam on the whole cookies and top with the cut-out cookies. Dust with powdered sugar before serving.
Spiced Rum Cake with Glaze
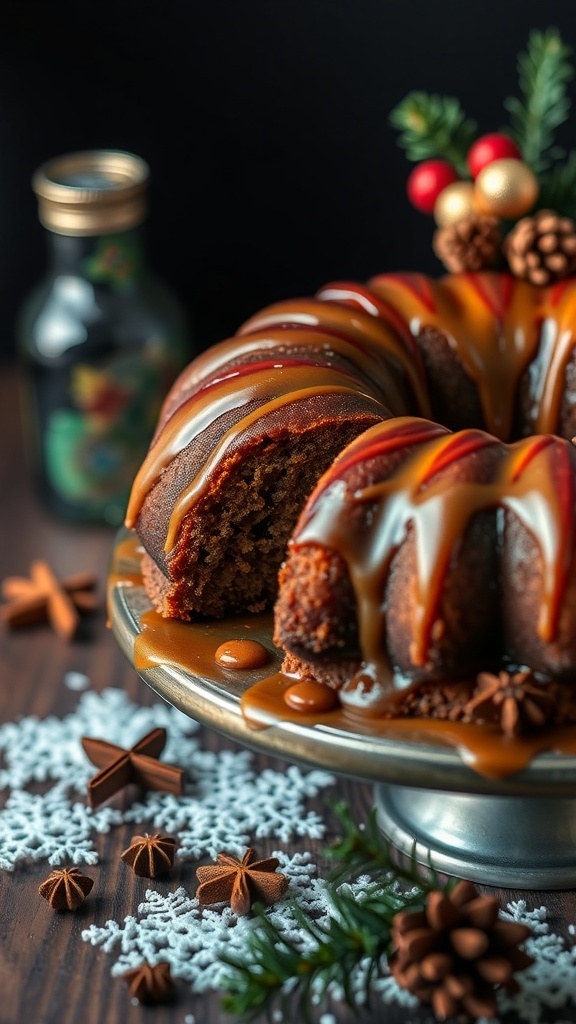
The spiced rum cake is a festive treat that brings warmth and cheer to any holiday gathering. Its rich, moist texture is complemented by the sweet, spiced flavors that fill the air as it bakes. The cake is beautifully topped with a glossy glaze that adds a touch of elegance. Imagine serving this delightful cake on a cozy winter evening, surrounded by friends and family.
This cake is not just about taste; it’s also about presentation. The bundt shape, adorned with a luscious glaze, makes it a stunning centerpiece on your holiday table. The aroma of rum and spices will have everyone eagerly anticipating a slice.
Now, let’s get into the fun part—making this delicious spiced rum cake! Gather your ingredients and follow these simple steps to create a dessert that will impress everyone.
Ingredients
- 2 cups all-purpose flour
- 1 teaspoon baking powder
- 1/2 teaspoon baking soda
- 1 teaspoon ground cinnamon
- 1/2 teaspoon ground nutmeg
- 1/4 teaspoon ground cloves
- 1/2 teaspoon salt
- 1 cup unsalted butter, softened
- 1 cup granulated sugar
- 1 cup brown sugar, packed
- 4 large eggs
- 1 cup spiced rum
- 1 teaspoon vanilla extract
- 1 cup powdered sugar (for glaze)
- 2 tablespoons milk (for glaze)
Instructions
- Preheat the oven to 350°F (175°C). Grease and flour a bundt pan.
- In a bowl, whisk together flour, baking powder, baking soda, cinnamon, nutmeg, cloves, and salt. Set aside.
- In a large mixing bowl, cream the softened butter with granulated and brown sugars until light and fluffy.
- Add eggs one at a time, mixing well after each addition. Stir in the spiced rum and vanilla extract.
- Gradually add the dry ingredients to the wet mixture, mixing until just combined.
- Pour the batter into the prepared bundt pan and smooth the top. Bake for 50-60 minutes or until a toothpick comes out clean.
- Let the cake cool in the pan for 10 minutes, then invert onto a wire rack to cool completely.
- For the glaze, whisk together powdered sugar and milk until smooth. Drizzle over the cooled cake before serving.
Coconut Macaroons Dipped in Chocolate
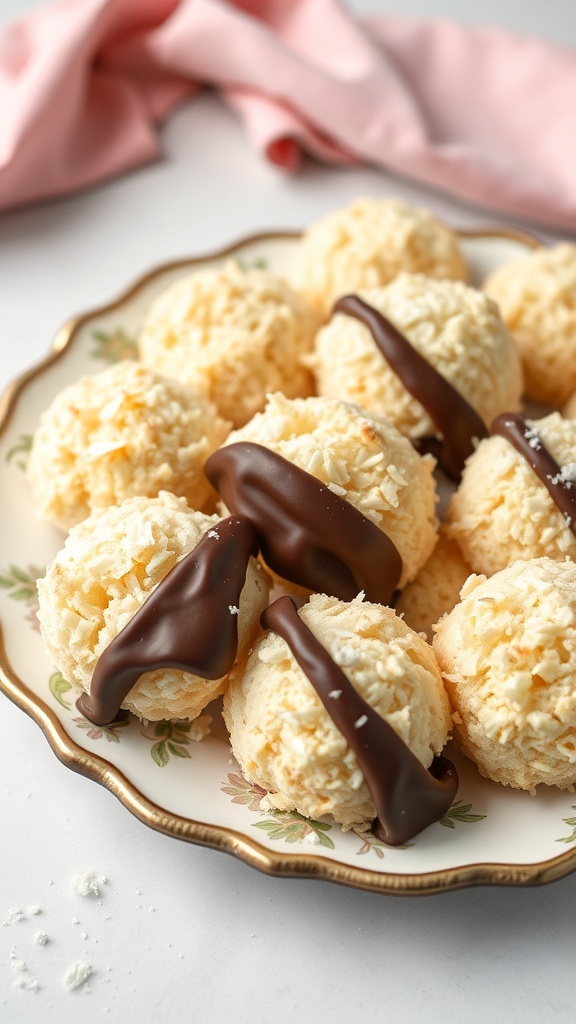
Coconut macaroons are a delightful treat, especially during the holiday season. These little bites of joy are made with shredded coconut, egg whites, and sugar, creating a chewy texture that pairs perfectly with a smooth chocolate dip. The contrast of the sweet coconut and rich chocolate makes these macaroons irresistible.
In the image, you can see a beautiful plate of coconut macaroons, each one generously dipped in dark chocolate. The glossy chocolate coating adds an elegant touch, making them perfect for holiday gatherings or as a sweet gift. The light, fluffy texture of the coconut shines through, inviting you to take a bite.
Making these macaroons is simple and fun. They are a great way to involve family and friends in the kitchen. Plus, they don’t require any fancy equipment, just a mixing bowl and a baking sheet!
Ingredients
- 2 2/3 cups shredded coconut
- 2/3 cup granulated sugar
- 2 large egg whites
- 1 teaspoon vanilla extract
- 1/4 teaspoon salt
- 8 ounces dark chocolate, chopped
Instructions
- Preheat the oven to 325°F (160°C). Line a baking sheet with parchment paper.
- In a large bowl, mix the shredded coconut, sugar, egg whites, vanilla extract, and salt until well combined.
- Using a spoon or your hands, form small mounds of the mixture and place them on the prepared baking sheet, spacing them about an inch apart.
- Bake for 20-25 minutes, or until the edges are golden brown. Remove from the oven and let them cool completely.
- While the macaroons cool, melt the dark chocolate in a microwave-safe bowl or over a double boiler until smooth.
- Once the macaroons are cool, dip the bottoms or half of each macaroon into the melted chocolate. Place them back on the parchment paper to set.
- Let the chocolate harden at room temperature or in the fridge for quicker results. Enjoy your delicious coconut macaroons!
Fruitcake with Nuts and Dried Fruits
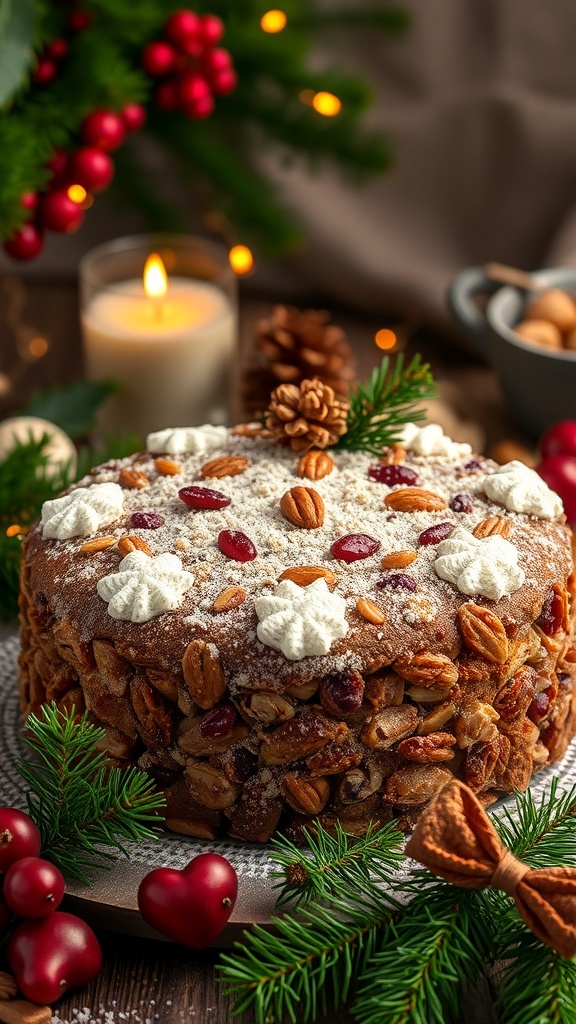
Fruitcake is a classic holiday treat that brings warmth and cheer to any gathering. This cake is packed with a delightful mix of nuts and dried fruits, making it a festive favorite. The image shows a beautifully decorated fruitcake, topped with whipped cream and adorned with nuts, all set against a cozy holiday backdrop. The rich colors and textures of the cake make it look inviting and delicious.
Making fruitcake is a simple process that fills your kitchen with wonderful aromas. Start by gathering your ingredients, which typically include a mix of dried fruits like raisins, cranberries, and apricots, along with a variety of nuts such as almonds and pecans. The combination of flavors creates a cake that is both sweet and nutty.
Once baked, the cake can be enjoyed fresh or aged for a richer flavor. Many people love to soak their fruitcake in rum or brandy, adding an extra layer of taste. This cake is perfect for sharing with family and friends during the holiday season.
Ingredients
- 2 cups mixed dried fruits (raisins, cranberries, apricots)
- 1 cup mixed nuts (almonds, pecans, walnuts)
- 1 cup all-purpose flour
- 1 teaspoon baking powder
- 1/2 teaspoon salt
- 1 teaspoon ground cinnamon
- 1/2 cup unsalted butter, softened
- 1 cup brown sugar, packed
- 3 large eggs
- 1/4 cup orange juice
- 1/4 cup rum or brandy (optional)
Instructions
- Preheat your oven to 325°F (160°C). Grease and flour a 9-inch round cake pan.
- In a bowl, mix the flour, baking powder, salt, and cinnamon. Set aside.
- In another bowl, cream the softened butter and brown sugar until light and fluffy. Add the eggs one at a time, mixing well after each addition.
- Stir in the orange juice and rum or brandy if using.
- Gradually add the dry ingredients to the wet mixture, mixing until just combined. Fold in the dried fruits and nuts.
- Pour the batter into the prepared cake pan and smooth the top. Bake for 50-60 minutes, or until a toothpick inserted in the center comes out clean.
- Let the cake cool in the pan for 10 minutes before transferring it to a wire rack to cool completely.
- Once cooled, you can decorate it with whipped cream and additional nuts if desired. Enjoy your festive fruitcake!