
Nothing beats the joy of whipping up some easy Christmas treats that are perfect for sharing with family and friends. From no-bake cookies to quick fudge, these simple recipes bring holiday cheer without the stress. Get ready to spread some sweetness this season!
Chocolate-Dipped Pretzels

Chocolate-dipped pretzels are a fun and easy treat to make during the holiday season. They combine the salty crunch of pretzels with the sweet richness of chocolate. Plus, they look festive with colorful sprinkles!
To start, you’ll need some pretzel rods and chocolate. Melt the chocolate in a microwave-safe bowl, stirring until smooth. Dip each pretzel into the melted chocolate, covering about two-thirds of it. Allow any excess chocolate to drip off before placing the pretzel on a baking sheet lined with parchment paper.
While the chocolate is still wet, sprinkle on some festive toppings like colorful sprinkles or crushed candy canes. This adds a nice touch and makes them even more appealing. Let the pretzels cool until the chocolate hardens, and they’re ready to enjoy!
Ingredients
- 1 bag of pretzel rods
- 2 cups chocolate chips (milk or dark)
- 1 cup assorted sprinkles
Instructions
- Melt the chocolate chips in a microwave-safe bowl, heating in 30-second intervals and stirring until smooth.
- Dip each pretzel rod into the melted chocolate, covering about two-thirds of the pretzel.
- Allow excess chocolate to drip off and place the pretzel on a parchment-lined baking sheet.
- Sprinkle your choice of toppings over the chocolate while it’s still wet.
- Let the pretzels cool completely until the chocolate hardens.
Christmas Tree Brownies
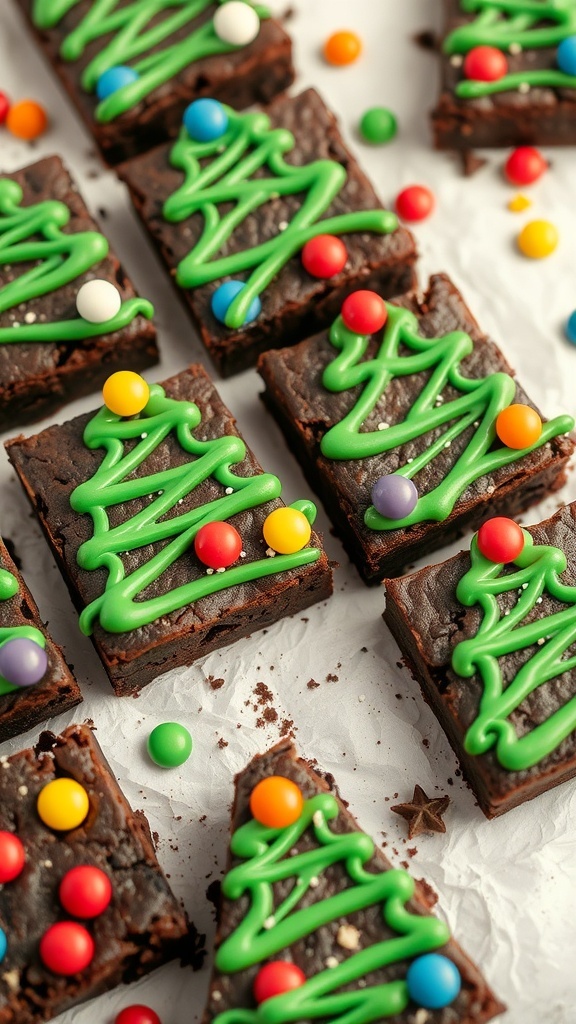
Christmas Tree Brownies are a fun and festive treat that everyone will love. These brownies are shaped like little Christmas trees, making them perfect for holiday gatherings. The rich chocolate flavor pairs wonderfully with colorful decorations, bringing a cheerful vibe to your dessert table.
To make these brownies, start with a simple brownie mix or your favorite homemade recipe. Once baked and cooled, cut them into tree shapes. Use green icing to create the tree branches and add colorful candies for ornaments. This is a great way to get the kids involved in holiday baking!
These brownies not only taste amazing but also look adorable. They can be a delightful centerpiece for your holiday dessert spread. Plus, they’re easy to make, which means you can whip them up even on a busy day. Enjoy the smiles they bring!
Ingredients
- 1 box brownie mix (plus ingredients needed on the box)
- Green icing
- Assorted candies (like M&Ms or Skittles)
- Powdered sugar (for dusting)
Instructions
- Prepare the Brownies: Preheat your oven and prepare the brownie mix according to the package instructions. Pour the batter into a greased baking pan.
- Bake: Bake the brownies until a toothpick comes out clean. Let them cool completely.
- Cut into Shapes: Once cooled, cut the brownies into tree shapes using a knife or cookie cutter.
- Decorate: Use green icing to pipe branches on the trees. Add colorful candies as ornaments.
- Serve: Dust with powdered sugar for a snowy effect and enjoy your festive treats!
Candy Cane Marshmallow Pops

Candy Cane Marshmallow Pops are a fun and festive treat that everyone will love. These pops are easy to make and perfect for holiday gatherings. The combination of fluffy marshmallows, sweet chocolate, and crunchy candy canes creates a delightful flavor and texture.
To start, you’ll need some large marshmallows, chocolate for melting, crushed candy canes, and lollipop sticks. Simply dip the marshmallows in melted chocolate, then roll them in the crushed candy canes. Insert a stick into each marshmallow and let them set. These pops not only look great but also taste amazing!
They make a wonderful gift or a sweet addition to any dessert table. Plus, kids can help with the decorating, making it a fun family activity. Enjoy these delicious treats with a warm cup of hot cocoa!
Ingredients
- 10 large marshmallows
- 1 cup chocolate chips (milk or dark)
- 1/2 cup crushed candy canes
- 10 lollipop sticks
Instructions
- Melt the chocolate: In a microwave-safe bowl, heat the chocolate chips in 30-second intervals until fully melted, stirring in between.
- Prepare the marshmallows: Insert a lollipop stick into each marshmallow.
- Dip the marshmallows: Dip each marshmallow into the melted chocolate, ensuring it’s fully coated.
- Coat with candy canes: Roll the chocolate-covered marshmallow in the crushed candy canes until well coated.
- Set and enjoy: Place the pops upright in a glass or let them cool on parchment paper until the chocolate hardens. Serve and enjoy!
Reindeer Cupcakes

These Reindeer Cupcakes are a fun and festive treat for the holiday season. They are not only delicious but also super cute! Each cupcake is topped with rich chocolate frosting, making them a delightful dessert for any Christmas gathering.
The cupcakes feature pretzel antlers, giving them a playful reindeer look. A red candy nose and googly eyes complete the charming design. These treats are sure to bring smiles to both kids and adults alike!
Making these cupcakes is easy and can be a fun activity to do with family or friends. Gather your ingredients and let’s get started!
Ingredients
- 1 box chocolate cake mix
- Ingredients needed for cake mix (usually eggs, oil, and water)
- 1 cup chocolate frosting
- 1 cup pretzel sticks
- Red candy (like M&M’s or Skittles) for noses
- Googly eyes (or white chocolate chips)
Instructions
- Preheat your oven and prepare the cupcake batter according to the box instructions.
- Fill cupcake liners in a muffin tin and bake as directed. Let them cool completely.
- Once cooled, frost each cupcake generously with chocolate frosting.
- Insert two pretzel sticks into the frosting to create antlers.
- Add a red candy for the nose and place the googly eyes on top.
- Serve and enjoy your festive Reindeer Cupcakes!
Peppermint Bark
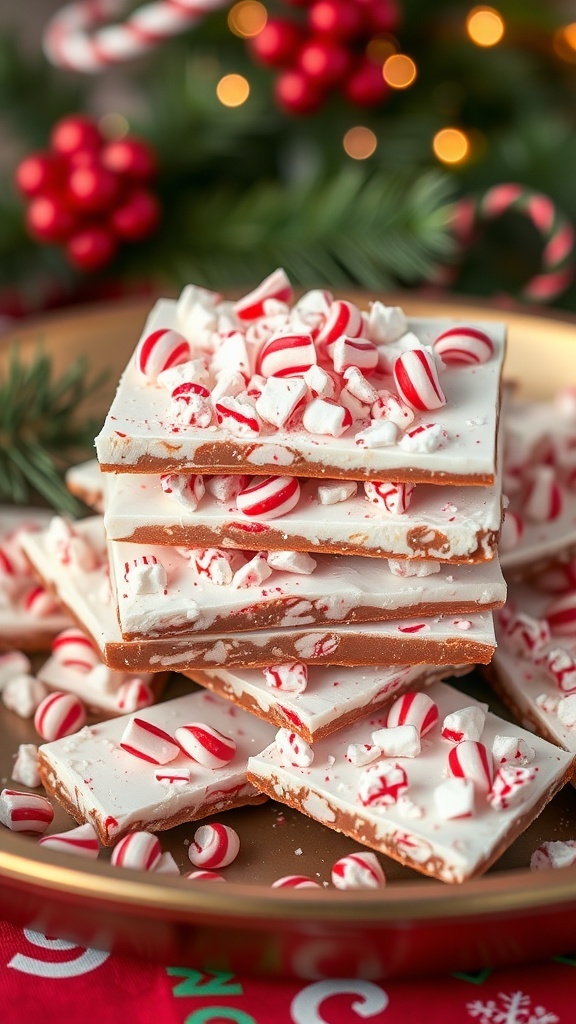
Peppermint bark is a festive treat that brings a delightful crunch and a burst of minty flavor. This sweet treat is perfect for sharing during the holiday season. The image shows layers of white and dark chocolate topped with crushed peppermint candies, creating a beautiful and tasty dessert.
Making peppermint bark is super easy and requires just a few ingredients. You can whip it up in no time, making it a great option for last-minute holiday gifts or snacks. The combination of creamy chocolate and refreshing peppermint is a classic that everyone loves.
Gather your ingredients, and let’s get started on this simple recipe!
Ingredients
- 8 ounces dark chocolate, chopped
- 8 ounces white chocolate, chopped
- 1 teaspoon peppermint extract
- 1 cup crushed peppermint candies
Instructions
- Melt the Dark Chocolate: In a microwave-safe bowl, melt the dark chocolate in 30-second intervals, stirring in between until smooth.
- Spread the Dark Chocolate: Pour the melted dark chocolate onto a parchment-lined baking sheet. Spread it evenly with a spatula and let it cool for about 10 minutes.
- Melt the White Chocolate: In another bowl, melt the white chocolate using the same method. Stir in the peppermint extract once melted.
- Layer the White Chocolate: Pour the melted white chocolate over the cooled dark chocolate layer. Use a spatula to spread it evenly.
- Add the Peppermint: Sprinkle the crushed peppermint candies over the top while the white chocolate is still warm. Press them down gently to ensure they stick.
- Cool and Cut: Let the bark cool completely at room temperature or in the fridge. Once set, break it into pieces and enjoy!
Snowman Rice Krispie Treats
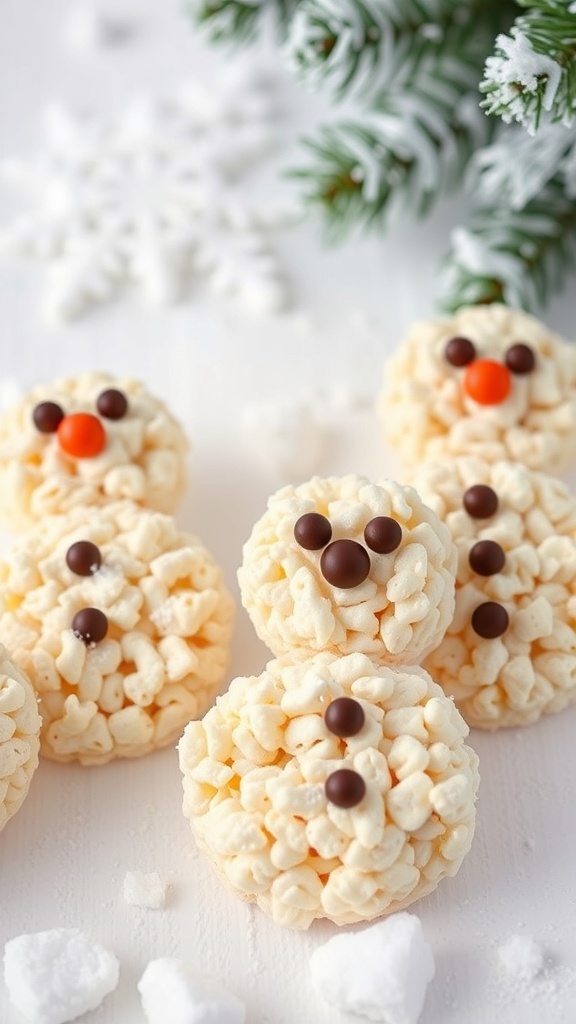
Snowman Rice Krispie Treats are a fun and festive way to celebrate the holiday season. These adorable treats are not only easy to make but also bring a smile to everyone’s face. Picture little snowmen made from crispy rice cereal, marshmallows, and a few colorful candies for decoration. They look great on a dessert table or as a fun activity to do with kids.
To create these delightful snowmen, you’ll need just a few simple ingredients. The process is straightforward, making it perfect for those who want to whip up something special without spending hours in the kitchen. Plus, they’re a great way to get creative with decorating!
Gather your ingredients and let’s get started on making these charming treats. They’re sure to be a hit at any holiday gathering!
Ingredients
- 6 cups Rice Krispies cereal
- 4 cups mini marshmallows
- 3 tablespoons butter
- 1/2 cup chocolate candies (for buttons)
- 1/4 cup orange candy (for noses)
- 1/4 cup icing (for decorating)
Instructions
- Melt the Butter: In a large saucepan, melt the butter over low heat. Add the mini marshmallows and stir until completely melted and smooth.
- Mix in the Cereal: Remove the saucepan from heat and add the Rice Krispies cereal. Stir until the cereal is well coated with the marshmallow mixture.
- Shape the Snowmen: Allow the mixture to cool slightly, then use your hands to form small balls. Make two different sizes for each snowman (one larger for the body and one smaller for the head).
- Decorate: Place the larger ball on a plate, then top it with the smaller ball. Use the chocolate candies for buttons and the orange candy for the nose. You can also use icing to add eyes and a mouth.
- Let Set: Allow the snowmen to set for a few minutes before serving. Enjoy your festive treats!
Holiday Fruit Skewers
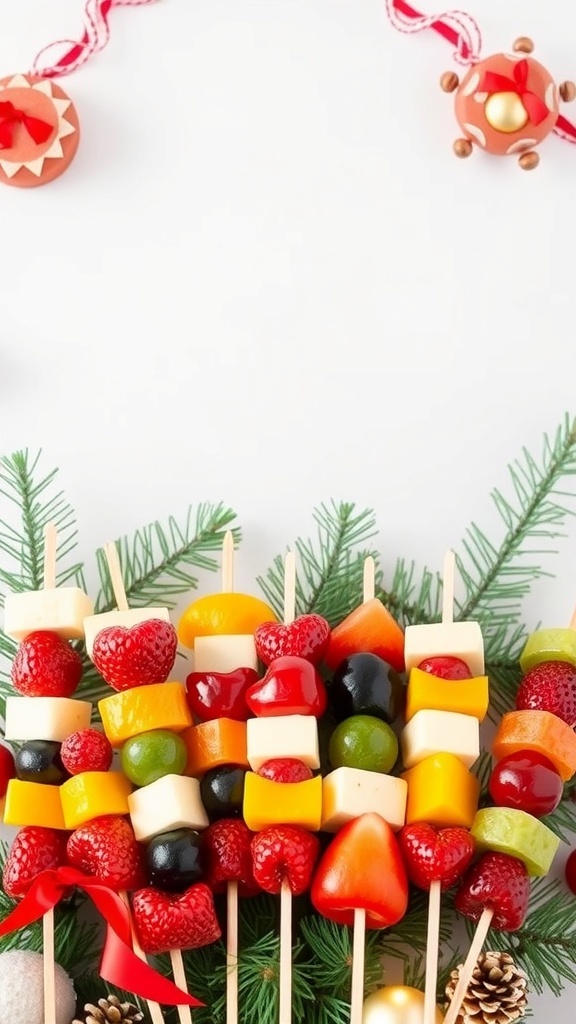
Holiday fruit skewers are a fun and colorful treat that everyone loves. They are easy to make and perfect for festive gatherings. Picture a mix of vibrant fruits and cheeses, all neatly arranged on skewers. These skewers not only look great but also offer a refreshing bite amidst all the rich holiday foods.
To make these skewers, you can use a variety of fruits like strawberries, grapes, and pineapple. Adding cubes of cheese gives a nice contrast to the sweetness of the fruit. You can even tie a little ribbon around the base of each skewer for a festive touch. They are great for kids and adults alike!
Here’s a simple recipe to create your own holiday fruit skewers:
Ingredients
- 1 cup strawberries, hulled
- 1 cup green grapes
- 1 cup pineapple chunks
- 1 cup cheese cubes (cheddar or mozzarella)
- 1 cup red bell pepper, cut into squares
- Wooden skewers
- Red ribbons for decoration (optional)
Instructions
- Prepare the Ingredients: Wash and cut all the fruits and cheese into bite-sized pieces.
- Assemble the Skewers: Take a wooden skewer and start threading the ingredients. Alternate between fruits and cheese for a colorful look.
- Decorate: If desired, tie a small ribbon around the base of each skewer for a festive flair.
- Serve: Arrange the skewers on a platter and enjoy them fresh!
Gingerbread Cookies

Gingerbread cookies are a classic holiday treat that brings warmth and cheer to any gathering. These delightful cookies come in various shapes, from cheerful gingerbread men to festive stars and snowflakes. The rich aroma of ginger, cinnamon, and molasses fills the kitchen as they bake, making it hard to resist sneaking a taste.
Decorating these cookies can be a fun activity for everyone. You can use icing, sprinkles, and candies to create unique designs. Whether you’re making them for a holiday party or just for fun, gingerbread cookies are sure to bring smiles.
Ingredients
- 3 cups all-purpose flour
- 1 tablespoon ground ginger
- 1 tablespoon ground cinnamon
- 1 teaspoon baking soda
- 1/2 teaspoon salt
- 3/4 cup unsalted butter, softened
- 3/4 cup brown sugar, packed
- 1/2 cup molasses
- 1 large egg
- 1 teaspoon vanilla extract
Instructions
- Mix Dry Ingredients: In a bowl, whisk together flour, ginger, cinnamon, baking soda, and salt.
- Combine Wet Ingredients: In another bowl, beat the butter and brown sugar until creamy. Add molasses, egg, and vanilla, mixing well.
- Combine Mixtures: Gradually add the dry ingredients to the wet mixture, stirring until a dough forms. Cover and chill for at least 1 hour.
- Preheat Oven: Preheat your oven to 350°F (175°C).
- Roll and Cut: On a floured surface, roll out the dough to about 1/4 inch thick. Use cookie cutters to cut out shapes.
- Bake: Place cookies on a baking sheet lined with parchment paper. Bake for 8-10 minutes or until edges are firm. Let cool.
- Decorate: Once cooled, use icing and decorations to bring your cookies to life!
Cinnamon Sugar Tortilla Chips
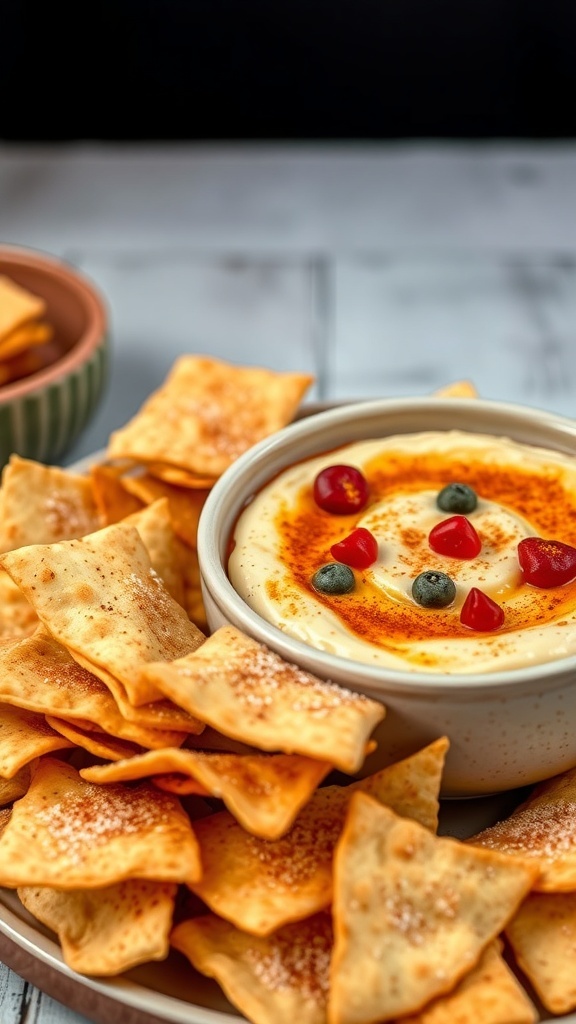
Cinnamon sugar tortilla chips are a fun and easy treat that everyone loves. They are crispy, sweet, and perfect for dipping. You can enjoy them with a variety of dips, like creamy yogurt or even chocolate sauce. The combination of cinnamon and sugar gives them a delightful flavor that feels festive and comforting.
Making these chips is simple. Start with flour tortillas, cut them into triangles, and bake or fry them until they’re golden and crunchy. Then, toss them in a mixture of cinnamon and sugar. They make a great snack for holiday gatherings or cozy nights at home.
Ingredients
- 4 flour tortillas
- 1/4 cup granulated sugar
- 1 tablespoon ground cinnamon
- 1/4 cup melted butter
- Pinch of salt
Instructions
- Preheat the oven to 350°F (175°C).
- Cut the tortillas into triangles.
- In a bowl, mix the sugar, cinnamon, and salt.
- Brush the melted butter on both sides of the tortilla triangles.
- Sprinkle the cinnamon sugar mixture over the triangles, coating them well.
- Place the chips on a baking sheet in a single layer.
- Bake for about 10-12 minutes, or until golden brown and crispy.
- Let them cool slightly before serving. Enjoy with your favorite dip!
Holiday Trail Mix
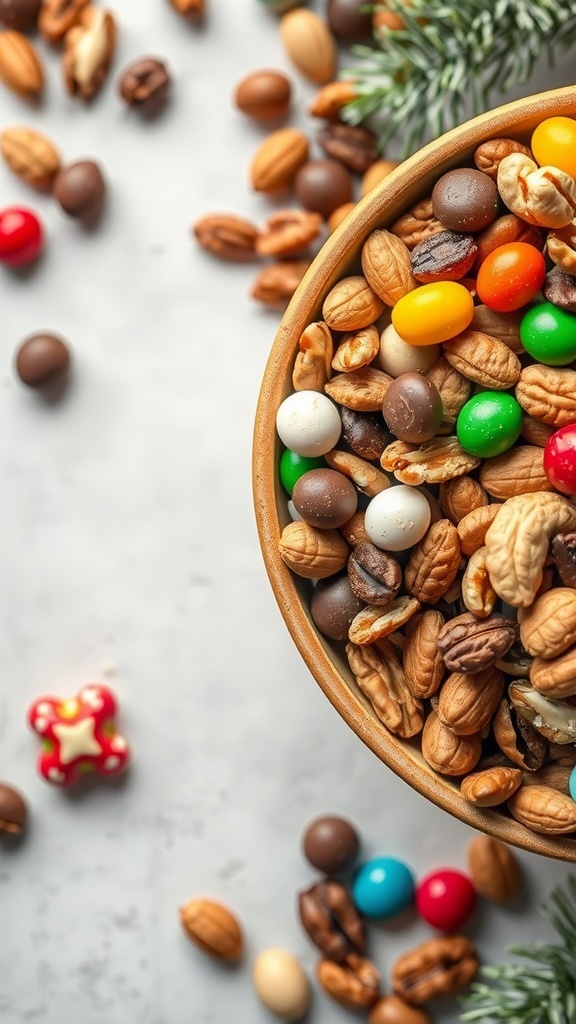
Holiday Trail Mix is a fun and easy treat that brings together a variety of flavors and textures. This mix is perfect for snacking during the festive season. Imagine a bowl filled with crunchy nuts, colorful candies, and sweet chocolate. It’s a delightful combination that everyone will enjoy.
Making your own trail mix is simple. You can customize it to include your favorite ingredients. Whether you prefer salty nuts, sweet candies, or dried fruits, the options are endless. Plus, it’s a great way to use up leftover snacks from holiday parties!
Gather your ingredients and get ready to mix. This treat is not just tasty; it’s also a great way to add some festive cheer to your gatherings. Serve it in a big bowl for everyone to share or package it in small bags for a fun gift.
Ingredients
- 2 cups mixed nuts (almonds, walnuts, pecans)
- 1 cup chocolate candies (M&M’s or similar)
- 1 cup pretzel pieces
- 1 cup dried fruit (cranberries or raisins)
- 1 cup popcorn (optional)
- 1/2 cup mini marshmallows (optional)
Instructions
- In a large bowl, combine all the ingredients. Mix well to ensure an even distribution of flavors.
- Taste and adjust the mix according to your preference. Add more nuts or candies if desired.
- Store the trail mix in an airtight container or package it in small bags for easy snacking.
- Enjoy your Holiday Trail Mix during movie nights, parties, or as a quick snack on the go!
Chocolate-Covered Oreos
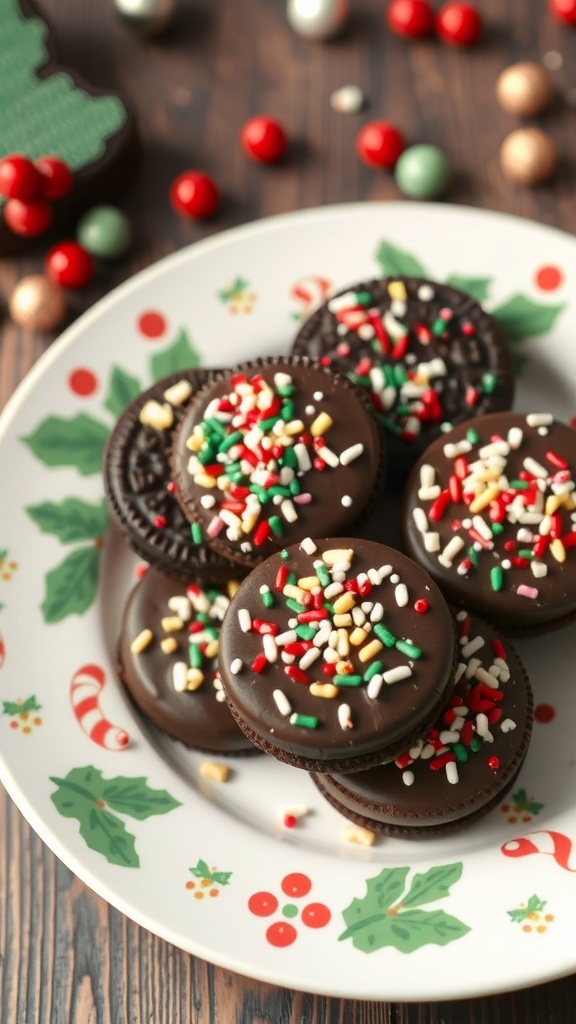
Chocolate-covered Oreos are a fun and festive treat for the holiday season. They are easy to make and perfect for sharing with friends and family. The image shows a plate filled with these delightful cookies, topped with colorful sprinkles that add a cheerful touch. The combination of rich chocolate and the classic Oreo flavor makes them irresistible.
To make these treats, you only need a few ingredients and some simple steps. They are great for parties, gifts, or just a sweet snack at home. Let’s get started!
Ingredients
- 1 package of Oreo cookies
- 1 cup of chocolate chips (dark or milk chocolate)
- 1 tablespoon of coconut oil (optional, for smoothness)
- Sprinkles for decoration
Instructions
- Melt the Chocolate: In a microwave-safe bowl, combine the chocolate chips and coconut oil. Heat in 30-second intervals, stirring in between, until smooth.
- Dip the Oreos: Using a fork, dip each Oreo into the melted chocolate, making sure it’s fully coated. Tap the fork on the side of the bowl to remove excess chocolate.
- Add Sprinkles: Place the dipped Oreos on a parchment-lined baking sheet. While the chocolate is still wet, sprinkle your choice of decorations on top.
- Let Them Set: Refrigerate the cookies for about 30 minutes, or until the chocolate hardens completely.
- Enjoy: Once set, serve them on a festive plate or package them as gifts!
Eggnog Fudge
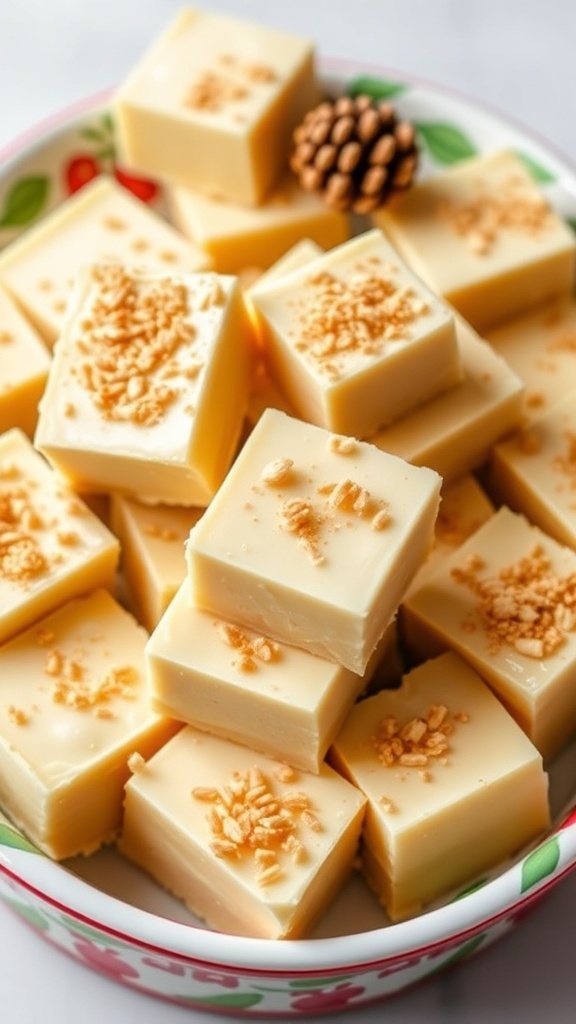
Eggnog fudge is a delightful treat that captures the essence of the holiday season. The creamy, smooth texture combined with the warm spices of eggnog makes it a perfect addition to your Christmas dessert table. This fudge is not only easy to make but also a crowd-pleaser. Just look at those perfectly cut squares, topped with a sprinkle of nutmeg and a hint of festive cheer!
Making eggnog fudge is a simple process. You’ll be amazed at how quickly you can whip up this sweet delight. It’s a great recipe to involve the kids, too. They’ll love helping to mix the ingredients and, of course, taste-testing!
Ingredients
- 2 cups white chocolate chips
- 1 cup sweetened condensed milk
- 1/2 cup eggnog
- 1 teaspoon vanilla extract
- 1/2 teaspoon ground nutmeg
- 1/4 teaspoon ground cinnamon
- 1/2 cup chopped nuts (optional)
Instructions
- Prepare the Pan: Line an 8-inch square baking dish with parchment paper, leaving some overhang for easy removal.
- Melt the Chocolate: In a medium saucepan over low heat, combine white chocolate chips and sweetened condensed milk. Stir until melted and smooth.
- Add Eggnog: Remove from heat and mix in eggnog, vanilla extract, nutmeg, and cinnamon until well combined.
- Pour and Chill: Pour the mixture into the prepared baking dish. If using, sprinkle chopped nuts on top. Refrigerate for at least 2 hours until set.
- Cut and Serve: Once set, lift the fudge out of the pan using the parchment paper. Cut into squares and enjoy!
Mini Cheesecake Bites

Mini cheesecake bites are a delightful treat that brings joy to any holiday gathering. These little desserts are not only cute but also packed with flavor. The creamy cheesecake filling sits atop a crunchy graham cracker crust, making each bite a perfect blend of textures.
In the image, you can see these charming mini cheesecakes topped with fresh raspberries and green grapes, adding a pop of color and a hint of freshness. The festive decorations around the plate, like pine sprigs and red berries, make them look even more appealing for the Christmas season.
Making mini cheesecake bites is simple and fun. They are great for sharing and can be prepared ahead of time, making them a stress-free option for holiday parties. Plus, everyone loves a bite-sized dessert!
Ingredients
- 1 cup graham cracker crumbs
- 1/4 cup granulated sugar
- 1/4 cup unsalted butter, melted
- 16 oz cream cheese, softened
- 1/2 cup granulated sugar
- 1 teaspoon vanilla extract
- 2 large eggs
- Fresh raspberries and green grapes for topping
Instructions
- Preheat the oven to 325°F (160°C). Line a muffin tin with cupcake liners.
- In a bowl, mix graham cracker crumbs, 1/4 cup sugar, and melted butter until combined. Press this mixture into the bottom of each cupcake liner.
- In another bowl, beat the cream cheese until smooth. Add 1/2 cup sugar and vanilla, mixing until well combined. Add eggs one at a time, mixing just until incorporated.
- Pour the cream cheese mixture over the crust in each liner, filling them about 3/4 full.
- Bake for 18-20 minutes, or until the centers are set. Let them cool completely before refrigerating for at least 2 hours.
- Once chilled, top each cheesecake bite with fresh raspberries and green grapes before serving.
Nutty Chocolate Clusters
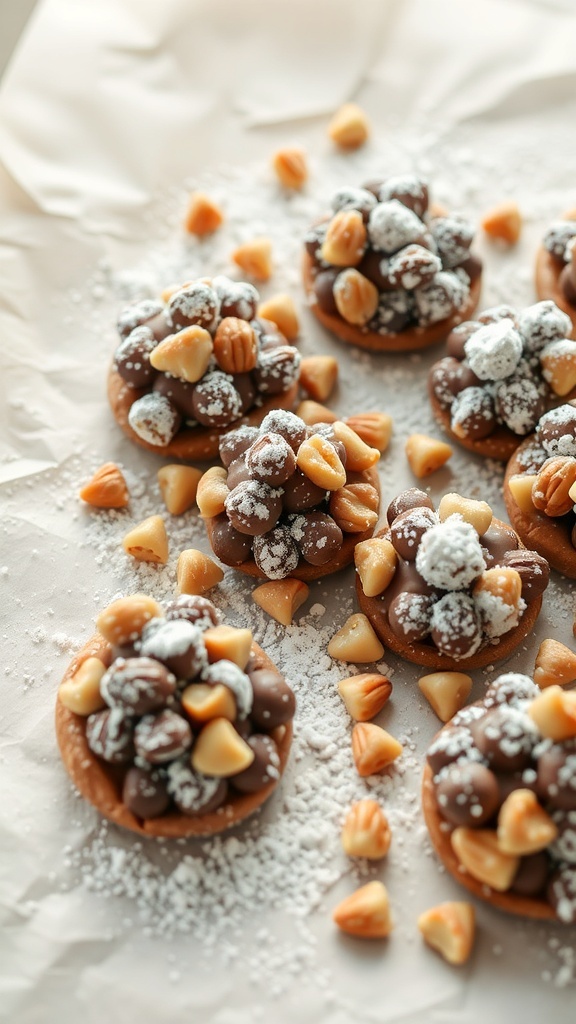
Nutty chocolate clusters are a delightful treat that combines the richness of chocolate with the crunch of various nuts. This simple recipe is perfect for the holiday season, making it a great addition to your Christmas treats. The clusters are not only easy to make, but they also look festive and inviting on any dessert table.
In the image, you can see a mix of chocolate-coated clusters surrounded by an assortment of nuts. The clusters are dusted with powdered sugar, which adds a touch of sweetness and a snowy appearance, perfect for the holiday vibe. The combination of different nuts like pecans, almonds, and peanuts gives each bite a unique texture and flavor.
Making these clusters is a fun activity to do with family or friends. You can customize them by using your favorite types of nuts or even adding dried fruits for extra flavor. They make great gifts too, packaged in a cute box or jar!
Ingredients
- 2 cups mixed nuts (such as almonds, pecans, and peanuts)
- 12 oz dark chocolate chips
- 1/2 cup powdered sugar
- 1 teaspoon vanilla extract
- Pinch of salt
Instructions
- Prepare the Nuts: Roughly chop the mixed nuts and set them aside.
- Melt the Chocolate: In a microwave-safe bowl, melt the dark chocolate chips in 30-second intervals, stirring in between until smooth.
- Mix Ingredients: Once melted, stir in the vanilla extract and a pinch of salt. Then, add the chopped nuts and mix until they are well coated with chocolate.
- Form Clusters: Using a spoon, drop spoonfuls of the chocolate-nut mixture onto a parchment-lined baking sheet, forming clusters.
- Dust with Sugar: While the chocolate is still warm, sprinkle powdered sugar over the clusters for a snowy effect.
- Chill: Place the baking sheet in the refrigerator for about 30 minutes or until the chocolate is set.
- Serve: Once set, enjoy your nutty chocolate clusters or package them up as gifts!
Marzipan Fruits
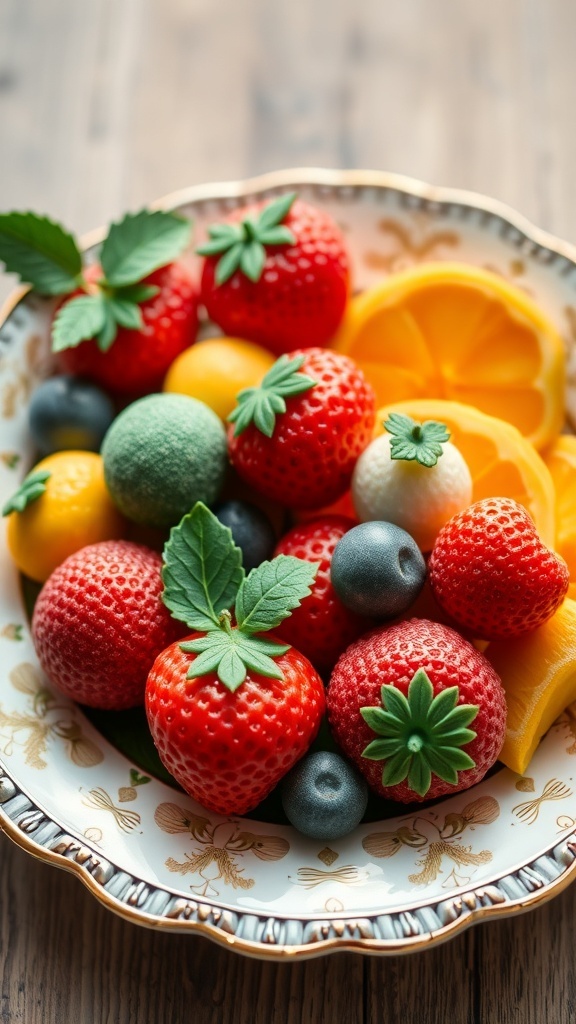
Marzipan fruits are a delightful treat that adds a festive touch to any holiday gathering. These colorful, sweet confections resemble real fruits and are made from almond paste and sugar. They are not only tasty but also visually appealing, making them a perfect centerpiece for your Christmas table.
Creating marzipan fruits is a fun activity for both kids and adults. You can shape them into strawberries, oranges, and even blueberries. The process is simple and allows for creativity. You can use food coloring to make them look even more realistic.
These treats can be enjoyed on their own or used to decorate cakes and pastries. They also make great gifts when packaged nicely. Everyone loves a homemade treat, especially during the holiday season!
Ingredients
- 2 cups almond flour
- 1 cup powdered sugar
- 1 egg white
- 1 teaspoon almond extract
- Food coloring (red, green, yellow, blue)
- Mint leaves (for decoration)
Instructions
- Mix almond flour and powdered sugar in a bowl.
- Add egg white and almond extract. Stir until a dough forms.
- Divide the dough into portions and color each with food coloring.
- Shape the dough into fruit forms, like strawberries and oranges.
- Use mint leaves to decorate the fruits.
- Let them dry for a few hours before serving or packaging.
Pecan Pie Bars
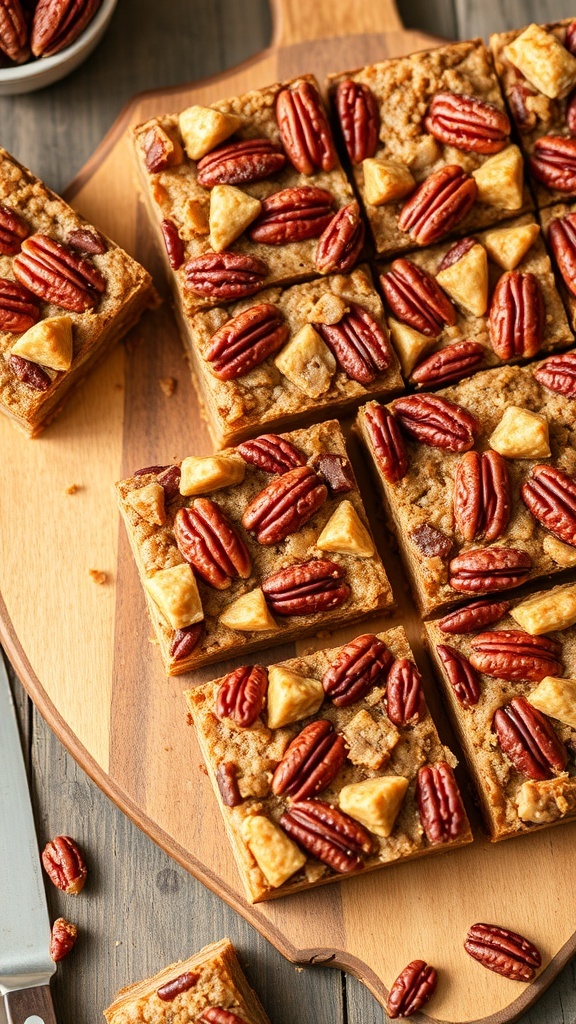
Pecan pie bars are a delightful twist on the classic pecan pie. They offer all the rich, nutty flavors in a convenient bar form. Perfect for holiday gatherings or cozy nights at home, these treats are easy to make and even easier to enjoy.
The image shows beautifully cut pecan pie bars, topped with whole pecans that add a nice crunch. The golden-brown filling is gooey and sweet, making each bite a little piece of heaven. The bars are neatly arranged on a wooden platter, showcasing their inviting texture and appealing look.
These bars are not just tasty; they are also simple to prepare. With just a few ingredients, you can whip up a batch that will impress friends and family alike. Let’s get started on making these delicious pecan pie bars!
Spiced Apple Chips
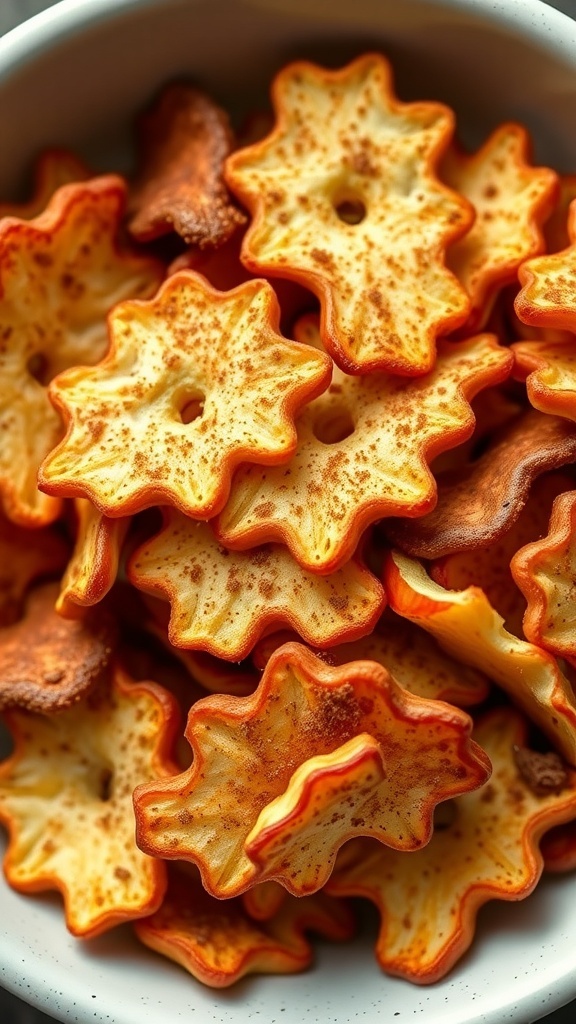
Spiced apple chips are a delightful treat that captures the essence of the holiday season. These crispy snacks are not only easy to make but also bring a warm, cozy flavor to your table. The image shows beautifully shaped apple chips, lightly dusted with spices, perfect for snacking or as a festive decoration.
Making spiced apple chips is a fun and simple process. You can enjoy them as a healthy snack or use them to add a touch of charm to your holiday gatherings. The sweet and spicy aroma fills your kitchen, making it feel like Christmas.
Here’s how you can whip up these tasty treats:
Ingredients
- 2 large apples (any variety)
- 1 teaspoon cinnamon
- 1/2 teaspoon nutmeg
- 1 tablespoon sugar (optional)
- 1 tablespoon lemon juice
Instructions
- Preheat your oven to 200°F (93°C).
- Slice the apples thinly, about 1/8 inch thick. You can use a mandoline for even slices.
- In a bowl, mix the cinnamon, nutmeg, and sugar (if using). Toss the apple slices with lemon juice, then sprinkle the spice mixture over them.
- Arrange the apple slices in a single layer on a baking sheet lined with parchment paper.
- Bake for 1.5 to 2 hours, flipping halfway through, until they are crisp and golden.
- Let them cool completely before serving. Enjoy your spiced apple chips!
Nutella-Stuffed Crescent Rolls

Nutella-stuffed crescent rolls are a delightful treat that brings joy to any holiday gathering. These little pastries are golden and flaky, with a rich chocolate-hazelnut filling that melts in your mouth. Topped with a sprinkle of powdered sugar, they look as good as they taste!
Making these treats is super easy. You can whip them up in no time, making them perfect for last-minute holiday baking. Just grab a can of crescent roll dough and some Nutella, and you’re halfway there. These rolls are not only delicious but also fun to make with family or friends.
Serve them warm for breakfast or as a sweet snack. They’re sure to impress everyone at your holiday table!
Ingredients
- 1 can of crescent roll dough
- 1/2 cup Nutella
- Powdered sugar for dusting
Instructions
- Preheat your oven to 375°F (190°C).
- Unroll the crescent roll dough and separate it into triangles.
- Place a teaspoon of Nutella at the wide end of each triangle.
- Roll the dough from the wide end to the point, forming a crescent shape.
- Place the rolls on a baking sheet lined with parchment paper.
- Bake for 12-15 minutes or until golden brown.
- Once out of the oven, let them cool slightly and dust with powdered sugar before serving.
White Chocolate Cranberry Bark
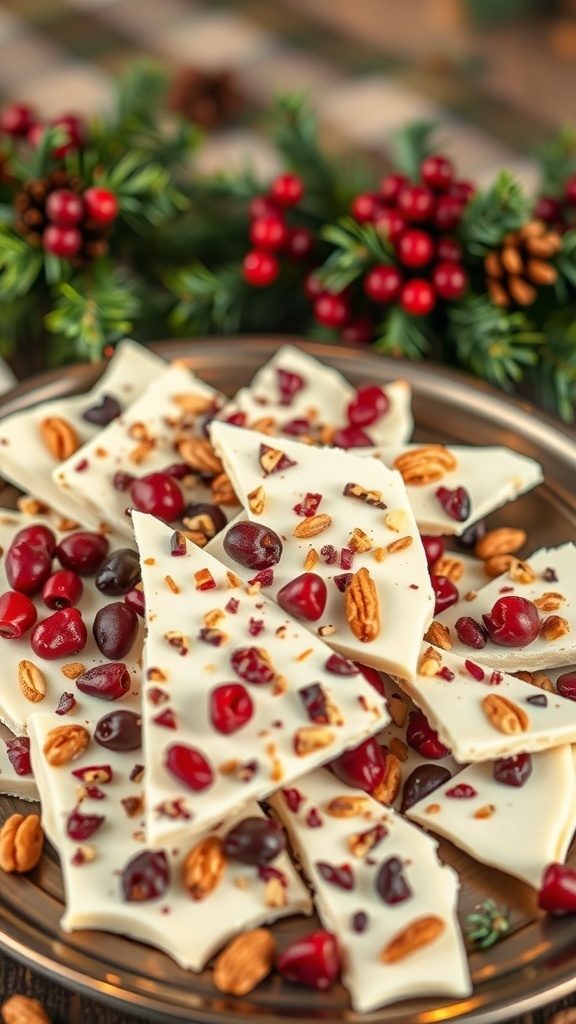
White Chocolate Cranberry Bark is a delightful treat that captures the spirit of the holidays. This sweet and crunchy snack is perfect for sharing with family and friends. The combination of creamy white chocolate, tart cranberries, and crunchy nuts creates a flavor explosion that everyone will love.
Making this bark is super easy and requires just a few ingredients. You can customize it by adding your favorite nuts or even a sprinkle of sea salt on top. It’s a great way to get into the festive mood and makes for a lovely gift when packaged nicely!
Here’s how you can whip up this delicious treat:
Ingredients
- 2 cups white chocolate chips
- 1 cup dried cranberries
- 1/2 cup chopped pecans or almonds
- 1/4 cup crushed peppermint (optional)
Instructions
- Melt the Chocolate: In a microwave-safe bowl, melt the white chocolate chips in 30-second intervals, stirring in between until smooth.
- Add Mix-Ins: Once melted, stir in the dried cranberries and chopped nuts. If you’re using crushed peppermint, add that too!
- Spread the Mixture: Line a baking sheet with parchment paper. Pour the chocolate mixture onto the sheet and spread it out evenly.
- Chill: Place the baking sheet in the refrigerator for about 1-2 hours, or until the chocolate is set.
- Break into Pieces: Once hardened, remove from the fridge and break into pieces. Enjoy your homemade White Chocolate Cranberry Bark!
Christmas Pudding Truffles

Christmas Pudding Truffles are a delightful twist on the classic holiday dessert. These little treats are rich, chocolatey, and packed with festive flavors. They look stunning on any holiday table, especially when garnished with a sprinkle of icing sugar or festive decorations. The combination of chocolate and traditional pudding flavors makes them a hit with everyone.
Making these truffles is simple and fun. You can get the kids involved in rolling the truffles and decorating them. They are perfect for sharing with friends and family or even as gifts. Plus, they can be made ahead of time, so you can enjoy more time with loved ones during the holidays.
Ingredients
- 200g dark chocolate, chopped
- 100g Christmas pudding, crumbled
- 50g cream cheese, softened
- 50g icing sugar
- 1 teaspoon vanilla extract
- Sprinkles or edible glitter for decoration
Instructions
- Melt the dark chocolate in a heatproof bowl over simmering water. Stir until smooth and let it cool slightly.
- In a mixing bowl, combine the crumbled Christmas pudding, cream cheese, icing sugar, and vanilla extract. Mix until well combined.
- Add the melted chocolate to the pudding mixture and stir until everything is evenly mixed.
- Chill the mixture in the fridge for about 30 minutes until firm.
- Once firm, scoop out small portions and roll them into balls. Place them on a baking sheet lined with parchment paper.
- Decorate each truffle with sprinkles or edible glitter.
- Chill again for about 15 minutes before serving. Enjoy your festive treats!
Hot Cocoa Bombs

Hot cocoa bombs are a fun and festive treat that bring joy to any holiday gathering. These delightful chocolate spheres are filled with cocoa mix and marshmallows, creating a magical experience when they melt in hot milk. The image shows a cozy cup of hot cocoa topped with colorful cocoa bombs, perfect for warming up on chilly winter days.
Making hot cocoa bombs is simple and enjoyable. You can customize them with different flavors and toppings to suit your taste. They also make great gifts for friends and family during the holiday season. Just imagine the smiles when they see these cute treats!
Ingredients
- 2 cups chocolate chips (milk or dark)
- 1 cup hot cocoa mix
- 1 cup mini marshmallows
- Sprinkles or other decorations (optional)
Instructions
- Melt the Chocolate: In a microwave-safe bowl, melt the chocolate chips in 30-second intervals, stirring in between until smooth.
- Coat the Molds: Using a spoon, coat the inside of silicone molds with melted chocolate. Make sure to cover the sides evenly. Let it set in the fridge for about 10 minutes.
- Add Filling: Once the chocolate is firm, fill half of the molds with hot cocoa mix and mini marshmallows. If desired, add sprinkles for extra fun!
- Seal the Bombs: Take the other half of the chocolate-coated molds and place them on top of the filled ones. Gently press to seal. You can add a little melted chocolate around the edges to help them stick.
- Chill and Serve: Let the cocoa bombs chill in the fridge for another 10 minutes. To serve, place one bomb in a mug and pour hot milk over it. Watch it melt and enjoy your delicious hot cocoa!
Fruitcake Bites
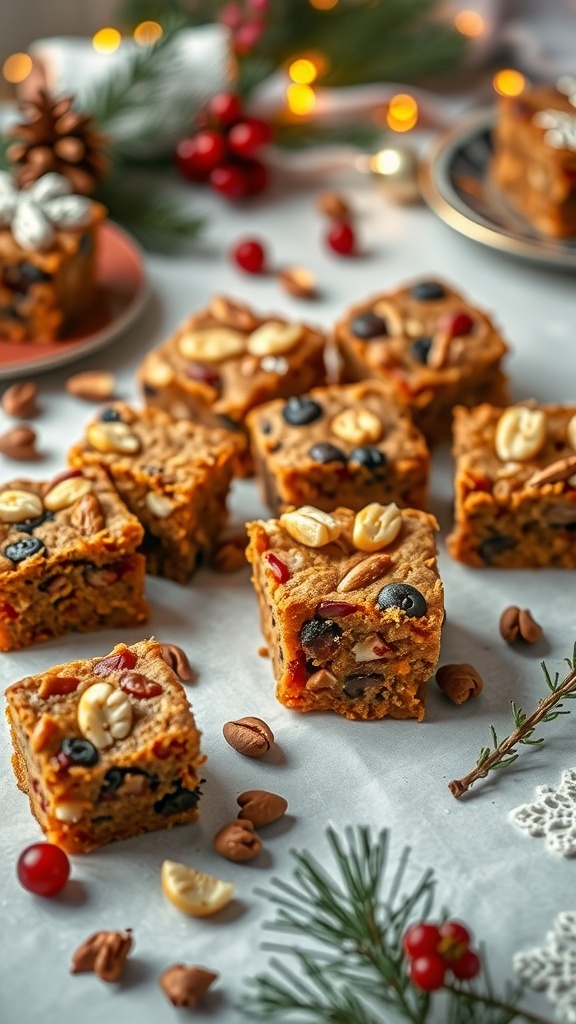
Fruitcake bites are a fun twist on the traditional holiday treat. They pack all the flavors of classic fruitcake into bite-sized pieces, making them perfect for sharing. The image shows a delightful array of these bites, topped with nuts and dried fruits. The festive colors and textures make them a standout on any holiday table.
These treats are not only tasty but also easy to make. You can customize them with your favorite fruits and nuts. They are great for holiday gatherings or as a sweet gift for friends and family. Plus, they look beautiful arranged on a platter, adding a festive touch to your celebrations.
Ingredients
- 2 cups mixed dried fruits (like raisins, cherries, and apricots)
- 1 cup mixed nuts (such as almonds, walnuts, and cashews)
- 1 cup all-purpose flour
- 1 teaspoon baking powder
- 1/2 teaspoon salt
- 1/2 cup unsalted butter, softened
- 1 cup brown sugar, packed
- 2 large eggs
- 1 teaspoon vanilla extract
- 1/2 teaspoon ground cinnamon
- 1/4 teaspoon ground nutmeg
Instructions
- Preheat your oven to 350°F (175°C) and grease a baking dish.
- In a bowl, mix the flour, baking powder, salt, cinnamon, and nutmeg.
- In another bowl, cream the softened butter and brown sugar until light and fluffy. Add the eggs and vanilla, mixing well.
- Gradually add the dry ingredients to the wet mixture, stirring until combined.
- Fold in the dried fruits and nuts until evenly distributed.
- Spread the mixture into the prepared baking dish and smooth the top.
- Bake for 25-30 minutes, or until a toothpick inserted in the center comes out clean.
- Let cool completely before cutting into bite-sized squares.
Chocolate Peppermint Cookies
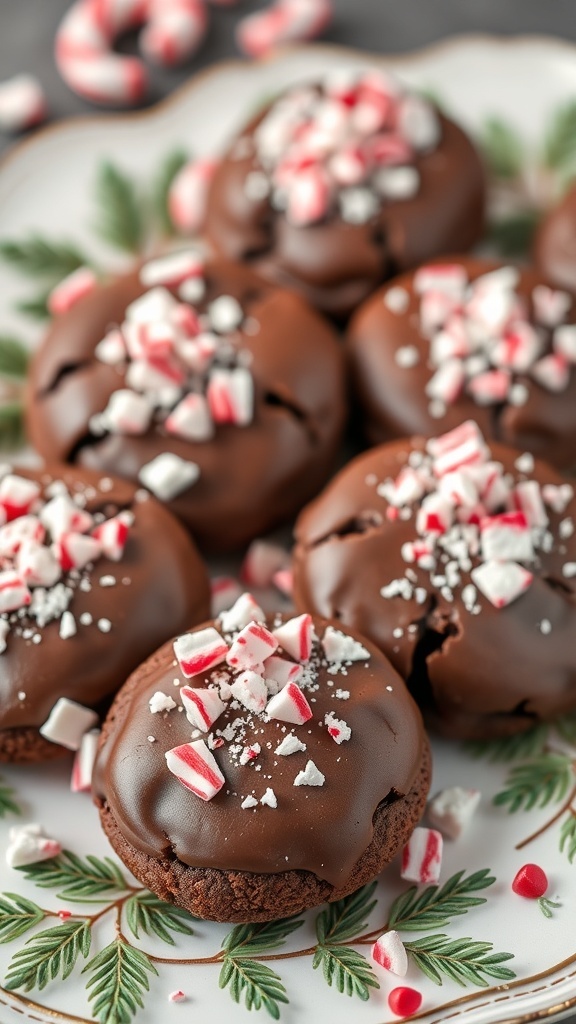
Chocolate peppermint cookies are a festive treat that brings joy to any holiday gathering. These cookies are soft, chewy, and topped with a rich chocolate glaze and crunchy peppermint pieces. The combination of chocolate and peppermint creates a delightful flavor that feels like a warm hug during the chilly season.
Making these cookies is easy and fun. You can whip them up in no time, perfect for last-minute holiday baking. They look great on a cookie platter and are sure to impress your friends and family. Plus, they make a wonderful gift when packaged in a cute box!
Here’s how you can make your own batch of chocolate peppermint cookies:
Ingredients
- 1 cup unsalted butter, softened
- 1 cup granulated sugar
- 1 cup brown sugar, packed
- 2 large eggs
- 1 teaspoon vanilla extract
- 2 1/4 cups all-purpose flour
- 3/4 cup unsweetened cocoa powder
- 1 teaspoon baking soda
- 1/2 teaspoon salt
- 1 cup chocolate chips
- 1/2 cup crushed peppermint candies
- 1 cup chocolate frosting (store-bought or homemade)
Instructions
- Preheat your oven to 350°F (175°C). Line a baking sheet with parchment paper.
- In a large bowl, cream together the softened butter, granulated sugar, and brown sugar until light and fluffy.
- Add the eggs one at a time, mixing well after each addition. Stir in the vanilla extract.
- In another bowl, whisk together the flour, cocoa powder, baking soda, and salt. Gradually add this dry mixture to the wet ingredients, mixing until just combined.
- Fold in the chocolate chips and crushed peppermint candies.
- Drop spoonfuls of dough onto the prepared baking sheet, spacing them about 2 inches apart.
- Bake for 10-12 minutes, or until the edges are set. Let them cool on the baking sheet for a few minutes before transferring to a wire rack.
- Once cooled, spread a layer of chocolate frosting on top of each cookie and sprinkle with additional crushed peppermint candies.
Enjoy your delicious chocolate peppermint cookies with a cup of hot cocoa or share them with loved ones!
Sugar Cookie Bars
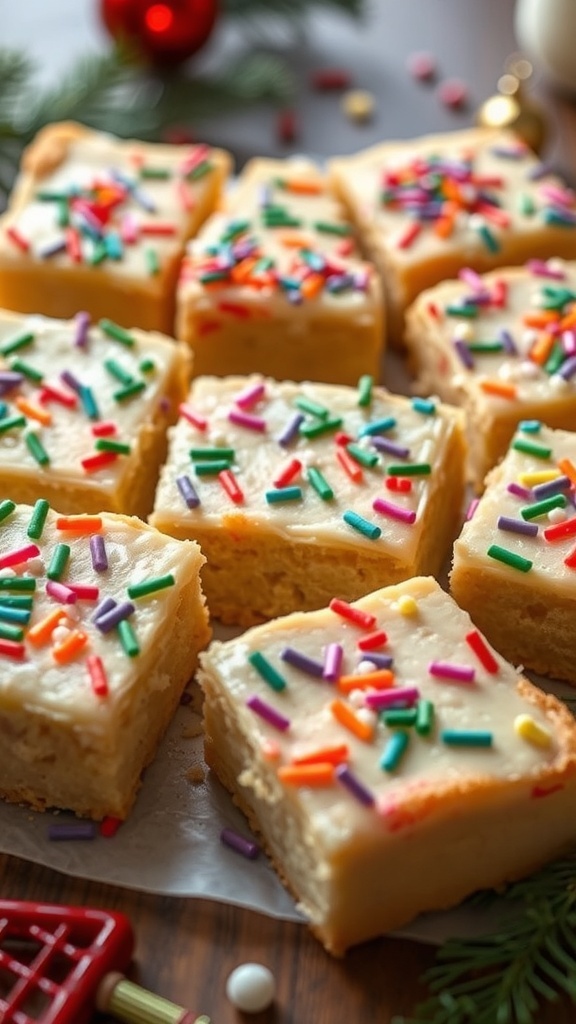
Sugar cookie bars are a delightful treat that captures the spirit of the holiday season. These bars are soft, chewy, and topped with a sweet frosting and colorful sprinkles. They are perfect for sharing at gatherings or enjoying with a warm cup of cocoa.
The image shows a tempting batch of sugar cookie bars, cut into squares and adorned with vibrant sprinkles. The festive colors make them a cheerful addition to any holiday table. The bars are easy to make, and their simplicity means you can whip them up quickly, even on busy days.
Gather your ingredients, and let’s get baking!
Ingredients
- 2 1/2 cups all-purpose flour
- 1 teaspoon baking powder
- 1/2 teaspoon salt
- 1 cup unsalted butter, softened
- 1 1/2 cups granulated sugar
- 2 large eggs
- 1 teaspoon vanilla extract
- 1/2 teaspoon almond extract (optional)
- 1 1/2 cups powdered sugar (for frosting)
- 2 tablespoons milk (for frosting)
- 1 teaspoon vanilla extract (for frosting)
- Sprinkles for topping
Instructions
- Preheat the oven to 350°F (175°C). Grease a 9×13 inch baking pan.
- In a bowl, mix flour, baking powder, and salt. Set aside.
- In a large bowl, cream together the softened butter and granulated sugar until light and fluffy.
- Add eggs, vanilla extract, and almond extract. Mix until well combined.
- Gradually add the flour mixture to the wet ingredients, stirring until just combined.
- Spread the batter evenly in the prepared baking pan.
- Bake for 20-25 minutes, or until the edges are lightly golden and a toothpick comes out clean.
- Let the bars cool completely in the pan.
- For the frosting, mix powdered sugar, milk, and vanilla extract until smooth. Spread over the cooled bars.
- Top with colorful sprinkles before slicing into squares.
Coconut Macaroons
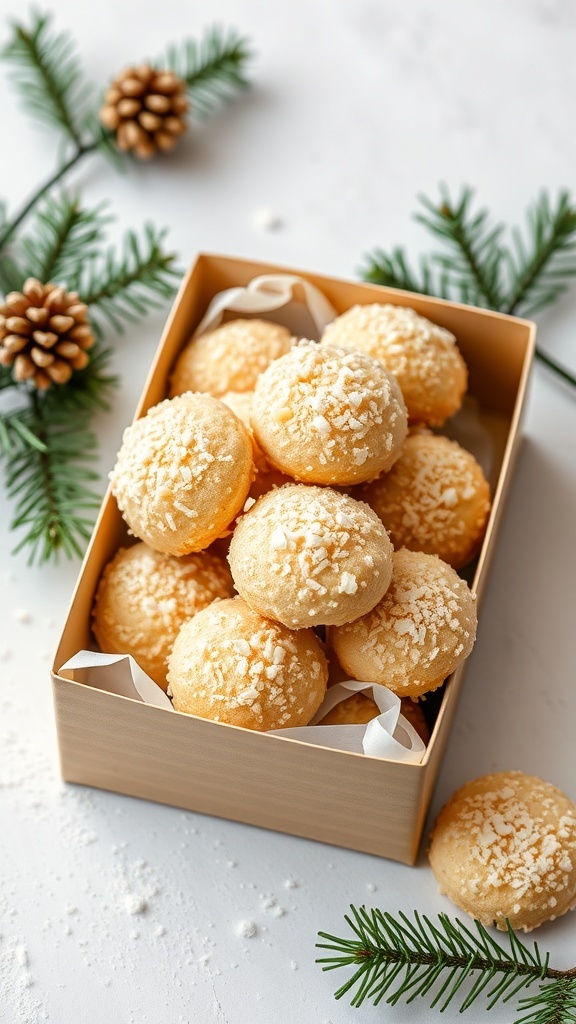
Coconut macaroons are a delightful treat that brings a taste of the tropics to your holiday celebrations. These sweet, chewy cookies are made with shredded coconut, giving them a unique texture and flavor. They’re easy to make and perfect for sharing with friends and family. The image shows a beautiful box filled with golden-brown macaroons, topped with a sprinkle of coconut flakes. They look inviting and festive, making them a great addition to any holiday dessert table.
Making coconut macaroons is straightforward. You only need a few ingredients, and the process is quick. These treats are not just delicious; they also make for a lovely gift when packaged nicely, just like in the image. Imagine surprising someone with a box of homemade coconut macaroons this Christmas!
Ingredients
- 2 2/3 cups sweetened shredded coconut
- 2/3 cup sweetened condensed milk
- 1 teaspoon vanilla extract
- 2 large egg whites
- 1/4 teaspoon salt
- 1/4 cup all-purpose flour (optional, for texture)
Instructions
- Preheat your oven to 325°F (160°C) and line a baking sheet with parchment paper.
- In a large bowl, combine the shredded coconut, sweetened condensed milk, vanilla extract, and salt. Mix well until everything is combined.
- In another bowl, beat the egg whites until soft peaks form. Gently fold the egg whites into the coconut mixture until just combined.
- If using flour, fold it in at this stage for added texture.
- Using a spoon or a cookie scoop, drop mounds of the mixture onto the prepared baking sheet, spacing them about an inch apart.
- Bake for 20-25 minutes, or until the edges are golden brown. Let them cool on the baking sheet for a few minutes before transferring to a wire rack.
- Enjoy your coconut macaroons fresh or store them in an airtight container for later!