
Christmas is the perfect time to get creative with your meals, and we’ve got some delicious menu ideas to help you celebrate the season! From festive appetizers to mouthwatering mains and delightful desserts, these suggestions will make your holiday gathering enjoyable and memorable. Let’s get straight to those tasty dishes that will impress your guests and bring joy to your table!
Cranberry Orange Relish

Cranberry orange relish is a festive addition to any holiday table. The vibrant colors of the cranberries and oranges bring a cheerful touch to your spread. This dish is not only visually appealing but also offers a delightful balance of tart and sweet flavors. The freshness of the oranges complements the cranberries perfectly, making it a refreshing side.
Making this relish is simple and quick. You can prepare it ahead of time, allowing the flavors to meld beautifully. It pairs wonderfully with turkey, ham, or even as a topping for cream cheese on crackers. Everyone will appreciate this bright and zesty condiment during the holiday feast.
Ingredients
- 12 ounces fresh cranberries
- 1 medium orange, peeled and chopped
- 1 cup granulated sugar
- 1/2 cup water
- 1/4 teaspoon cinnamon (optional)
Instructions
- Rinse the cranberries and remove any stems or damaged berries.
- In a medium saucepan, combine the cranberries, chopped orange, sugar, and water.
- Bring the mixture to a boil over medium heat, stirring occasionally.
- Once boiling, reduce the heat and let it simmer for about 10-15 minutes, until the cranberries burst and the mixture thickens.
- If using, stir in the cinnamon and mix well.
- Remove from heat and let it cool to room temperature.
- Transfer to a serving bowl and refrigerate until ready to serve.
Creamy Mashed Potatoes with Chives
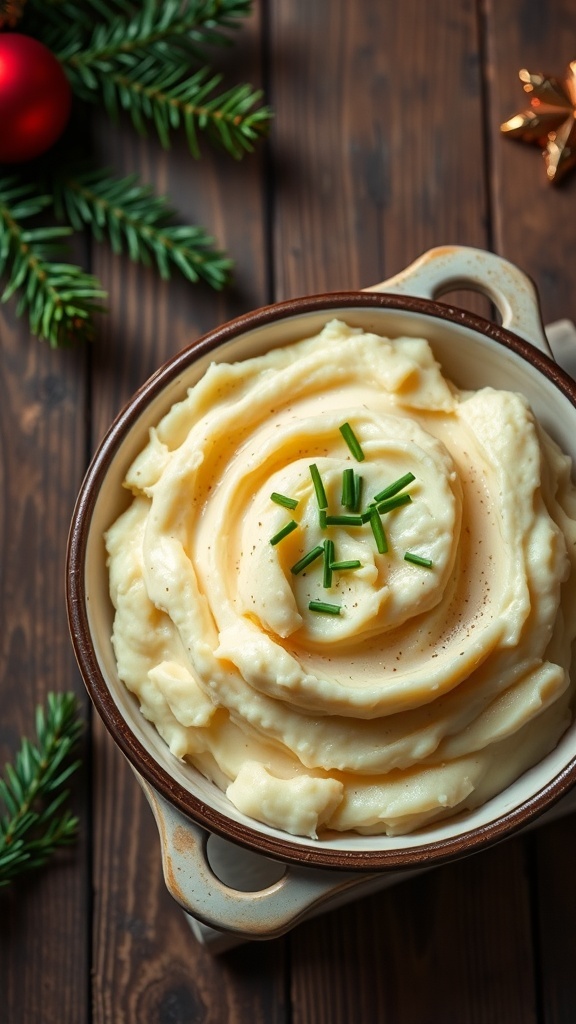
When it comes to holiday meals, creamy mashed potatoes are a classic side dish that everyone loves. The image shows a bowl of fluffy mashed potatoes, elegantly swirled and topped with fresh chives. This dish not only looks inviting but also adds a comforting touch to any festive table.
The creamy texture of these mashed potatoes is achieved by using butter and cream, making them rich and smooth. The addition of chives gives a pop of color and a mild onion flavor that complements the potatoes perfectly. This dish is simple to make and can be prepared ahead of time, allowing you to enjoy more time with your guests.
To make these creamy mashed potatoes, you’ll need a few basic ingredients. Start with good quality potatoes, preferably Yukon Gold or Russets, as they yield the best texture. The key is to boil them until tender, then mash them with butter, cream, and seasonings. The chives can be added right before serving for a fresh taste.
Ingredients
- 2 pounds Yukon Gold potatoes, peeled and diced
- 1/2 cup unsalted butter
- 1 cup heavy cream
- Salt and pepper to taste
- 1/4 cup fresh chives, chopped
Instructions
- Boil the Potatoes: Place the diced potatoes in a large pot and cover with cold water. Add a pinch of salt and bring to a boil. Cook until the potatoes are fork-tender, about 15-20 minutes.
- Drain and Mash: Drain the potatoes well and return them to the pot. Add the butter and begin mashing until smooth.
- Add Cream and Season: Gradually stir in the heavy cream until you reach your desired consistency. Season with salt and pepper to taste.
- Mix in Chives: Fold in the chopped chives, reserving a few for garnish.
- Serve: Transfer the mashed potatoes to a serving bowl, garnish with remaining chives, and enjoy!
Butternut Squash Soup with Toasted Pumpkin Seeds
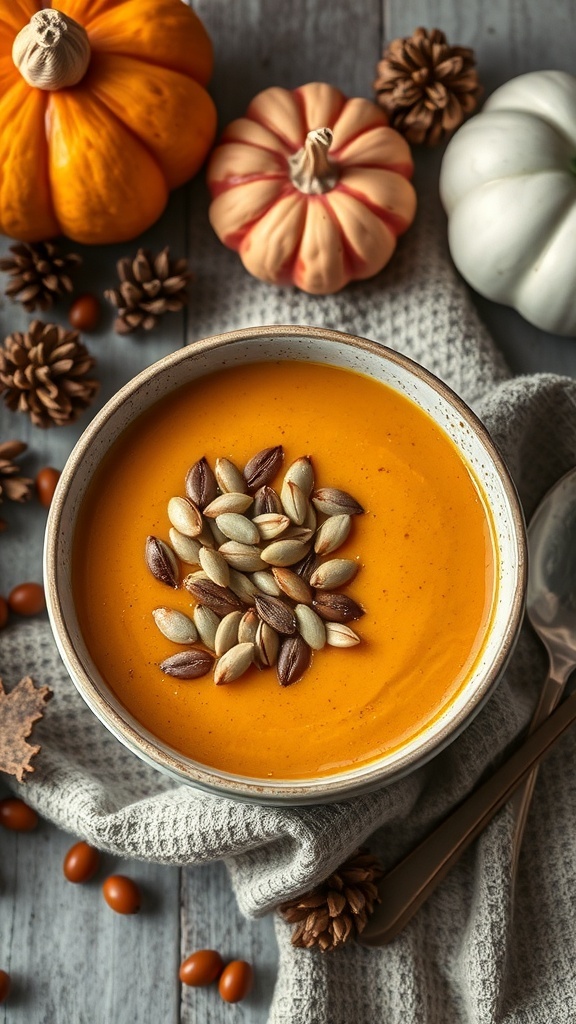
Butternut squash soup is a warm and inviting dish perfect for the holiday season. Its vibrant orange color and creamy texture make it a delightful starter for any Christmas menu. The soup is topped with toasted pumpkin seeds, adding a nice crunch and a nutty flavor that complements the sweetness of the squash.
To make this soup, you’ll need fresh butternut squash, onions, garlic, vegetable broth, and a few spices. Roasting the squash enhances its natural sweetness, while blending it with broth creates a smooth consistency. The toasted pumpkin seeds not only add texture but also provide a healthy dose of nutrients.
This dish is not only tasty but also visually appealing, making it a great addition to your holiday table. Serve it in a nice bowl, garnished with the pumpkin seeds, and enjoy the cozy flavors of winter.
Ingredients
- 1 large butternut squash, peeled and cubed
- 1 onion, chopped
- 2 cloves garlic, minced
- 4 cups vegetable broth
- 1 teaspoon ground cinnamon
- 1/2 teaspoon nutmeg
- Salt and pepper to taste
- 1/2 cup pumpkin seeds, toasted
- Olive oil for roasting
Instructions
- Preheat your oven to 400°F (200°C). Toss the cubed butternut squash with olive oil, salt, and pepper. Spread it on a baking sheet and roast for about 25-30 minutes until tender.
- In a large pot, heat a little olive oil over medium heat. Add the chopped onion and garlic, sautéing until translucent.
- Add the roasted squash to the pot along with the vegetable broth, cinnamon, and nutmeg. Bring to a simmer and cook for about 10 minutes.
- Using an immersion blender, blend the soup until smooth. If you don’t have an immersion blender, you can carefully transfer it to a regular blender in batches.
- Serve hot, garnished with toasted pumpkin seeds on top.
Savory Stuffing with Sage and Sausage
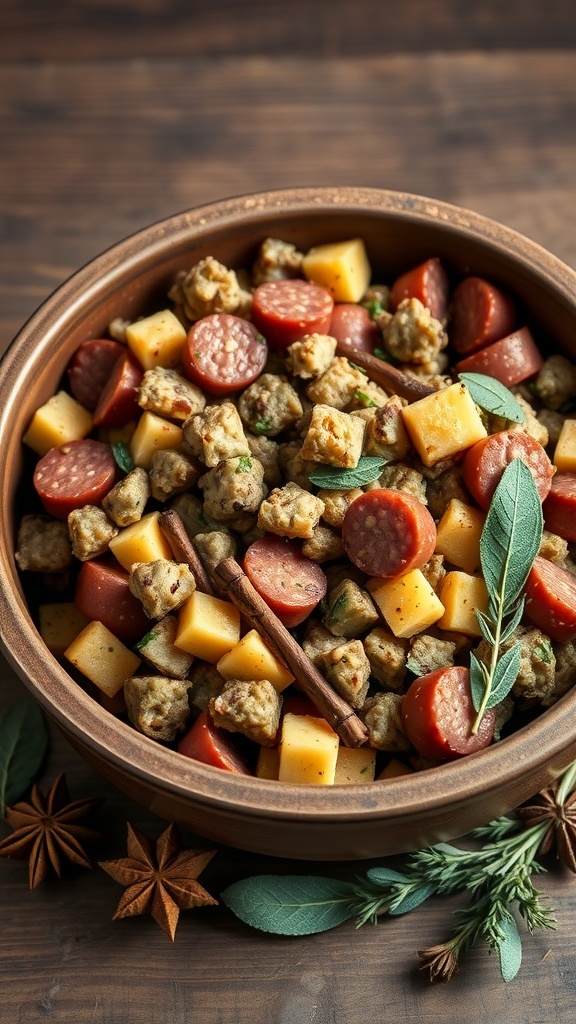
This savory stuffing is a delightful addition to your Christmas menu. Picture a warm bowl filled with golden-brown bread cubes, juicy sausage, and aromatic sage. The combination of flavors creates a comforting dish that pairs perfectly with your holiday feast.
The stuffing features a mix of hearty ingredients. You’ll find tender sausage pieces, cubes of cheese, and hints of fresh herbs like sage and thyme. The spices bring everything together, making each bite a burst of flavor. It’s a dish that not only tastes great but also fills your home with a wonderful aroma.
Making this stuffing is straightforward. You’ll start by browning the sausage in a skillet, letting the flavors develop. Then, combine it with bread cubes, cheese, and herbs in a large bowl. Pour in some broth to moisten everything, and mix it well. Finally, bake until it’s golden and crispy on top.
Ingredients
- 1 pound sausage (Italian or breakfast)
- 8 cups bread cubes (day-old bread works best)
- 1 cup cheddar cheese, cubed
- 1/2 cup onion, chopped
- 1/2 cup celery, chopped
- 2 tablespoons fresh sage, chopped
- 1 teaspoon dried thyme
- 2 cups chicken broth
- Salt and pepper to taste
Instructions
- Preheat your oven to 350°F (175°C).
- In a skillet, cook the sausage over medium heat until browned. Remove from heat and let it cool slightly.
- In a large bowl, combine the bread cubes, cooked sausage, cheese, onion, celery, sage, thyme, salt, and pepper.
- Pour the chicken broth over the mixture and stir until everything is well combined.
- Transfer the stuffing to a greased baking dish. Cover with foil and bake for 30 minutes.
- Remove the foil and bake for an additional 15-20 minutes, or until the top is golden brown.
Garlic Butter Green Beans
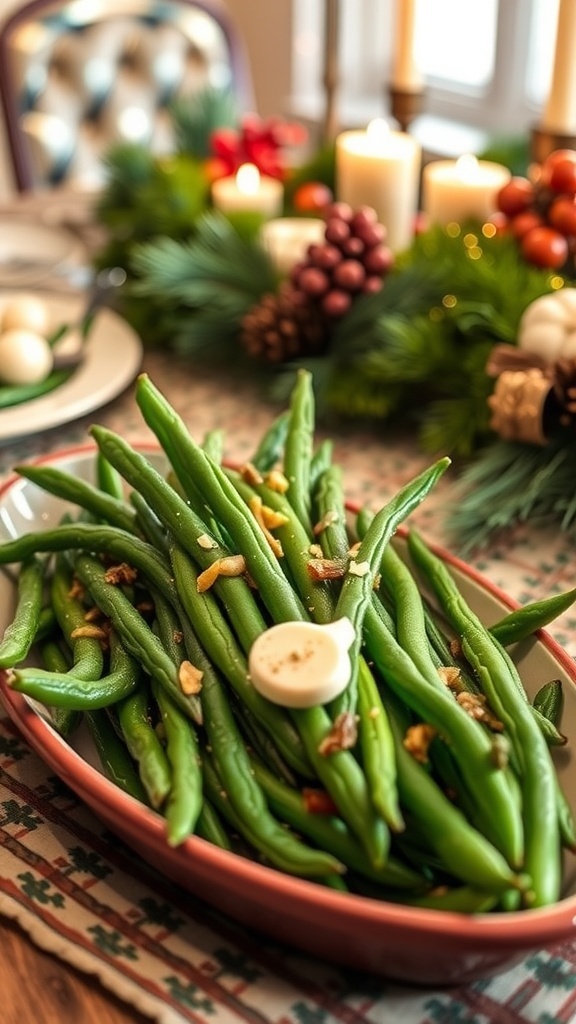
Garlic butter green beans are a delightful addition to any Christmas menu. Their vibrant green color and fresh aroma make them a feast for the eyes and the palate. This dish is simple yet elegant, perfect for holiday gatherings. The buttery garlic flavor enhances the natural taste of the beans, making them irresistible.
To prepare this dish, start with fresh green beans. They should be bright and crisp. The garlic adds a wonderful aroma, while the butter gives a rich, smooth finish. You can also sprinkle some toasted nuts on top for added crunch and flavor.
This side dish pairs well with roasted meats and festive mains, making it a versatile choice for your holiday table. Plus, it’s quick to make, allowing you to spend more time enjoying the company of your loved ones.
Ingredients
- 1 pound fresh green beans, trimmed
- 3 tablespoons unsalted butter
- 3 cloves garlic, minced
- Salt and pepper to taste
- 1/4 cup toasted almonds or walnuts (optional)
Instructions
- Blanch the Green Beans: Bring a pot of salted water to a boil. Add the green beans and cook for about 3-4 minutes until bright green and tender-crisp. Drain and immediately plunge them into ice water to stop the cooking process.
- Prepare the Garlic Butter: In a large skillet, melt the butter over medium heat. Add the minced garlic and sauté for about 1 minute until fragrant.
- Combine: Add the blanched green beans to the skillet. Toss to coat them in the garlic butter. Season with salt and pepper to taste.
- Serve: If using, sprinkle the toasted nuts over the top before serving. Enjoy your delicious garlic butter green beans!
Honey-Glazed Ham with Pineapple
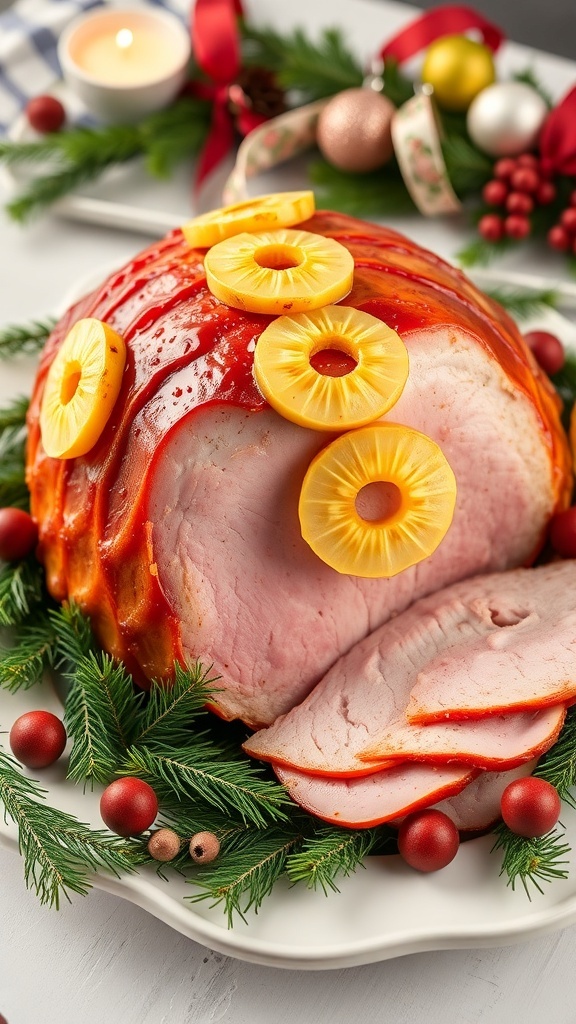
Honey-glazed ham with pineapple is a classic holiday dish that brings warmth and joy to any festive table. The image shows a beautifully cooked ham, adorned with bright pineapple rings and a shiny glaze. This dish not only looks stunning but also offers a delightful mix of sweet and savory flavors.
The ham is often the centerpiece of the Christmas feast. Its golden-brown crust glistens, inviting everyone to dig in. The sweetness of the honey complements the saltiness of the ham, while the pineapple adds a refreshing twist. It’s a dish that appeals to both kids and adults alike.
Making honey-glazed ham is simpler than it seems. With just a few ingredients, you can create a dish that will impress your guests. Serve it alongside your favorite sides, and you have a meal that feels festive and special.
Ingredients
- 1 fully cooked ham (about 8-10 pounds)
- 1 cup honey
- 1/2 cup brown sugar
- 1/4 cup Dijon mustard
- 1 can pineapple slices (in juice)
- Whole cloves (optional)
Instructions
- Preheat your oven to 325°F (165°C).
- Score the surface of the ham in a diamond pattern and place it in a roasting pan.
- In a bowl, mix honey, brown sugar, and Dijon mustard until well combined.
- Brush the glaze over the ham, making sure to get it into the scored areas.
- If using, insert whole cloves into the intersections of the diamond cuts.
- Arrange pineapple slices on top of the ham and secure them with toothpicks if needed.
- Cover the ham loosely with foil and bake for about 1.5 to 2 hours, basting with the glaze every 30 minutes.
- Remove the foil for the last 30 minutes to allow the glaze to caramelize.
- Once heated through and caramelized, remove from the oven and let it rest for 15 minutes before slicing.
Maple Brussels Sprouts with Bacon
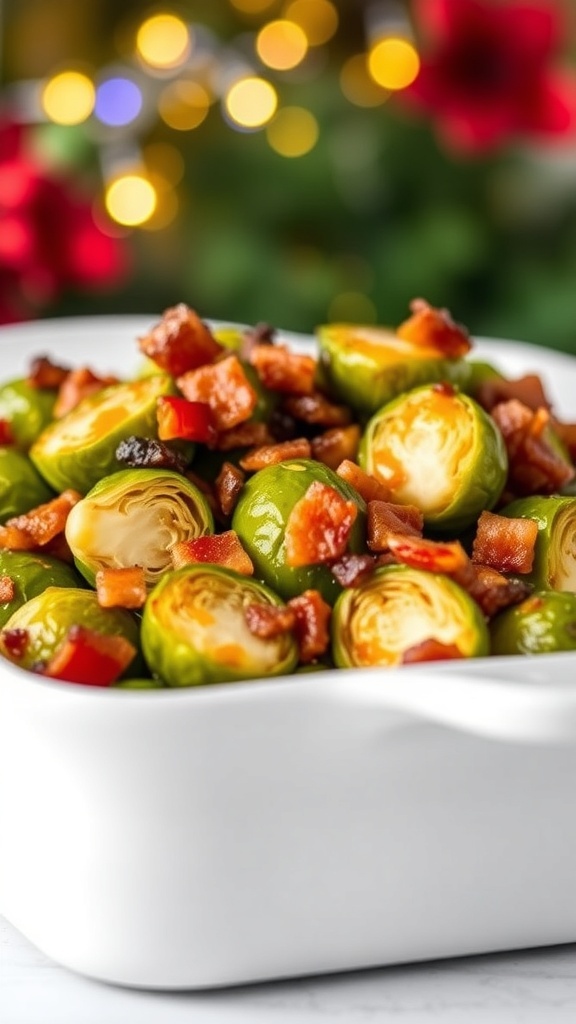
Maple Brussels sprouts with bacon are a delightful addition to any Christmas menu. This dish combines the earthy flavor of Brussels sprouts with the savory crunch of bacon, all tied together with a hint of sweetness from maple syrup. The vibrant green of the sprouts and the crispy bits of bacon create a visually appealing dish that is sure to impress your guests.
To prepare this dish, you’ll want to start by roasting the Brussels sprouts until they’re tender and slightly caramelized. The bacon adds a wonderful texture and flavor that complements the sprouts perfectly. Drizzling maple syrup over the top just before serving adds that festive touch that makes this dish stand out.
This recipe is not only tasty but also easy to make. It’s perfect for holiday gatherings or a cozy family dinner. Let’s get cooking!
Ingredients
- 1 pound Brussels sprouts, trimmed and halved
- 6 slices of bacon, chopped
- 1/4 cup maple syrup
- 2 tablespoons olive oil
- Salt and pepper to taste
- 1/4 teaspoon red pepper flakes (optional)
Instructions
- Preheat your oven to 400°F (200°C).
- In a large bowl, toss the halved Brussels sprouts with olive oil, salt, pepper, and red pepper flakes if using.
- Spread the Brussels sprouts on a baking sheet in a single layer. Scatter the chopped bacon over the top.
- Roast in the preheated oven for about 20-25 minutes, stirring halfway through, until the sprouts are tender and the bacon is crispy.
- Remove from the oven and drizzle with maple syrup. Toss to combine and serve warm.
Roasted Garlic and Herb Butter Turkey
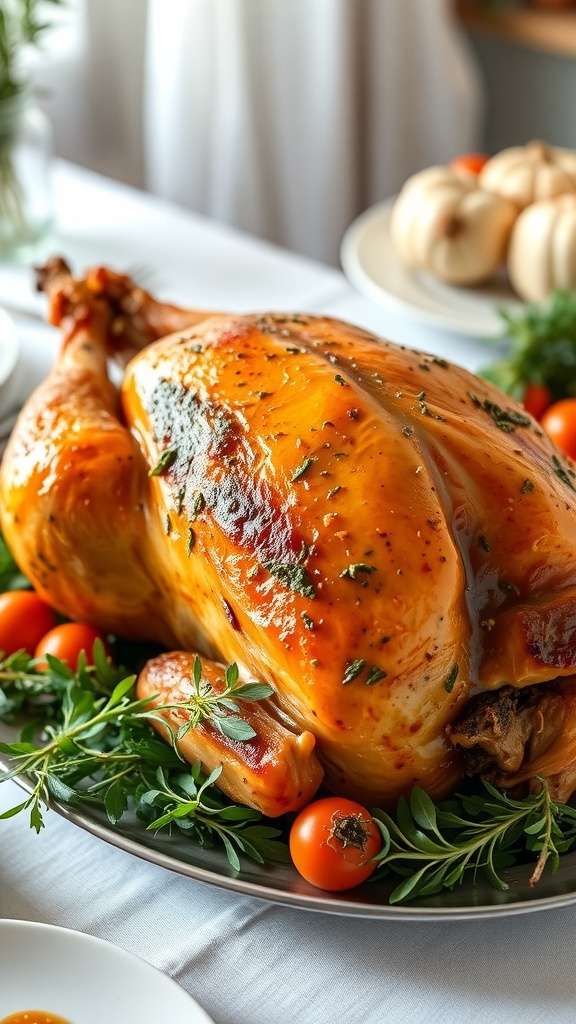
Picture this: a beautifully roasted turkey, golden brown and glistening, resting on a platter. This turkey is not just any turkey; it’s infused with garlic and herbs, making it the star of your Christmas feast. The aroma wafting through your kitchen will have everyone eagerly waiting to dig in.
Using garlic and herb butter gives the turkey a rich flavor that pairs perfectly with traditional sides. The crispy skin and juicy meat are sure to impress your guests. Plus, it’s surprisingly easy to prepare!
Let’s get to the fun part—making this delicious turkey. Gather your ingredients, roll up your sleeves, and let’s make a meal that everyone will remember.
Ingredients
- 1 whole turkey (12-14 pounds)
- 1 cup unsalted butter, softened
- 6 cloves garlic, minced
- 2 tablespoons fresh rosemary, chopped
- 2 tablespoons fresh thyme, chopped
- 2 tablespoons fresh sage, chopped
- Salt and pepper to taste
- 1 lemon, quartered
- 1 onion, quartered
- 4 cups low-sodium chicken broth
Instructions
- Prepare the Butter: In a bowl, mix the softened butter with minced garlic, rosemary, thyme, sage, salt, and pepper.
- Prep the Turkey: Preheat your oven to 325°F (165°C). Remove the turkey giblets and pat the turkey dry with paper towels.
- Season the Turkey: Gently lift the skin of the turkey and spread half of the garlic herb butter underneath. Rub the remaining butter all over the outside of the turkey.
- Stuff the Turkey: Place the lemon and onion quarters inside the turkey cavity for added flavor.
- Roast the Turkey: Place the turkey on a roasting rack in a large pan. Pour chicken broth into the bottom of the pan. Roast for about 3-4 hours, basting every 30 minutes, until the internal temperature reaches 165°F (75°C).
- Rest and Serve: Once done, let the turkey rest for at least 20 minutes before carving. This allows the juices to redistribute, ensuring a moist turkey.
Herb-Crusted Rack of Lamb
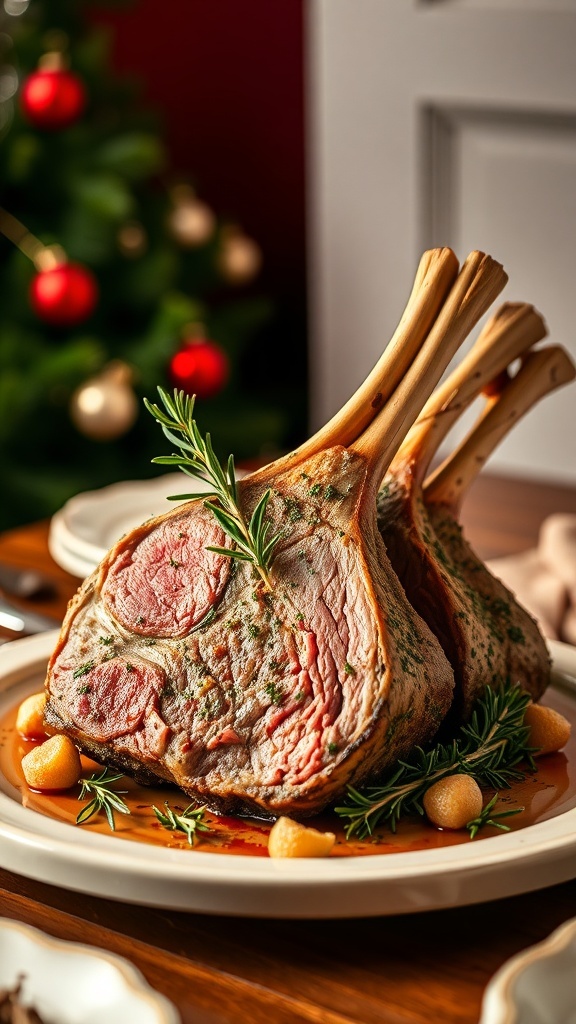
When it comes to festive dining, a Herb-Crusted Rack of Lamb is a showstopper. This dish not only looks stunning but also brings rich flavors to your table. The tender meat, coated in a mix of fresh herbs, creates a delightful contrast with the juicy lamb. It’s perfect for impressing guests during holiday gatherings.
The vibrant green of the herbs against the beautifully roasted meat makes it visually appealing. Pair it with seasonal sides like roasted vegetables or creamy mashed potatoes for a complete meal. The aroma that fills your kitchen while it cooks is simply irresistible!
Ready to make this delicious dish? Here’s how:
Ingredients
- 1 rack of lamb (about 8 ribs)
- 2 tablespoons Dijon mustard
- 1 cup fresh breadcrumbs
- 1/2 cup fresh parsley, chopped
- 2 tablespoons fresh rosemary, chopped
- 2 tablespoons fresh thyme, chopped
- 3 cloves garlic, minced
- Salt and pepper to taste
- 2 tablespoons olive oil
Instructions
- Preheat your oven to 400°F (200°C).
- Season the rack of lamb with salt and pepper. Heat olive oil in a skillet over medium-high heat. Sear the lamb for about 2-3 minutes on each side until browned.
- In a bowl, mix the breadcrumbs, parsley, rosemary, thyme, garlic, and Dijon mustard. Press this mixture onto the lamb to coat it evenly.
- Place the lamb on a baking sheet and roast in the oven for about 20-25 minutes for medium-rare, or until it reaches your desired doneness.
- Let it rest for 5-10 minutes before slicing. Serve with your favorite sides and enjoy!
Spiced Apple Cider

Spiced apple cider is a warm and inviting drink that perfectly captures the essence of the holiday season. Imagine a cozy mug filled with a rich, amber liquid, garnished with a cinnamon stick. The aroma of apples, spices, and a hint of sweetness fills the air, making it a delightful addition to any Christmas gathering.
This drink not only warms you up but also brings people together. It’s great for sipping while decorating the tree or enjoying a quiet evening by the fire. Plus, it’s simple to make and can be prepared in large batches, making it perfect for holiday parties.
Here’s how to create your own spiced apple cider:
Ingredients
- 8 cups apple cider
- 1 orange, sliced
- 3-4 cinnamon sticks
- 1 teaspoon whole cloves
- 1 teaspoon allspice berries
- 1/4 cup brown sugar (optional)
- 1/4 cup lemon juice
Instructions
- Combine all ingredients in a large pot.
- Heat over medium heat until it starts to simmer.
- Reduce heat and let it simmer for about 20-30 minutes to allow the flavors to meld.
- Strain the cider to remove the spices and orange slices.
- Serve warm in mugs, garnished with a cinnamon stick if desired.
Mulled Wine with Spices

Mulled wine is a classic winter drink that warms you from the inside out. Picture a cozy evening with friends, laughter in the air, and the sweet aroma of spices filling your home. This delightful beverage is perfect for holiday gatherings or a quiet night by the fire.
The image captures a steaming mug of mulled wine, garnished with a slice of orange and surrounded by festive decorations. The deep red color of the wine contrasts beautifully with the bright orange, making it visually appealing. Cinnamon sticks and star anise add a touch of elegance and hint at the flavors within.
Making mulled wine is simple and rewarding. You can customize it with your favorite spices and fruits. The warmth of the spices, combined with the rich flavor of the wine, creates a comforting drink that embodies the spirit of the season.
Ingredients
- 1 bottle of red wine (750ml)
- 1 orange, sliced
- 2-3 tablespoons sugar (to taste)
- 2-3 cinnamon sticks
- 4-5 whole cloves
- 2-3 star anise
- 1/4 cup brandy (optional)
- Fresh cranberries or apple slices for garnish (optional)
Instructions
- Combine all ingredients: In a large pot, combine the red wine, orange slices, sugar, cinnamon sticks, cloves, and star anise.
- Heat gently: Warm the mixture over low heat. Avoid boiling, as this can cook off the alcohol.
- Simmer: Let it simmer for about 15-20 minutes, allowing the flavors to meld together.
- Taste and adjust: Taste the mulled wine and adjust the sweetness if needed. If using, stir in the brandy.
- Serve: Strain the wine into mugs and garnish with fresh cranberries or apple slices if desired. Enjoy warm!
Chocolate Peppermint Cake
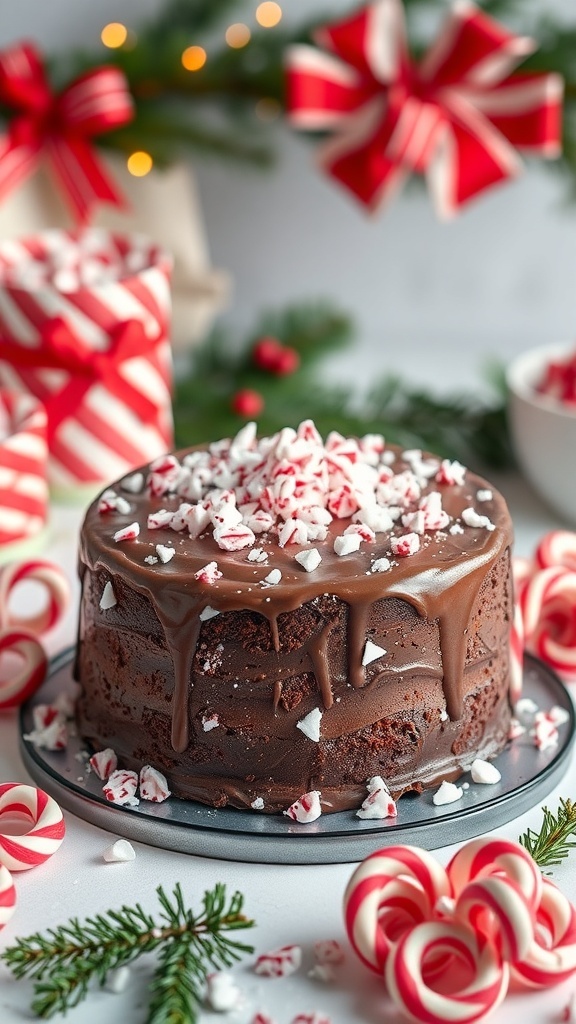
Chocolate Peppermint Cake is a festive treat that captures the spirit of the holiday season. This cake is rich, moist, and topped with a delightful chocolate ganache. The peppermint adds a refreshing twist that makes it perfect for Christmas gatherings.
The image showcases a beautifully decorated cake, drizzled with chocolate and sprinkled with crushed peppermint candies. Surrounding the cake are festive candy canes and holiday decorations, creating a cheerful atmosphere. This dessert not only tastes amazing but also looks stunning on any holiday table.
Making this cake is easier than you might think. Gather your ingredients, and let’s get started!
Ingredients
- 1 ¾ cups all-purpose flour
- 1 ¾ cups granulated sugar
- ¾ cup unsweetened cocoa powder
- 1 ½ teaspoons baking powder
- 1 ½ teaspoons baking soda
- 1 teaspoon salt
- 2 large eggs
- 1 cup whole milk
- ½ cup vegetable oil
- 2 teaspoons vanilla extract
- 1 cup boiling water
- 1 cup heavy cream
- 8 ounces semi-sweet chocolate, chopped
- ½ teaspoon peppermint extract
- Candy canes, crushed (for topping)
Instructions
- Preheat the oven to 350°F (175°C). Grease and flour two 9-inch round cake pans.
- In a large bowl, combine flour, sugar, cocoa powder, baking powder, baking soda, and salt. Mix well.
- Add eggs, milk, oil, and vanilla to the dry ingredients. Beat on medium speed for 2 minutes. Stir in boiling water until well combined.
- Pour the batter evenly into the prepared pans. Bake for 30-35 minutes or until a toothpick comes out clean.
- Let the cakes cool in the pans for 10 minutes, then remove from pans and cool completely on wire racks.
- For the ganache, heat the heavy cream in a saucepan until just boiling. Pour over the chopped chocolate and let sit for 5 minutes. Stir until smooth and add peppermint extract.
- Once the cakes are cool, place one layer on a serving plate. Spread a layer of ganache on top, then place the second layer on top. Pour the remaining ganache over the top and let it drip down the sides.
- Finish by sprinkling crushed candy canes on top. Slice and serve!
Red Velvet Cupcakes with Cream Cheese Frosting

Red velvet cupcakes are a festive treat that brings a pop of color to any Christmas gathering. Their rich, red hue is perfect for the holiday season, making them not just delicious but visually appealing too. Topped with creamy frosting and a sprinkle of festive decorations, these cupcakes are sure to impress your guests.
Making red velvet cupcakes is simple and fun. The combination of cocoa powder and buttermilk gives them a unique flavor that pairs wonderfully with cream cheese frosting. Whether you’re hosting a holiday party or just looking to satisfy a sweet tooth, these cupcakes are a great choice.
Ingredients
- 1 1/2 cups all-purpose flour
- 1 cup granulated sugar
- 1 teaspoon baking soda
- 1 teaspoon salt
- 1 teaspoon cocoa powder
- 1 cup vegetable oil
- 1 cup buttermilk, room temperature
- 2 large eggs
- 2 tablespoons red food coloring
- 1 teaspoon vanilla extract
- 1 teaspoon white vinegar
- 8 oz cream cheese, softened
- 1/2 cup unsalted butter, softened
- 4 cups powdered sugar
- 1 teaspoon vanilla extract (for frosting)
Instructions
- Preheat your oven to 350°F (175°C) and line a cupcake pan with liners.
- In a large bowl, mix together the flour, sugar, baking soda, salt, and cocoa powder.
- In another bowl, whisk together the oil, buttermilk, eggs, food coloring, vanilla extract, and vinegar.
- Combine the wet ingredients with the dry ingredients, mixing until just combined.
- Fill each cupcake liner about 2/3 full with the batter. Bake for 18-20 minutes or until a toothpick comes out clean.
- Let the cupcakes cool completely before frosting.
- For the frosting, beat together the cream cheese and butter until smooth. Gradually add the powdered sugar and vanilla extract, mixing until creamy.
- Frost the cooled cupcakes and add any festive decorations you like!
Eggnog Cheesecake with Nutmeg
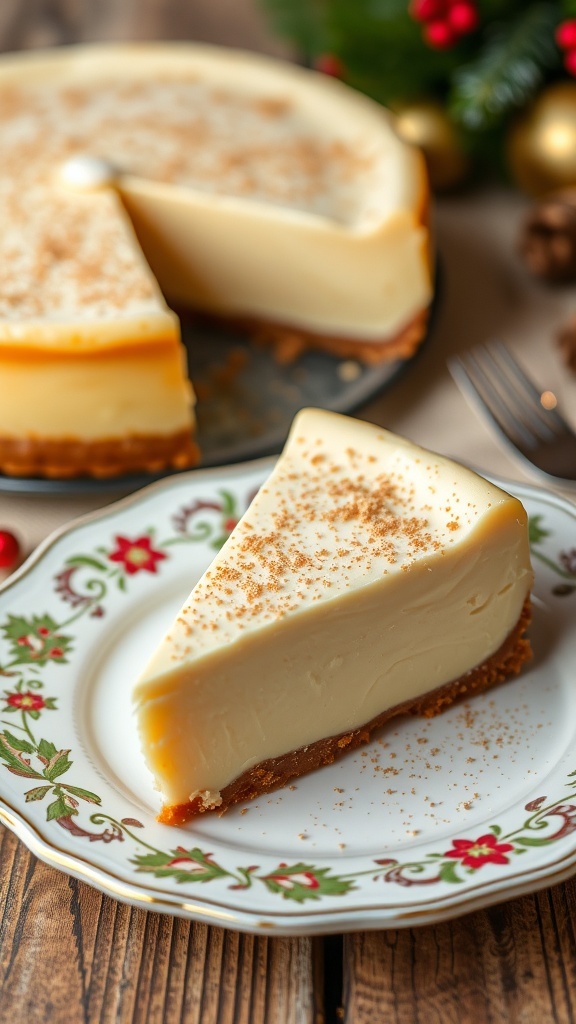
Eggnog cheesecake is a delightful twist on a classic dessert, perfect for the holiday season. This creamy cheesecake is infused with the warm flavors of eggnog and nutmeg, making it a festive treat that everyone will love. The smooth filling sits atop a crunchy graham cracker crust, creating a wonderful contrast in textures.
Imagine serving this cheesecake at your holiday gathering. It not only looks stunning on the table, but it also brings a cozy, festive vibe to your menu. The hint of nutmeg adds a lovely spice that complements the rich flavors of eggnog, making each bite feel like a warm hug.
Whether you’re hosting a big family dinner or a small gathering with friends, this cheesecake will surely impress. It’s easy to make and can be prepared ahead of time, allowing you to enjoy the festivities without stress.
Ingredients
- 1 ½ cups graham cracker crumbs
- ½ cup unsalted butter, melted
- 2 cups cream cheese, softened
- 1 cup granulated sugar
- 1 cup eggnog
- 3 large eggs
- 1 teaspoon vanilla extract
- 1 teaspoon ground nutmeg
- ¼ teaspoon salt
Instructions
- Preheat your oven to 325°F (160°C). Grease a 9-inch springform pan.
- In a bowl, mix graham cracker crumbs and melted butter until combined. Press this mixture firmly into the bottom of the springform pan to form the crust.
- In a large mixing bowl, beat the cream cheese until smooth. Gradually add sugar, mixing until well combined.
- Add eggnog, eggs, vanilla extract, nutmeg, and salt. Mix until smooth and creamy.
- Pour the cheesecake filling over the crust in the springform pan.
- Bake for 55-60 minutes, or until the center is set but still slightly jiggly.
- Turn off the oven and let the cheesecake cool inside for an hour. Then, refrigerate for at least 4 hours or overnight.
- Before serving, sprinkle a little extra nutmeg on top for garnish. Slice and enjoy!
Classic Beef Wellington
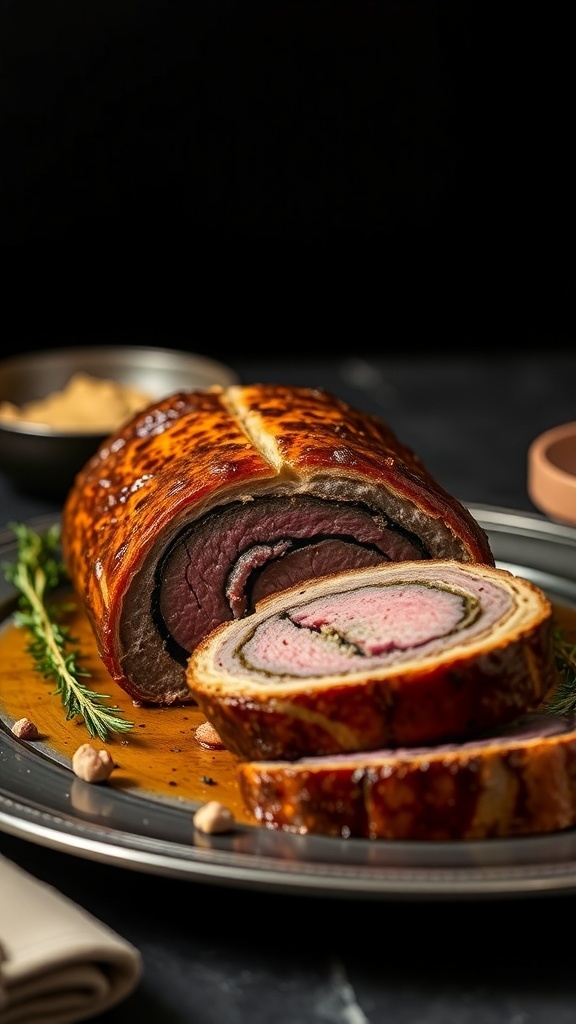
Beef Wellington is a showstopper for any holiday meal. This dish features a tender beef fillet wrapped in layers of mushroom duxelles and prosciutto, all encased in a flaky puff pastry. The golden crust is not just for looks; it adds a delightful crunch that contrasts beautifully with the juicy beef inside.
The image captures a perfectly cooked Beef Wellington, showcasing its rich, savory layers. The deep brown crust glistens, hinting at the delicious flavors within. Slices reveal the pink, succulent beef, surrounded by earthy mushrooms and herbs. This dish is sure to impress your guests and make your Christmas dinner memorable.
Making Beef Wellington may seem daunting, but with a little preparation, it can be a fun cooking project. Pair it with some roasted vegetables or a rich red wine sauce for a complete meal that feels festive and special.
Ingredients
- 1.5 lbs beef tenderloin
- 2 cups mushrooms, finely chopped
- 4 oz prosciutto, thinly sliced
- 2 tbsp Dijon mustard
- 1 sheet puff pastry, thawed
- 1 egg, beaten (for egg wash)
- Salt and pepper to taste
- Fresh thyme, for seasoning
Instructions
- Prepare the Beef: Season the beef tenderloin with salt and pepper. Sear it in a hot pan for about 2-3 minutes on each side until browned. Remove and let it cool.
- Make the Duxelles: In the same pan, add the chopped mushrooms and cook until all moisture evaporates. Stir in thyme and season with salt and pepper. Let it cool.
- Assemble: Lay out the prosciutto on a sheet of plastic wrap, slightly overlapping. Spread the mushroom mixture over the prosciutto, then place the beef on top. Roll tightly using the plastic wrap and refrigerate for 15 minutes.
- Wrap in Pastry: Roll out the puff pastry on a floured surface. Unwrap the beef and place it in the center of the pastry. Fold the pastry over the beef, sealing the edges. Brush with beaten egg.
- Bake: Preheat the oven to 400°F (200°C). Place the wrapped beef on a baking sheet and bake for 25-30 minutes until golden brown. Let it rest for 10 minutes before slicing.
Gingerbread Cookies with Royal Icing

Gingerbread cookies are a classic treat during the holiday season. They bring warmth and joy to any gathering. The image shows a delightful assortment of gingerbread cookies, beautifully decorated with royal icing. Each cookie features unique designs, from cheerful gingerbread men to festive snowflakes, all set against a backdrop of twinkling lights from a Christmas tree.
Making gingerbread cookies is not just about the taste; it’s also about the fun of decorating them. Kids and adults alike can enjoy piping icing and adding colorful sprinkles. These cookies can be hung on the tree or enjoyed fresh from the oven.
Here’s a simple recipe to create your own batch of gingerbread cookies with royal icing:
Ingredients
- 3 cups all-purpose flour
- 1 tablespoon ground ginger
- 1 tablespoon ground cinnamon
- 1/2 teaspoon ground cloves
- 1 teaspoon baking soda
- 1/2 teaspoon salt
- 3/4 cup unsalted butter, softened
- 1 cup brown sugar, packed
- 1 large egg
- 1/2 cup molasses
- 2 cups powdered sugar
- 2 tablespoons meringue powder
- 1/4 cup water
- Food coloring (optional)
Instructions
- Make the Dough: In a bowl, whisk together flour, ginger, cinnamon, cloves, baking soda, and salt. In another bowl, cream the butter and brown sugar until fluffy. Beat in the egg and molasses. Gradually add the dry ingredients to the wet mixture, mixing until combined.
- Chill the Dough: Divide the dough into two discs, wrap in plastic wrap, and refrigerate for at least 2 hours.
- Roll and Cut: Preheat the oven to 350°F (175°C). Roll out the dough on a floured surface to about 1/4 inch thick. Use cookie cutters to cut out shapes and place them on a baking sheet.
- Bake: Bake for 8-10 minutes until the edges are firm. Let cool completely on a wire rack.
- Make the Royal Icing: In a bowl, combine powdered sugar, meringue powder, and water. Beat until stiff peaks form. If desired, divide and color with food coloring.
- Decorate: Use piping bags to decorate the cooled cookies with royal icing. Let the icing dry completely before serving or storing.
Caprese Skewers with Balsamic Glaze
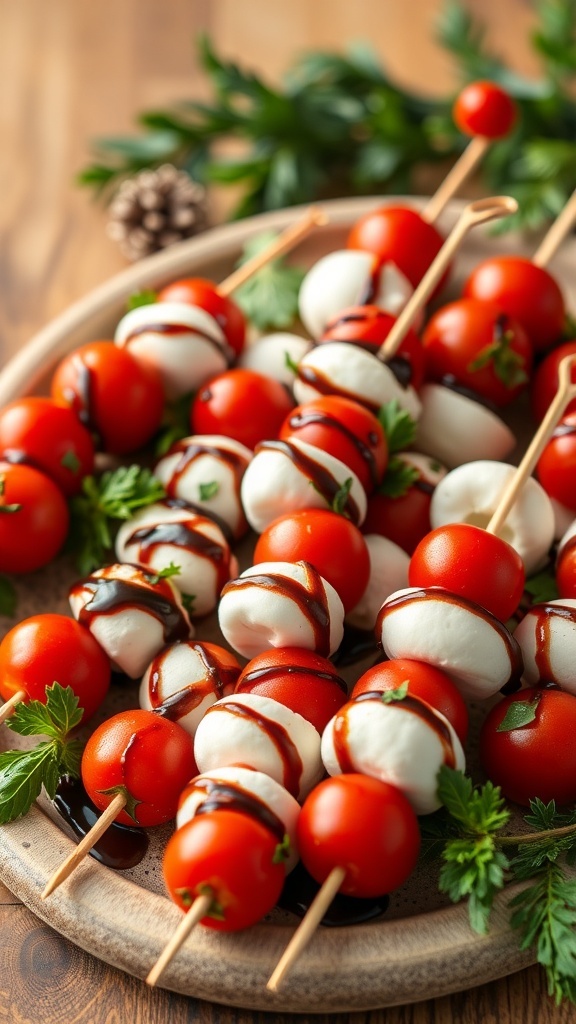
Caprese skewers are a fun and fresh way to enjoy the classic flavors of a Caprese salad. These skewers combine juicy cherry tomatoes, creamy mozzarella balls, and fragrant basil leaves, all drizzled with a rich balsamic glaze. They look stunning on a platter, making them perfect for holiday gatherings or festive dinners.
To make these skewers, simply thread a cherry tomato, a basil leaf, and a mozzarella ball onto a skewer. Repeat until the skewer is filled, leaving a little space at each end for easy handling. Once assembled, drizzle with balsamic glaze for a sweet and tangy finish. These bites are not only delicious but also add a pop of color to your Christmas table.
Here’s how to make your own Caprese skewers:
Chocolate Fondue with Fresh Fruit
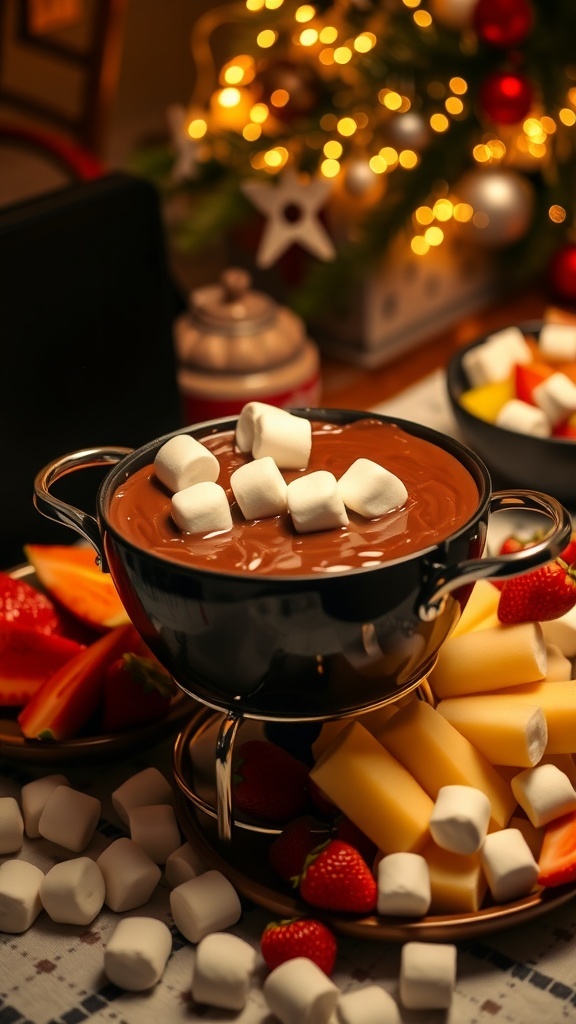
Chocolate fondue is a delightful treat that brings joy to any holiday gathering. Picture a warm pot of melted chocolate, surrounded by an array of fresh fruits. Strawberries, apples, and marshmallows are perfect for dipping, creating a fun and interactive dessert experience.
The rich chocolate pairs beautifully with the sweetness of the fruit. Each bite is a little moment of happiness. It’s a great way to indulge without feeling too heavy, making it a popular choice for festive occasions.
Setting up a chocolate fondue station is easy. Just melt the chocolate, prepare your fruits, and let everyone enjoy dipping. It’s a simple yet elegant addition to your Christmas menu.
Ingredients
- 1 cup semi-sweet chocolate chips
- 1/2 cup heavy cream
- 1 teaspoon vanilla extract
- Fresh strawberries, washed and hulled
- Apple slices
- Marshmallows
- Banana slices
Instructions
- Prepare the Chocolate: In a saucepan, combine chocolate chips and heavy cream over low heat. Stir until the chocolate is fully melted and smooth.
- Add Flavor: Remove from heat and stir in vanilla extract for added flavor.
- Arrange the Dippers: On a platter, arrange the fresh fruits and marshmallows for easy dipping.
- Serve: Pour the melted chocolate into a fondue pot or a heat-safe bowl. Keep warm and enjoy dipping your fruits!
Christmas Tree Vegetable Platter
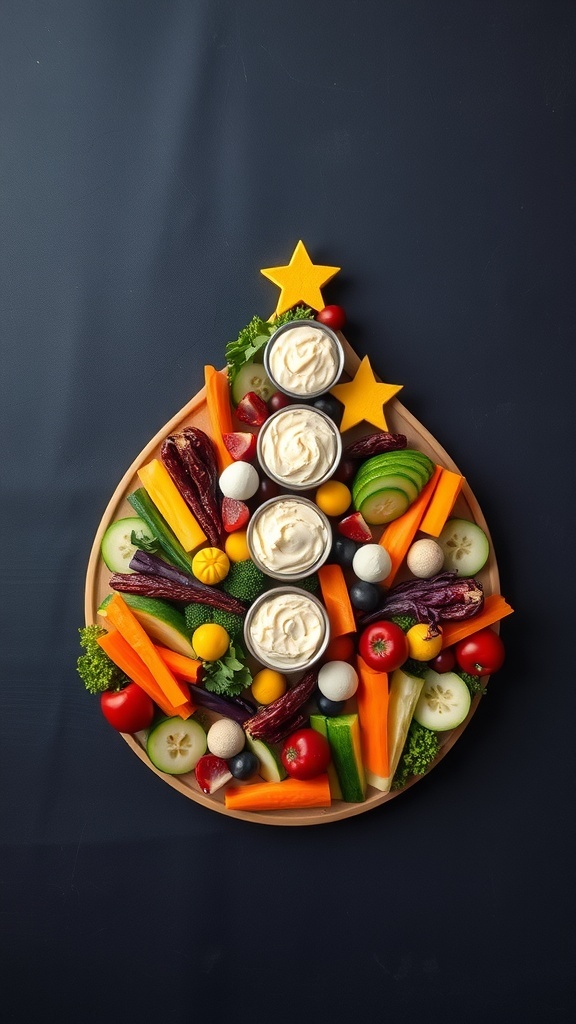
This Christmas Tree Vegetable Platter is a fun and festive way to serve veggies during the holiday season. Shaped like a Christmas tree, it features a colorful array of fresh vegetables that are sure to impress your guests. The vibrant colors of the carrots, cucumbers, and cherry tomatoes create a cheerful display on your table.
The platter is topped with star-shaped cheese and served with delicious dips, making it not only visually appealing but also tasty. It’s a great way to encourage everyone to munch on healthy snacks while enjoying the festivities. Plus, it’s easy to prepare and can be customized with your favorite vegetables.
Gather your friends and family around this delightful platter, and watch as they dive into the fresh flavors. It’s a perfect addition to any holiday gathering!
Ingredients
- 1 cup baby carrots
- 1 cup cucumber slices
- 1 cup cherry tomatoes
- 1 cup bell pepper strips (various colors)
- 1 cup broccoli florets
- 1 cup radishes
- 1 cup grape tomatoes
- 1 cup cauliflower florets
- 1 cup dip (ranch or hummus)
- 1/2 cup cheese (cut into star shapes)
Instructions
- Prepare the Vegetables: Wash and cut all the vegetables into bite-sized pieces. Arrange them on a large platter in the shape of a Christmas tree.
- Add the Dips: Place small bowls of your chosen dip at the base of the tree.
- Decorate: Use the star-shaped cheese pieces to decorate the top of the tree.
- Serve: Enjoy this colorful and healthy platter with friends and family during your holiday celebrations!
Shrimp Cocktail with Zesty Sauce
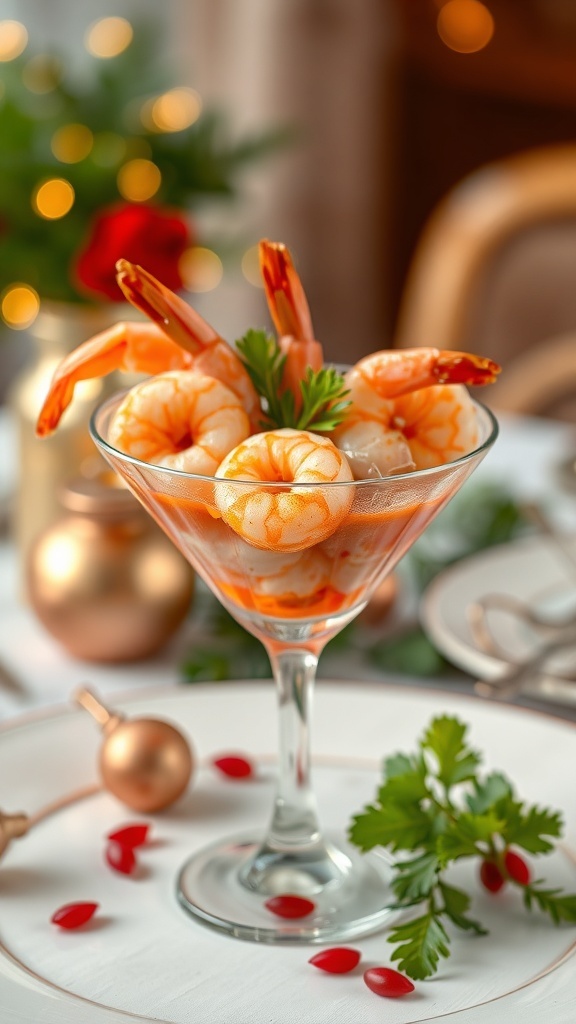
Nothing says festive like a classic shrimp cocktail, especially during the holiday season. This dish is not only visually appealing but also a crowd-pleaser. Imagine a beautiful glass filled with plump, juicy shrimp, elegantly arranged and ready to be dipped into a zesty sauce. The bright colors of the shrimp against the backdrop of a holiday table create a warm and inviting atmosphere.
The shrimp cocktail is perfect for any gathering. It’s easy to prepare and can be made ahead of time, allowing you to enjoy the festivities without stress. Pair it with a tangy cocktail sauce, and you have a delightful appetizer that everyone will love.
Let’s get started on making this delicious shrimp cocktail!
Ingredients
- 1 pound large shrimp, peeled and deveined
- 1 cup ketchup
- 2 tablespoons horseradish
- 1 tablespoon lemon juice
- 1 teaspoon Worcestershire sauce
- Salt and pepper to taste
- Lemon wedges for garnish
Instructions
- Cook the Shrimp: Bring a large pot of salted water to a boil. Add the shrimp and cook for about 2-3 minutes until they turn pink. Drain and cool under cold running water.
- Prepare the Sauce: In a bowl, mix together ketchup, horseradish, lemon juice, Worcestershire sauce, salt, and pepper. Adjust seasoning to taste.
- Assemble: Arrange the cooked shrimp in a glass or on a platter. Serve with the zesty sauce on the side and garnish with lemon wedges.
- Enjoy: Dive into this refreshing shrimp cocktail with your friends and family!
Baked Brie with Cranberries and Walnuts
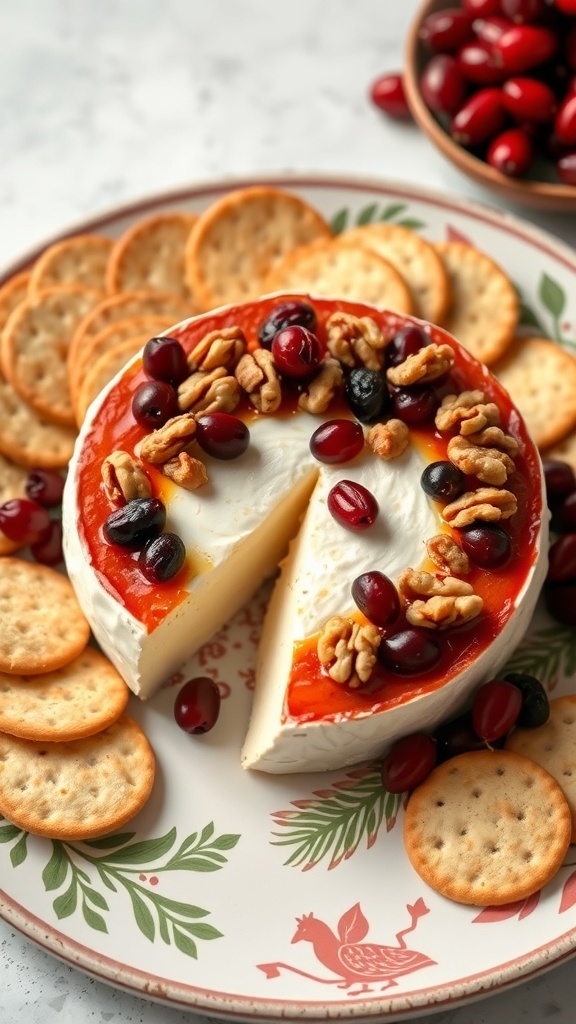
Baked Brie with cranberries and walnuts is a festive treat that brings warmth to any holiday gathering. The creamy texture of the Brie pairs perfectly with the tartness of cranberries and the crunch of walnuts. This dish not only looks stunning on the table but also offers a delightful combination of flavors that everyone will love.
To make this dish, start by selecting a good quality Brie cheese. Place it on a decorative plate surrounded by your favorite crackers. Top the Brie with cranberry sauce and sprinkle chopped walnuts on top. The vibrant colors of the cranberries and walnuts add a cheerful touch to your spread.
When baked, the cheese becomes gooey and inviting. Serve it warm, allowing guests to scoop it onto crackers for a delicious bite. This dish is perfect for sharing and can be made in just a few simple steps.
Ingredients
- 1 round Brie cheese (about 8 ounces)
- 1/2 cup cranberry sauce
- 1/4 cup walnuts, chopped
- Crackers for serving
Instructions
- Preheat your oven to 350°F (175°C).
- Place the Brie on a baking sheet lined with parchment paper.
- Spread the cranberry sauce evenly over the top of the Brie.
- Sprinkle the chopped walnuts on top of the cranberry sauce.
- Bake in the preheated oven for about 10-15 minutes, or until the cheese is soft and gooey.
- Remove from the oven and let it cool slightly before serving with crackers.
Pomegranate and Feta Salad
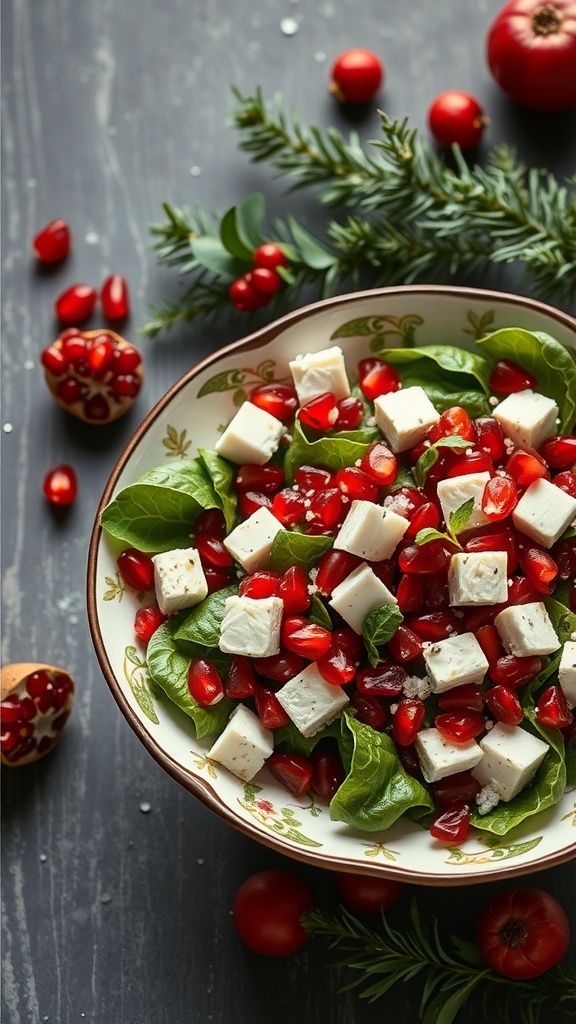
This Pomegranate and Feta Salad is a delightful addition to your Christmas menu. The vibrant colors and fresh ingredients make it a festive choice. The juicy pomegranate seeds add a burst of sweetness, while the feta cheese brings a creamy, salty contrast. Together, they create a refreshing dish that balances the heavier holiday meals.
To prepare this salad, start with a base of fresh spinach. The greens provide a crisp texture and a healthy touch. Toss in the pomegranate seeds and cubes of feta cheese for that perfect mix of flavors. You can also add some chopped nuts for an extra crunch.
This salad is not just pretty; it’s easy to make and can be prepared in advance. It’s perfect for holiday gatherings or as a light side dish. Serve it chilled for the best taste.
Ingredients
- 4 cups fresh spinach
- 1 cup pomegranate seeds
- 1 cup feta cheese, cubed
- 1/2 cup walnuts or pecans, chopped (optional)
- 2 tablespoons olive oil
- 1 tablespoon balsamic vinegar
- Salt and pepper to taste
Instructions
- In a large bowl, combine the fresh spinach, pomegranate seeds, and feta cheese.
- If using, add the chopped walnuts or pecans for added crunch.
- In a small bowl, whisk together the olive oil, balsamic vinegar, salt, and pepper.
- Drizzle the dressing over the salad and toss gently to combine.
- Serve immediately or chill in the refrigerator for up to an hour before serving.
Pecan Pie with Whipped Cream
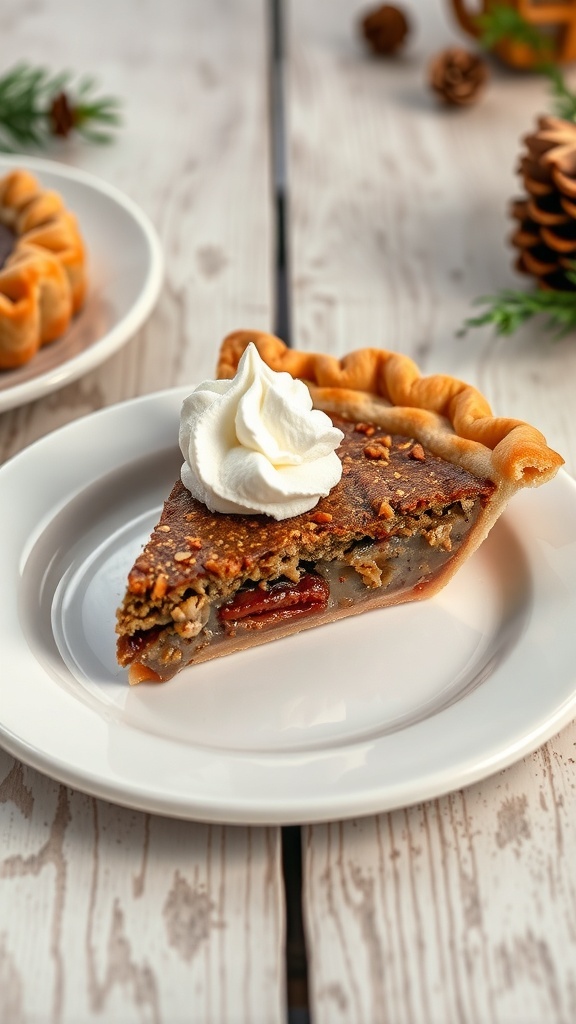
Pecan pie is a classic dessert that brings warmth and sweetness to any holiday gathering. Its rich, nutty flavor pairs perfectly with a dollop of whipped cream, making it a favorite for many. The image showcases a slice of pecan pie, beautifully presented on a white plate. The golden crust cradles a gooey filling, studded with crunchy pecans and topped with a generous swirl of whipped cream. This pie not only looks inviting but also promises a delightful taste experience.
Making pecan pie is straightforward and rewarding. It’s a great way to impress your guests with minimal effort. The combination of sweet, sticky filling and crunchy nuts creates a perfect balance. Serve it warm or at room temperature, and don’t forget the whipped cream on top!
Ingredients
- 1 unbaked pie crust
- 1 cup corn syrup
- 1 cup brown sugar
- 1/3 cup unsalted butter, melted
- 3 large eggs
- 1 teaspoon vanilla extract
- 1 1/2 cups pecans, chopped
- Whipped cream for serving
Instructions
- Preheat your oven to 350°F (175°C).
- In a large bowl, mix the corn syrup, brown sugar, and melted butter until smooth.
- Add the eggs one at a time, mixing well after each addition. Stir in the vanilla extract.
- Fold in the chopped pecans until evenly distributed.
- Pour the filling into the unbaked pie crust.
- Bake for 60-70 minutes, or until the filling is set and the crust is golden brown.
- Let the pie cool before slicing. Serve with a generous dollop of whipped cream on top.
Stuffed Mushrooms with Cream Cheese
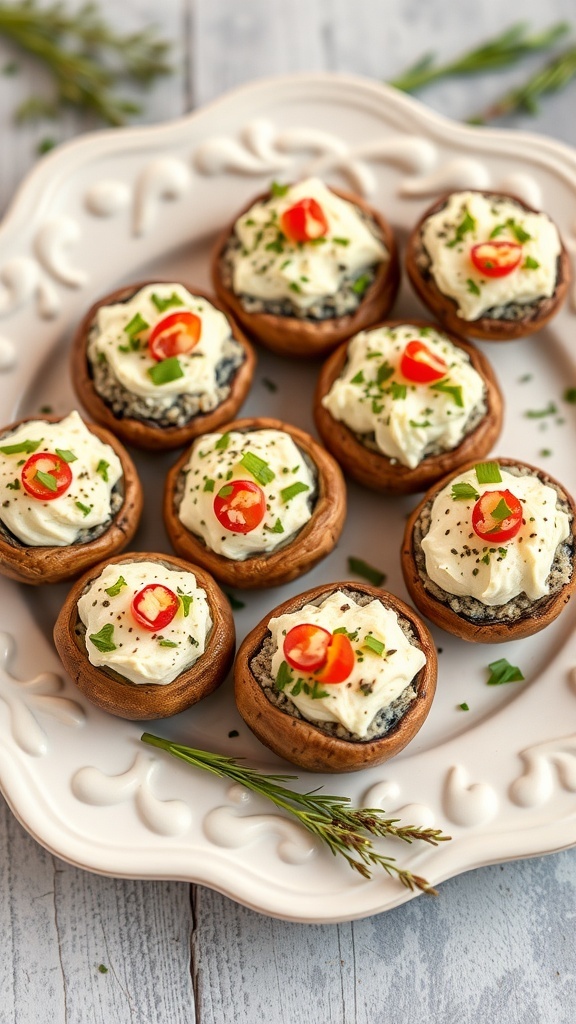
Stuffed mushrooms are a fantastic addition to any Christmas menu. They are not only delicious but also visually appealing. The image shows a platter filled with golden-brown mushrooms topped with creamy white cheese and vibrant red peppers. The green herbs sprinkled on top add a fresh touch, making them look festive and inviting.
These little bites are perfect for gatherings, serving as a delightful appetizer. They are easy to make and can be prepared ahead of time, allowing you to enjoy the holiday festivities without stress. The combination of cream cheese and herbs creates a rich flavor that pairs wonderfully with the earthy taste of mushrooms.
Let’s get into how you can whip up these tasty stuffed mushrooms for your holiday celebration!
Ingredients
- 16 large mushrooms
- 8 oz cream cheese, softened
- 1/4 cup grated Parmesan cheese
- 1/4 cup chopped fresh herbs (like parsley and chives)
- 1 clove garlic, minced
- 1/2 teaspoon salt
- 1/4 teaspoon black pepper
- 1/4 teaspoon red pepper flakes (optional)
- 1/4 cup diced red bell pepper (for topping)
Instructions
- Preheat your oven to 375°F (190°C).
- Clean the mushrooms and remove the stems. Finely chop the stems and set aside.
- In a bowl, mix the cream cheese, Parmesan cheese, chopped mushroom stems, herbs, garlic, salt, pepper, and red pepper flakes until well combined.
- Stuff each mushroom cap with the cream cheese mixture, pressing down gently to fill them.
- Place the stuffed mushrooms on a baking sheet. Top each with a sprinkle of diced red bell pepper for color.
- Bake for 20-25 minutes or until the mushrooms are tender and the tops are golden.
- Remove from the oven and let them cool slightly before serving. Enjoy your festive treat!
Holiday Fruitcake with Nuts
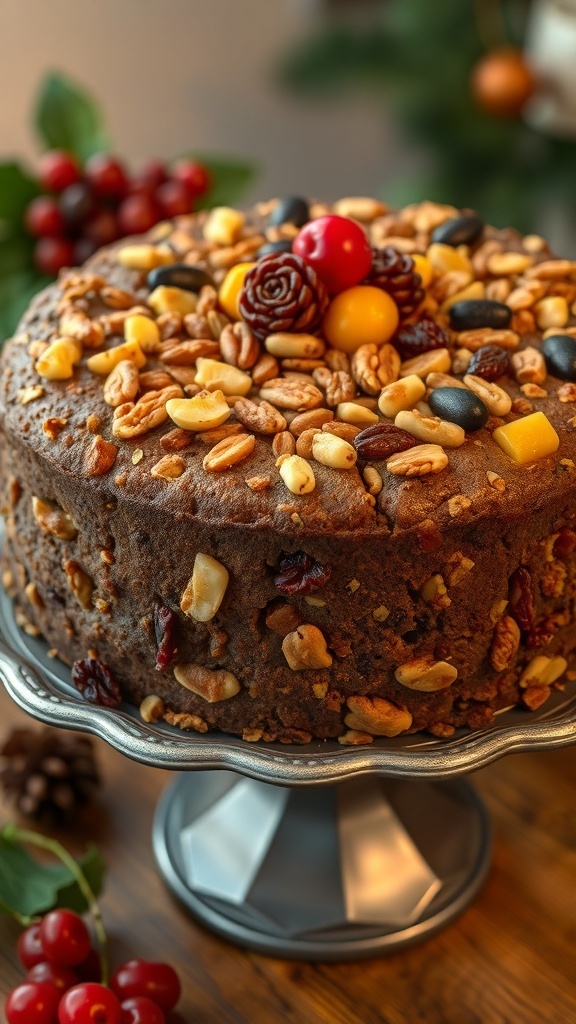
Fruitcake often gets a bad rap, but this holiday version is a delightful treat. The image showcases a beautifully decorated fruitcake, topped with a variety of nuts and fruits. Its rich, golden-brown color hints at the delicious flavors packed inside. The festive presentation makes it a perfect centerpiece for any holiday table.
This fruitcake is not just about looks; it’s filled with dried fruits, nuts, and spices that create a warm, comforting flavor. It’s a classic that brings back memories of family gatherings and holiday cheer. Whether you love it or are trying it for the first time, this cake is sure to impress.
Making this fruitcake is straightforward. Gather your ingredients, and let’s get baking!
Ingredients
- 2 cups mixed dried fruits (raisins, cranberries, apricots)
- 1 cup mixed nuts (walnuts, pecans, almonds)
- 1 cup all-purpose flour
- 1 teaspoon baking powder
- 1 teaspoon ground cinnamon
- 1/2 teaspoon ground nutmeg
- 1/4 teaspoon salt
- 1/2 cup unsalted butter, softened
- 1 cup brown sugar, packed
- 3 large eggs
- 1 teaspoon vanilla extract
- 1/4 cup orange juice
- 1/4 cup honey
Instructions
- Preheat the oven to 325°F (160°C). Grease a round cake pan and line the bottom with parchment paper.
- In a bowl, mix the flour, baking powder, cinnamon, nutmeg, and salt. Set aside.
- In another bowl, cream the butter and brown sugar until light and fluffy. Add the eggs one at a time, mixing well after each addition.
- Stir in the vanilla extract, orange juice, and honey. Gradually add the dry ingredients, mixing until just combined.
- Fold in the dried fruits and nuts until evenly distributed.
- Pour the batter into the prepared pan and smooth the top. Bake for 50-60 minutes or until a toothpick inserted in the center comes out clean.
- Let the cake cool in the pan for 10 minutes, then transfer it to a wire rack to cool completely.
- Decorate with additional nuts and fruits if desired before serving.
Peppermint Bark with Dark Chocolate
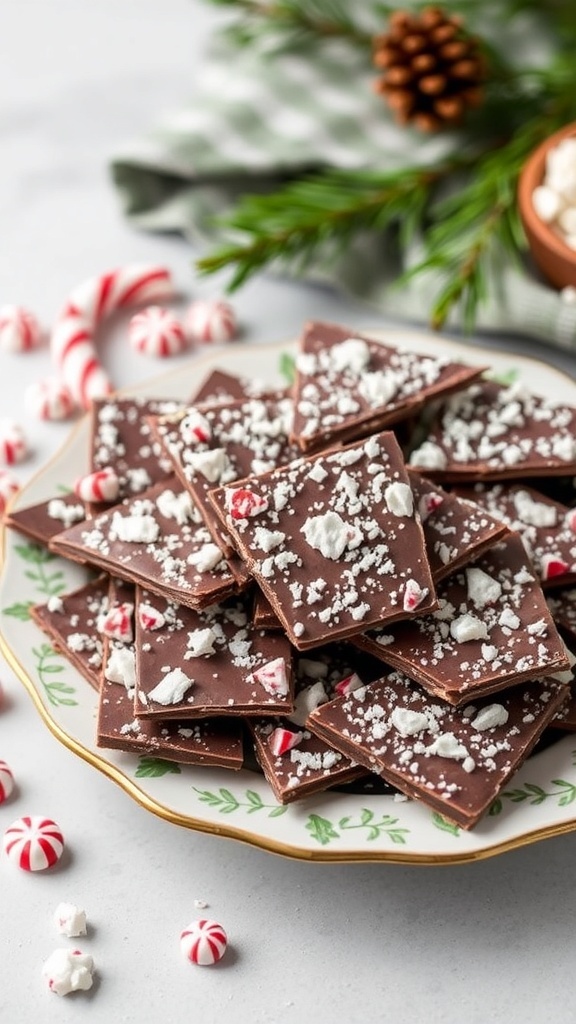
Peppermint bark is a festive treat that brings together the rich flavor of dark chocolate and the refreshing crunch of peppermint. This delightful combination makes it a favorite during the holiday season. The image shows a beautiful plate stacked high with pieces of peppermint bark, sprinkled with crushed candy canes. The vibrant red and white of the candy contrasts perfectly with the dark chocolate, creating an eye-catching dessert that’s sure to impress.
Making peppermint bark is simple and fun! It’s a great activity to do with family or friends, and the results are delicious. You can package it up as gifts or serve it at holiday gatherings. The best part? It requires just a few ingredients and minimal effort.
Ingredients
- 12 ounces dark chocolate, chopped
- 1 cup white chocolate, chopped
- 1/2 cup crushed peppermint candies or candy canes
- 1 teaspoon peppermint extract (optional)
Instructions
- Melt the Dark Chocolate: In a microwave-safe bowl, melt the dark chocolate in 30-second intervals, stirring in between until smooth.
- Spread the Chocolate: Pour the melted dark chocolate onto a parchment-lined baking sheet. Spread it into an even layer about 1/4 inch thick.
- Add Peppermint: If using, mix the peppermint extract into the melted dark chocolate. Sprinkle half of the crushed peppermint candies over the chocolate layer.
- Chill: Place the baking sheet in the refrigerator for about 20 minutes to let the chocolate set.
- Melt the White Chocolate: In another bowl, melt the white chocolate in the same manner as the dark chocolate.
- Spread the White Chocolate: Once the dark chocolate is set, pour the melted white chocolate over the dark layer. Spread it evenly.
- Top with More Peppermint: Sprinkle the remaining crushed peppermint candies on top of the white chocolate layer.
- Final Chill: Return the baking sheet to the refrigerator for another 30 minutes to set completely.
- Break into Pieces: Once set, break the bark into pieces and enjoy!