Friendsgiving is the perfect excuse to gather your favorite people and celebrate the spirit of gratitude with some delicious food! Whether you’re hosting or attending, it’s all about creating a warm and inviting atmosphere filled with tasty dishes that everyone can enjoy. Check out these fun and easy Friendsgiving food ideas that will have your friends raving about the feast!
Roasted Brussels Sprouts with Bacon

Roasted Brussels sprouts with bacon are a fantastic addition to any Friendsgiving table. These little green gems are not only delicious but also bring a nice crunch and savory flavor that everyone will love. The combination of crispy bacon and tender sprouts creates a mouthwatering dish that pairs well with other holiday favorites.
To make this dish, start with fresh Brussels sprouts. Trim the ends and cut them in half for even roasting. The bacon adds a smoky flavor that elevates the sprouts. Toss everything together with olive oil, salt, and pepper before roasting in the oven until they are golden brown and crispy.
This dish is simple to prepare and can be made ahead of time, making it perfect for a gathering. Plus, it’s a great way to get everyone to enjoy their veggies!
Ingredients
- 1 pound Brussels sprouts, trimmed and halved
- 6 slices of bacon, chopped
- 2 tablespoons olive oil
- Salt and pepper to taste
- 1/4 cup grated Parmesan cheese (optional)
Instructions
- Preheat your oven to 400°F (200°C).
- In a large bowl, combine the halved Brussels sprouts and chopped bacon.
- Drizzle with olive oil and season with salt and pepper. Toss to coat evenly.
- Spread the mixture on a baking sheet in a single layer.
- Roast in the oven for 20-25 minutes, stirring halfway through, until the sprouts are tender and the bacon is crispy.
- If desired, sprinkle with grated Parmesan cheese before serving.
Maple Glazed Carrots
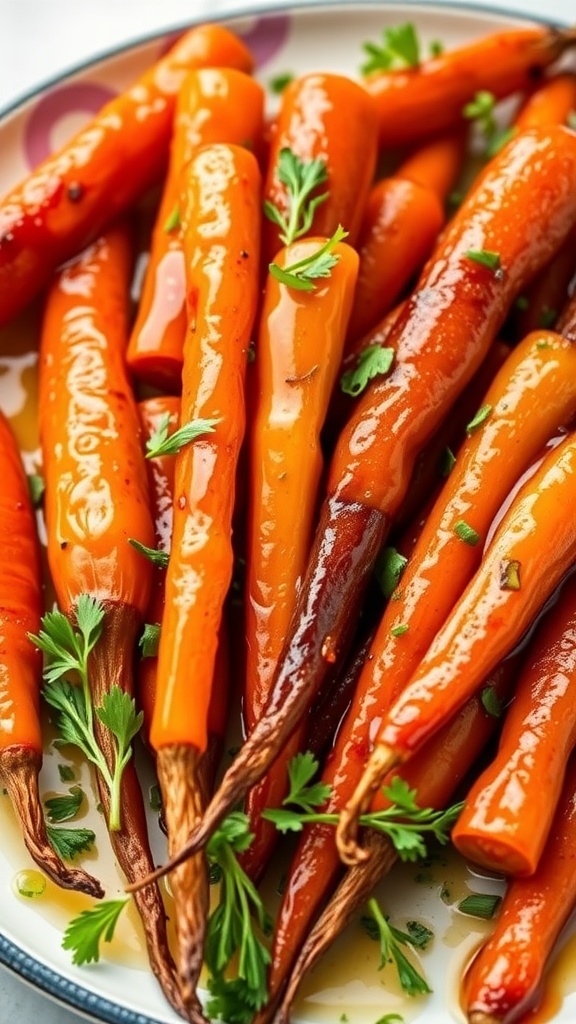
Maple glazed carrots are a delightful addition to any Friendsgiving table. Their vibrant orange color and glossy finish make them visually appealing. The sweetness of the maple syrup pairs perfectly with the natural earthiness of the carrots, creating a dish that is both simple and elegant.
These carrots are not just tasty; they are also easy to prepare. You can roast them in the oven or sauté them on the stovetop. Either way, they come out tender and full of flavor. Plus, they add a nice touch of sweetness to balance out savory dishes.
To make this dish, you’ll need fresh carrots, maple syrup, butter, salt, and pepper. The preparation is straightforward, making it a great choice for busy hosts. Just toss the carrots in the maple mixture and cook until they are tender and caramelized.
Ingredients
- 1 pound fresh carrots, peeled and cut into sticks
- 1/4 cup maple syrup
- 2 tablespoons unsalted butter
- Salt and pepper to taste
- Fresh parsley for garnish (optional)
Instructions
- Preheat your oven to 400°F (200°C).
- In a large bowl, combine the carrots, maple syrup, melted butter, salt, and pepper. Toss until the carrots are well coated.
- Spread the carrots on a baking sheet in a single layer.
- Roast in the oven for 25-30 minutes, or until the carrots are tender and caramelized, stirring halfway through.
- Remove from the oven and garnish with fresh parsley if desired. Serve warm and enjoy!
Stuffed Acorn Squash

Stuffed acorn squash is a delightful dish that brings warmth and comfort to any Friendsgiving table. The vibrant orange and green hues of the squash make it visually appealing, while the hearty stuffing inside adds a burst of flavor. This dish is not only beautiful but also packed with nutrients, making it a perfect choice for a festive gathering.
The filling often includes a mix of grains, nuts, and dried fruits, creating a satisfying combination of textures and tastes. It’s a great way to showcase seasonal ingredients and can easily be adapted to suit various dietary preferences. Whether you’re a vegetarian or just looking to add more plant-based options to your meal, stuffed acorn squash is a winner.
To make this dish, you’ll need a few simple ingredients. The preparation is straightforward, allowing you to focus on enjoying time with friends and family. Serve it as a main dish or a side, and watch as everyone digs in!
Ingredients
- 2 acorn squashes
- 1 cup cooked quinoa
- 1/2 cup chopped walnuts
- 1/2 cup dried cranberries
- 1/2 cup diced apples
- 1 teaspoon cinnamon
- Salt and pepper to taste
- 2 tablespoons olive oil
Instructions
- Preheat your oven to 400°F (200°C).
- Cut the acorn squashes in half and scoop out the seeds. Brush the insides with olive oil and sprinkle with salt and pepper.
- Place the squash halves cut-side down on a baking sheet and roast for about 25-30 minutes, until tender.
- In a bowl, mix the cooked quinoa, chopped walnuts, dried cranberries, diced apples, cinnamon, and a pinch of salt and pepper.
- Once the squash is done, flip them over and fill each half with the quinoa mixture.
- Return to the oven and bake for an additional 10-15 minutes until heated through.
- Serve warm and enjoy!
Cranberry Orange Relish
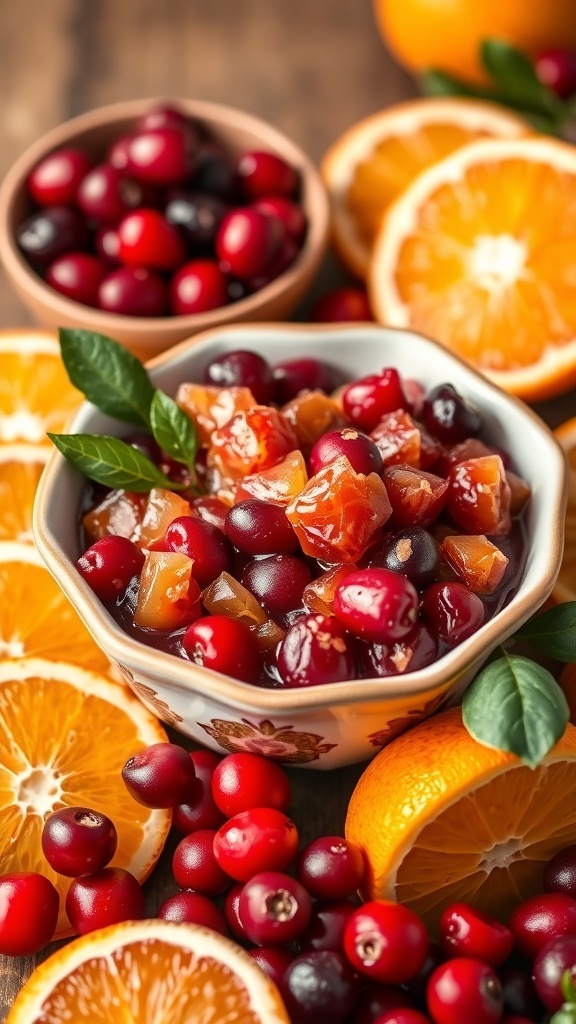
Cranberry orange relish is a bright and zesty addition to your Friendsgiving table. This dish combines the tartness of fresh cranberries with the sweetness of oranges, creating a refreshing contrast to savory dishes. The vibrant colors and flavors make it a standout side that everyone will love.
Making this relish is simple and quick. You can whip it up in no time, allowing you to focus on other dishes. Plus, it can be made ahead of time, which is always a bonus during busy holiday preparations.
To prepare this delightful relish, you’ll need fresh cranberries, oranges, sugar, and a hint of cinnamon. The combination of these ingredients results in a sweet and tangy treat that pairs perfectly with turkey or ham. It’s also a great topping for sandwiches or served with cheese.
Ingredients
- 12 oz fresh cranberries
- 1 large orange, peeled and diced
- 1 cup granulated sugar
- 1/4 cup water
- 1/2 teaspoon ground cinnamon
Instructions
- Rinse the cranberries under cold water and remove any stems or damaged berries.
- In a medium saucepan, combine the cranberries, diced orange, sugar, water, and cinnamon.
- Bring the mixture to a boil over medium heat, stirring occasionally.
- Once boiling, reduce the heat and let it simmer for about 10-15 minutes, or until the cranberries burst and the mixture thickens.
- Remove from heat and let it cool. The relish will thicken further as it cools.
- Transfer to a serving bowl and refrigerate until ready to serve.
Pumpkin Soup with Sage

Pumpkin soup is a warm and inviting dish, perfect for Friendsgiving gatherings. The vibrant orange color of the soup is not just eye-catching; it also brings a cozy feel to the table. This creamy soup is topped with a swirl of cream and fresh sage leaves, adding a touch of elegance. A slice of crusty bread on the side makes it even more delightful.
This dish is simple to prepare and can be made ahead of time, allowing you to enjoy more time with friends. The combination of pumpkin and sage creates a comforting flavor that everyone will love. Plus, it’s a great way to showcase seasonal ingredients!
Ingredients
- 2 tablespoons olive oil
- 1 onion, chopped
- 2 cloves garlic, minced
- 4 cups pumpkin puree (fresh or canned)
- 4 cups vegetable broth
- 1 cup heavy cream
- 1 teaspoon ground sage
- Salt and pepper to taste
- Fresh sage leaves for garnish
- Crusty bread for serving
Instructions
- Heat olive oil in a large pot over medium heat. Add chopped onion and garlic, sautéing until soft.
- Stir in the pumpkin puree and vegetable broth. Bring to a simmer and cook for about 15 minutes.
- Add heavy cream and ground sage, stirring well. Season with salt and pepper.
- Use an immersion blender to puree the soup until smooth. If you don’t have one, carefully transfer to a blender in batches.
- Serve hot, garnished with fresh sage leaves and a swirl of cream. Enjoy with crusty bread!
Creamy Garlic Mashed Potatoes
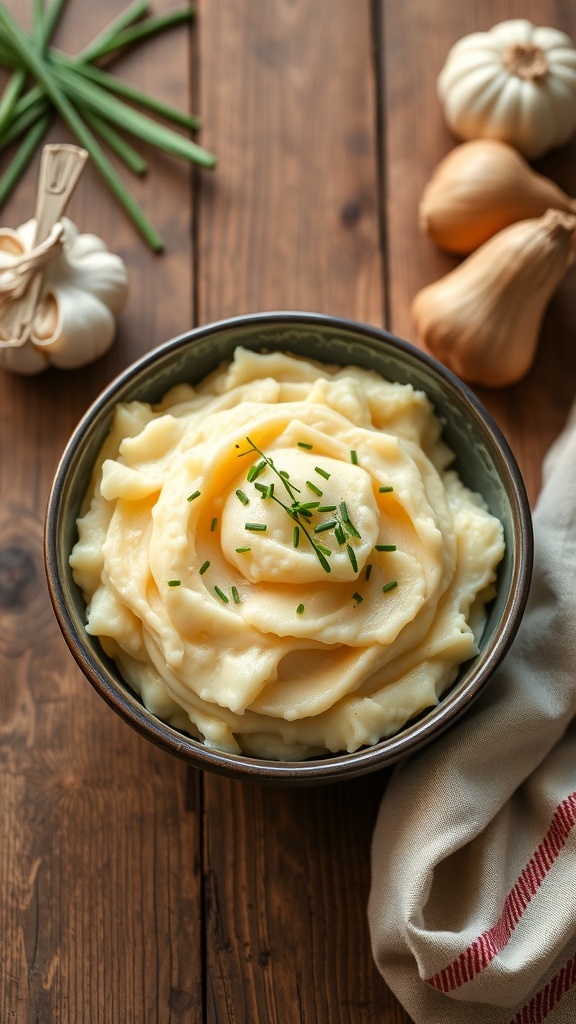
Creamy garlic mashed potatoes are a must-have for any Friendsgiving gathering. They bring comfort and warmth to the table, making them the perfect side dish. The creamy texture paired with the rich flavor of garlic creates a delightful experience for your taste buds.
Imagine a bowl filled with fluffy mashed potatoes, topped with a sprinkle of fresh chives. The golden hue of the potatoes contrasts beautifully with the vibrant green of the chives. Surrounding the bowl are fresh garlic cloves and shallots, hinting at the delicious flavors that await. This dish not only looks inviting but also smells amazing!
Making these mashed potatoes is simple and fun. They can be prepared ahead of time, allowing you to enjoy more time with friends and family. Serve them alongside your favorite main dishes, and watch everyone come back for seconds.
Ingredients
- 2 pounds russet potatoes, peeled and cubed
- 4 cloves garlic, minced
- 1/2 cup unsalted butter
- 1/2 cup heavy cream
- Salt and pepper to taste
- Fresh chives, chopped (for garnish)
Instructions
- Boil the Potatoes: In a large pot, add the cubed potatoes and cover with water. Bring to a boil and cook until tender, about 15-20 minutes.
- Prepare the Garlic: In a small saucepan, melt the butter over low heat. Add the minced garlic and cook until fragrant, about 1-2 minutes. Be careful not to burn it.
- Drain and Mash: Once the potatoes are tender, drain them and return them to the pot. Add the garlic butter and heavy cream. Mash until smooth and creamy.
- Season: Taste and add salt and pepper as needed. Mix well.
- Serve: Transfer the mashed potatoes to a serving bowl. Garnish with chopped chives before serving.
Herbed Stuffing with Sausage

Herbed stuffing with sausage is a classic dish that brings warmth and comfort to any Friendsgiving gathering. The combination of savory sausage and aromatic herbs creates a delightful flavor that pairs perfectly with turkey or can stand alone as a hearty side. This dish is not just about taste; it also adds a beautiful texture to your table with its golden-brown cubes and vibrant green herbs.
In the image, you can see a skillet filled with perfectly cooked stuffing. The sausage is sliced into bite-sized pieces, mingling with fluffy bread cubes. Fresh herbs like parsley add a pop of color and freshness. This dish is sure to impress your friends and family.
Ingredients
- 1 pound sausage (your choice of type)
- 4 cups bread cubes (day-old bread works best)
- 1 cup chicken broth
- 1 small onion, diced
- 2 celery stalks, diced
- 2 teaspoons dried thyme
- 1 teaspoon dried sage
- 1/2 teaspoon salt
- 1/4 teaspoon black pepper
- 2 tablespoons fresh parsley, chopped (for garnish)
Instructions
- Cook the Sausage: In a large skillet over medium heat, cook the sausage until browned. Break it into small pieces as it cooks. Remove from the skillet and set aside.
- Sauté Vegetables: In the same skillet, add diced onion and celery. Sauté until softened, about 5 minutes.
- Combine Ingredients: In a large bowl, mix the bread cubes, cooked sausage, sautéed vegetables, thyme, sage, salt, and pepper. Pour in the chicken broth and stir until everything is well combined.
- Transfer to Skillet: Spread the mixture evenly in the skillet. Cover and cook on low heat for about 15 minutes, allowing the flavors to meld.
- Garnish and Serve: Remove from heat, sprinkle with fresh parsley, and serve warm. Enjoy this delicious herbed stuffing with your Friendsgiving feast!
Savory Herb Roasted Turkey
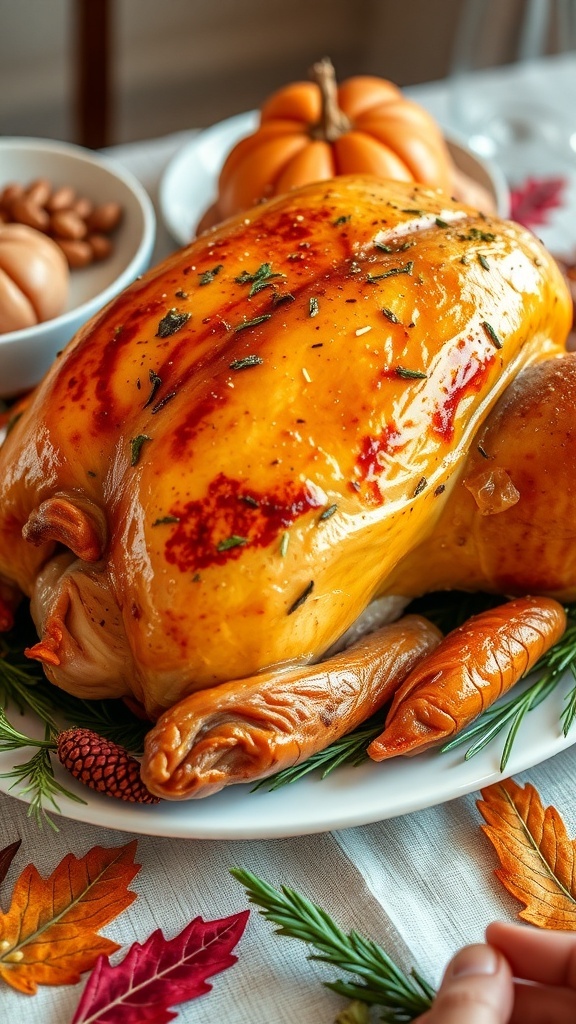
Friendsgiving is a time to gather with friends and enjoy delicious food. One centerpiece that never fails to impress is a savory herb roasted turkey. This dish is not just about the turkey; it’s about the flavors that come together to create a memorable meal.
The image shows a beautifully roasted turkey, golden brown and glistening with herbs. Surrounding it are festive decorations like pumpkins and candles, setting a warm and inviting mood. The turkey is adorned with fresh herbs, hinting at the aromatic experience that awaits everyone at the table.
To make your Friendsgiving special, a well-prepared turkey can be the star of the show. It’s juicy, flavorful, and perfect for sharing. Pair it with sides like mashed potatoes, green beans, and cranberry sauce for a complete feast.
Ingredients
- 1 whole turkey (12-14 pounds)
- 1/2 cup unsalted butter, softened
- 2 tablespoons olive oil
- 4 cloves garlic, minced
- 1 tablespoon fresh rosemary, chopped
- 1 tablespoon fresh thyme, chopped
- 1 tablespoon fresh sage, chopped
- Salt and pepper to taste
- 2 cups low-sodium chicken broth
Instructions
- Preheat your oven to 325°F (165°C).
- In a bowl, mix the softened butter, olive oil, garlic, rosemary, thyme, sage, salt, and pepper.
- Pat the turkey dry with paper towels. Carefully loosen the skin over the breast and thighs, then spread the herb mixture under the skin.
- Rub any remaining mixture over the outside of the turkey. Place the turkey in a roasting pan.
- Pour the chicken broth into the bottom of the pan. This will keep the turkey moist while roasting.
- Roast the turkey for about 3 to 4 hours, or until the internal temperature reaches 165°F (75°C). Baste the turkey every 30 minutes with the pan juices.
- Once done, let the turkey rest for at least 20 minutes before carving. This helps keep it juicy.
Pumpkin Spice Bread
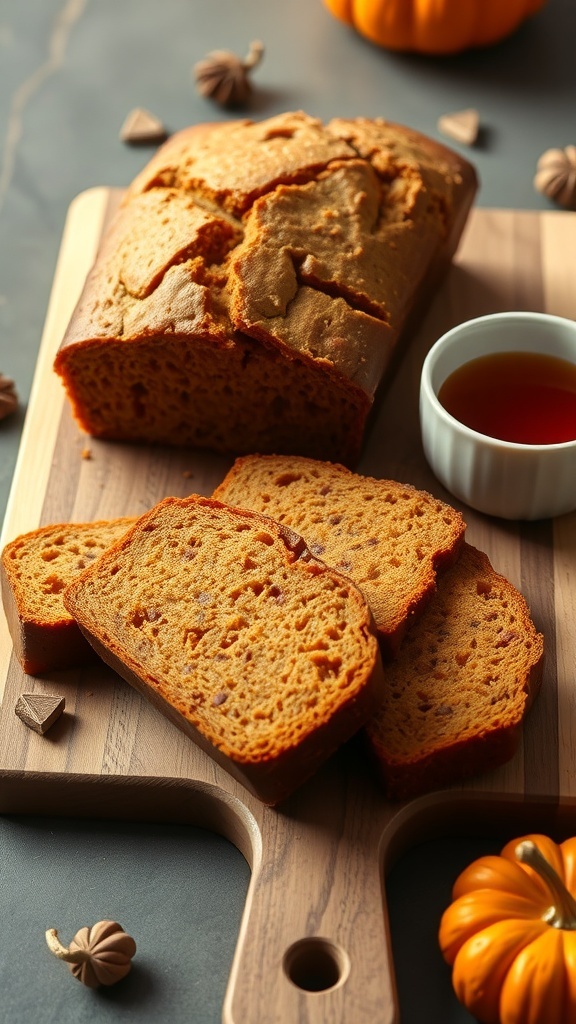
Pumpkin spice bread is a delightful treat that captures the essence of fall. This loaf, with its warm spices and moist texture, is perfect for sharing at your Friendsgiving gathering. The inviting aroma of cinnamon and nutmeg fills the air, making it hard to resist a slice (or two!).
Imagine serving this bread warm, perhaps with a drizzle of maple syrup or a dollop of cream cheese spread. It pairs wonderfully with coffee or tea, making it a cozy addition to your holiday table. Plus, it’s easy to make, so you can whip it up even if you’re short on time!
Ingredients
- 1 ½ cups all-purpose flour
- 1 teaspoon baking soda
- ½ teaspoon baking powder
- 1 teaspoon ground cinnamon
- ½ teaspoon ground nutmeg
- ½ teaspoon ground ginger
- ¼ teaspoon salt
- ½ cup granulated sugar
- ½ cup brown sugar, packed
- ½ cup vegetable oil
- 2 large eggs
- 1 cup canned pumpkin puree
- 1 teaspoon vanilla extract
Instructions
- Preheat your oven to 350°F (175°C). Grease a loaf pan.
- In a bowl, whisk together the flour, baking soda, baking powder, spices, and salt.
- In another bowl, mix the granulated sugar, brown sugar, and oil until well combined. Add the eggs, pumpkin puree, and vanilla, mixing until smooth.
- Gradually add the dry ingredients to the wet mixture, stirring until just combined.
- Pour the batter into the prepared loaf pan and smooth the top.
- Bake for 60-70 minutes, or until a toothpick inserted in the center comes out clean.
- Let it cool in the pan for 10 minutes before transferring to a wire rack to cool completely.
Brie and Cranberry Baked Wontons

Brie and cranberry baked wontons are a delightful twist on traditional appetizers. These little bites are perfect for Friendsgiving gatherings, offering a mix of creamy cheese and sweet-tart cranberry sauce. They’re easy to make and sure to impress your friends.
In the image, you can see wonton wrappers filled with chunks of brie cheese and topped with a generous dollop of cranberry sauce. The golden edges of the wrappers hint at the crispy texture that awaits. Pair these with a sweet dipping sauce for an extra treat!
These wontons are not just tasty; they also bring a festive touch to your table. They can be made ahead of time and baked just before serving, making them a great choice for busy hosts. Everyone will love the combination of flavors and textures in each bite.
Ingredients
- 1 package of wonton wrappers
- 8 ounces brie cheese, cut into small pieces
- 1 cup cranberry sauce
- 1 egg, beaten (for egg wash)
- Cooking spray or oil for greasing
Instructions
- Preheat your oven to 375°F (190°C) and grease a baking sheet with cooking spray or oil.
- Take a wonton wrapper and place a piece of brie in the center. Top with a spoonful of cranberry sauce.
- Fold the wrapper over the filling to create a triangle, sealing the edges with the beaten egg.
- Place the filled wontons on the baking sheet and lightly brush the tops with the egg wash.
- Bake for 15-20 minutes, or until golden brown and crispy.
- Serve warm with extra cranberry sauce on the side for dipping.
Spinach and Artichoke Dip
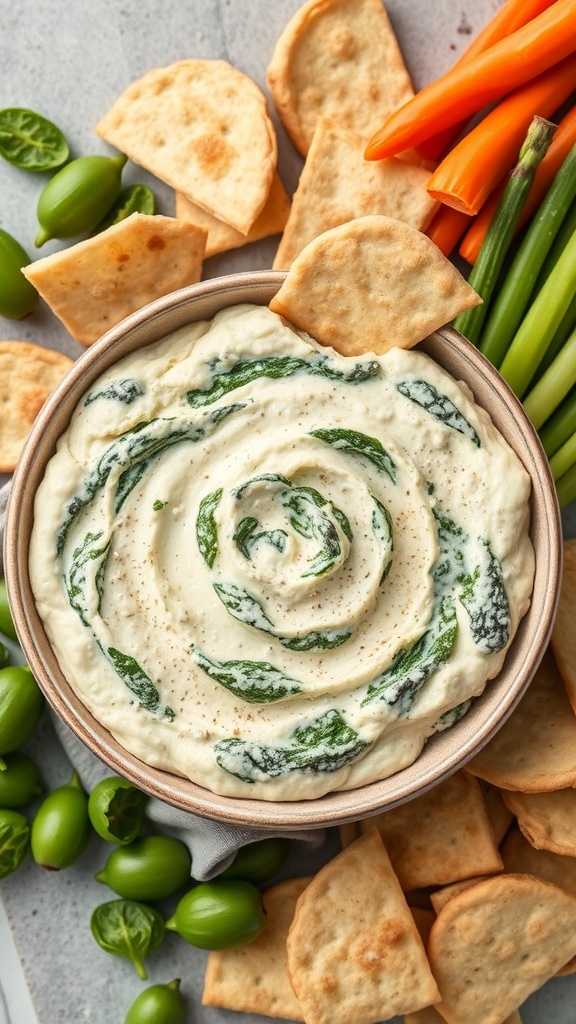
Spinach and artichoke dip is a classic favorite for any Friendsgiving gathering. This creamy, cheesy dip is perfect for sharing and pairs wonderfully with pita chips and fresh veggies. The vibrant green spinach and artichoke hearts create a beautiful contrast against the creamy base, making it as pleasing to the eye as it is to the palate.
To make this dip, you’ll want to gather some simple ingredients. Cream cheese, sour cream, and mozzarella cheese are the base, while spinach and artichokes add flavor and texture. You can serve it warm or cold, but warm is definitely the way to go for that gooey, melty goodness!
Here’s how to whip up this delicious dip:
Ingredients
- 1 cup cream cheese, softened
- 1/2 cup sour cream
- 1 cup shredded mozzarella cheese
- 1 cup cooked spinach, chopped
- 1 cup canned artichoke hearts, drained and chopped
- 1/4 cup grated Parmesan cheese
- 2 cloves garlic, minced
- Salt and pepper to taste
Instructions
- Preheat your oven to 350°F (175°C).
- In a mixing bowl, combine the cream cheese, sour cream, and mozzarella cheese. Mix until smooth.
- Add the chopped spinach, artichokes, garlic, and Parmesan cheese. Stir until everything is well combined.
- Season with salt and pepper to taste.
- Transfer the mixture to a baking dish and spread it evenly.
- Bake for 20-25 minutes, or until the top is golden and bubbly.
- Serve warm with pita chips, fresh veggies, or your favorite dippers!
Roasted Vegetable Medley
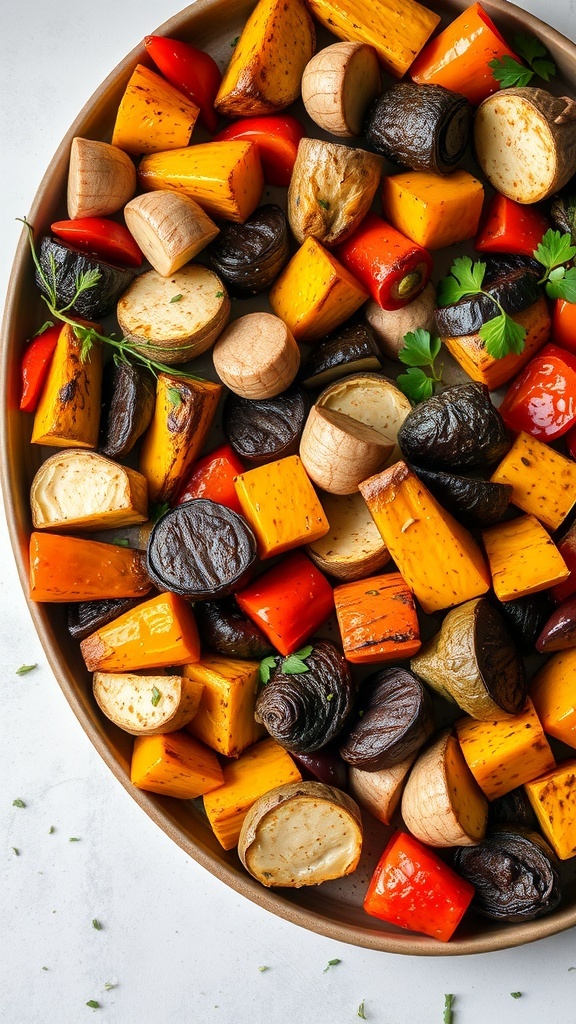
Roasted vegetable medley is a colorful and tasty addition to any Friendsgiving feast. Imagine a platter filled with vibrant veggies like sweet potatoes, bell peppers, and mushrooms, all perfectly roasted to bring out their natural flavors. This dish is not only visually appealing but also packed with nutrients, making it a healthy choice for your gathering.
Preparing this medley is simple and allows for creativity. You can mix and match your favorite vegetables based on what’s in season or what you have on hand. The roasting process caramelizes the sugars in the veggies, giving them a deliciously sweet and savory taste. Plus, the aroma that fills your kitchen while they roast is simply irresistible!
To make this roasted vegetable medley, you’ll want to start by selecting your veggies. Cut them into uniform pieces for even cooking. Toss them in olive oil, salt, and your favorite herbs. Spread them out on a baking sheet and roast until they are tender and slightly browned. Serve them warm, garnished with fresh herbs for a pop of color.
Ingredients
- 2 cups sweet potatoes, peeled and cubed
- 1 cup bell peppers, chopped
- 1 cup mushrooms, halved
- 1 cup zucchini, sliced
- 3 tablespoons olive oil
- 1 teaspoon salt
- 1 teaspoon black pepper
- 1 teaspoon garlic powder
- 1 teaspoon dried thyme
- Fresh parsley for garnish
Instructions
- Preheat your oven to 425°F (220°C).
- In a large bowl, combine sweet potatoes, bell peppers, mushrooms, and zucchini.
- Drizzle with olive oil, then sprinkle with salt, pepper, garlic powder, and thyme. Toss until everything is well coated.
- Spread the vegetables in a single layer on a baking sheet.
- Roast for 25-30 minutes, stirring halfway through, until the veggies are tender and golden brown.
- Remove from the oven and garnish with fresh parsley before serving.
Apple Crisp with Oat Topping

Apple crisp with oat topping is a classic dessert that brings warmth and comfort to any Friendsgiving gathering. The image showcases a delicious bowl filled with tender baked apples, topped with a crunchy oat mixture. A scoop of vanilla ice cream rests on top, melting slightly into the warm apples, creating a delightful contrast of textures and flavors.
This dish is perfect for sharing with friends and family. The sweet and tart apples blend beautifully with the buttery, crispy topping. It’s simple to make and can be prepared ahead of time, making it a stress-free addition to your holiday table.
Ingredients
- 6 cups peeled and sliced apples (about 6 medium apples)
- 1 tablespoon lemon juice
- 1/2 cup granulated sugar
- 1 teaspoon ground cinnamon
- 1/4 teaspoon salt
- 1 cup rolled oats
- 1 cup all-purpose flour
- 1/2 cup packed brown sugar
- 1/2 cup unsalted butter, melted
Instructions
- Preheat the oven to 350°F (175°C).
- In a large bowl, toss the sliced apples with lemon juice, granulated sugar, cinnamon, and salt. Spread the apple mixture evenly in a greased 9×13 inch baking dish.
- In another bowl, combine the oats, flour, brown sugar, and melted butter. Mix until crumbly.
- Sprinkle the oat mixture over the apples, covering them evenly.
- Bake for 30-35 minutes, or until the apples are tender and the topping is golden brown.
- Let it cool slightly before serving. Top with a scoop of vanilla ice cream if desired.
Sweet Potato Casserole with Marshmallows
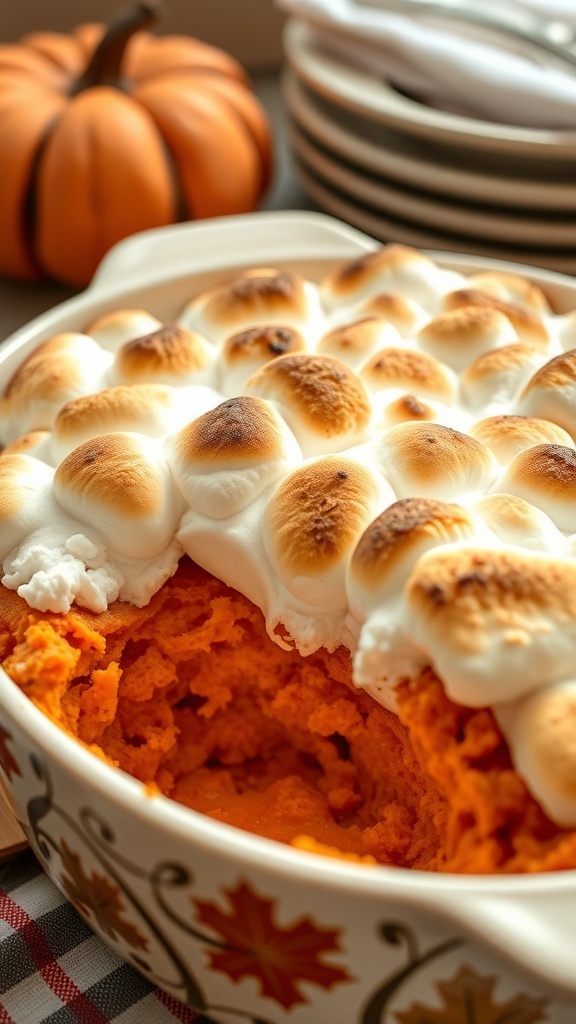
Sweet potato casserole is a classic dish that brings warmth and comfort to any Friendsgiving table. The creamy texture of the sweet potatoes pairs perfectly with the sweet, toasted marshmallows on top. This dish not only tastes great but also looks beautiful, making it a crowd-pleaser.
The image shows a delicious casserole with a golden-brown marshmallow topping, ready to be served. The warm orange color of the sweet potatoes peeks through, inviting everyone to dig in. With a festive pumpkin in the background, it captures the essence of the holiday season.
Making this casserole is simple and fun. You can involve friends and family in the preparation, making it a great way to bond while cooking. Plus, the sweet aroma that fills your kitchen will have everyone excited for the meal!
Ingredients
- 4 cups sweet potatoes, peeled and cubed
- 1/2 cup granulated sugar
- 1/2 cup milk
- 1/4 cup unsalted butter, melted
- 2 large eggs
- 1 teaspoon vanilla extract
- 1/2 teaspoon salt
- 2 cups mini marshmallows
Instructions
- Preheat your oven to 350°F (175°C).
- Boil the sweet potatoes in a large pot until tender, about 15-20 minutes. Drain and mash them in a bowl.
- Add sugar, milk, melted butter, eggs, vanilla extract, and salt to the mashed sweet potatoes. Mix until smooth.
- Transfer the mixture to a greased baking dish and spread it evenly.
- Bake for 25 minutes. Remove from the oven and sprinkle mini marshmallows on top.
- Return to the oven and bake for an additional 10-15 minutes, or until the marshmallows are golden brown.
- Let it cool slightly before serving. Enjoy your sweet potato casserole!
Pecan Pie Bars

Pecan pie bars are a delightful twist on the classic pecan pie, perfect for Friendsgiving gatherings. These bars are easy to make and serve, allowing everyone to enjoy the rich, nutty flavor without the fuss of slicing a pie.
The image shows a beautiful plate of pecan pie bars, drizzled with caramel and topped with whole pecans. The golden-brown crust and filling look inviting, making them a must-have dessert for any holiday table.
These bars combine the sweetness of brown sugar with the crunch of pecans, all nestled in a buttery crust. They are sure to impress your friends and family!
Ingredients
- 1 cup all-purpose flour
- 1/2 cup unsalted butter, softened
- 1/4 cup granulated sugar
- 1/4 teaspoon salt
- 1 cup brown sugar, packed
- 1/2 cup corn syrup
- 3 large eggs
- 1 teaspoon vanilla extract
- 1 cup chopped pecans
- 1/4 cup caramel sauce (for drizzling)
Instructions
- Preheat the oven to 350°F (175°C). Grease a 9×9-inch baking pan.
- Make the crust: In a bowl, mix flour, butter, granulated sugar, and salt until crumbly. Press the mixture into the bottom of the prepared pan.
- Bake the crust for about 15 minutes until lightly golden.
- Prepare the filling: In another bowl, whisk together brown sugar, corn syrup, eggs, and vanilla until smooth. Stir in the chopped pecans.
- Pour the filling over the baked crust and spread evenly.
- Bake for an additional 25-30 minutes until the filling is set. Let cool completely before cutting into bars.
- Drizzle with caramel sauce before serving for an extra touch of sweetness.
Cheese and Charcuterie Board

A cheese and charcuterie board is a fantastic addition to any Friendsgiving gathering. It’s not just about the food; it’s about creating a beautiful spread that encourages sharing and conversation. This board features a variety of cheeses, meats, nuts, and fruits, making it visually appealing and delicious.
Start with a selection of cheeses. You can include hard cheeses like aged cheddar or gouda, soft cheeses like brie or goat cheese, and even blue cheese for a bold flavor. Pair these with an assortment of cured meats such as prosciutto, salami, or chorizo. The combination of textures and flavors will keep everyone coming back for more.
Add some nuts like almonds or walnuts for crunch, and include fresh fruits like grapes or figs for sweetness. A few sprigs of herbs can add a pop of color and freshness. Don’t forget to include some crackers or bread for a complete experience!
To make your own cheese and charcuterie board, follow this simple recipe:
Ingredients
- 1 cup aged cheddar cheese, sliced
- 1 cup gouda cheese, sliced
- 1 cup brie cheese, cut into wedges
- 1 cup prosciutto, rolled
- 1 cup salami, sliced
- 1 cup mixed nuts (almonds, walnuts)
- 1 cup grapes or figs
- 1 cup assorted crackers
- Fresh herbs (like rosemary or basil) for garnish
Instructions
- Prepare the Board: Start with a large wooden or slate board. Arrange the cheeses in different sections, leaving space for meats and other items.
- Add the Meats: Place the rolled prosciutto and sliced salami around the cheeses. You can fan them out for a nice presentation.
- Fill in the Gaps: Add the nuts and fruits in the empty spaces. This will create a colorful and inviting look.
- Include Crackers: Place the assorted crackers on one side of the board for easy access.
- Garnish: Finish off with fresh herbs scattered around the board for a touch of greenery.
Your cheese and charcuterie board is now ready to impress your friends at Friendsgiving!
Cauliflower Gratin
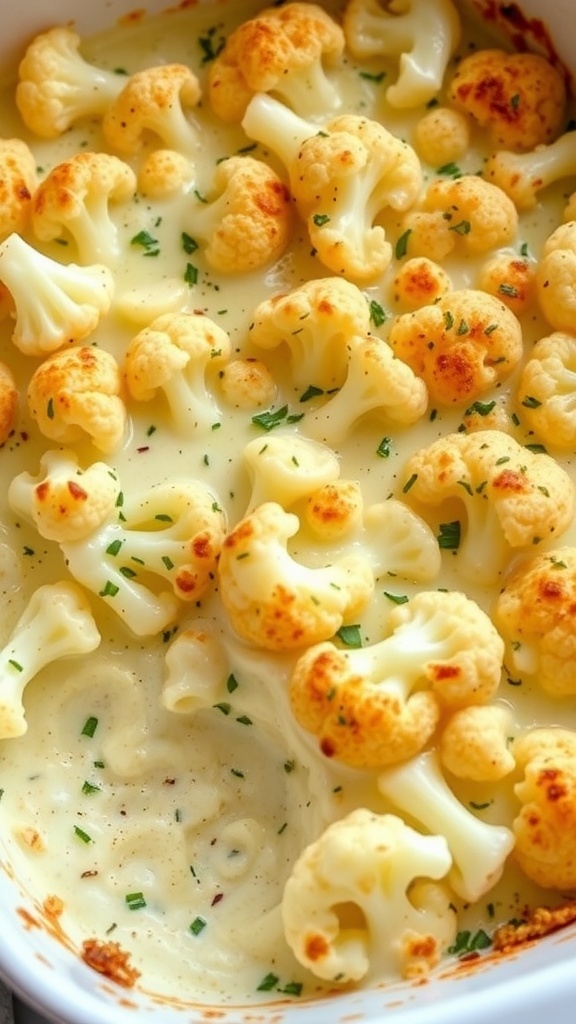
Cauliflower gratin is a wonderful dish that brings comfort and flavor to your Friendsgiving table. This creamy and cheesy delight features tender cauliflower florets swimming in a rich cheese sauce, topped with a golden crust. It’s a great way to add a veggie option that everyone will love.
This dish is not only tasty but also simple to prepare. You can make it ahead of time and pop it in the oven just before serving. The combination of cheese and cauliflower makes it a crowd-pleaser, perfect for sharing with friends and family.
Let’s get to the recipe so you can whip this up for your gathering!
Ingredients
- 1 large head of cauliflower, cut into florets
- 2 cups heavy cream
- 1 cup shredded cheddar cheese
- 1 cup grated Parmesan cheese
- 2 tablespoons butter
- 2 cloves garlic, minced
- Salt and pepper to taste
- 1/2 teaspoon paprika (optional)
- Chopped parsley for garnish
Instructions
- Preheat your oven to 375°F (190°C).
- In a large pot, bring salted water to a boil. Add the cauliflower florets and cook for about 5 minutes until slightly tender. Drain and set aside.
- In a saucepan, melt the butter over medium heat. Add minced garlic and cook for about 1 minute until fragrant.
- Pour in the heavy cream and bring to a gentle simmer. Stir in the cheddar and Parmesan cheese until melted and smooth. Season with salt, pepper, and paprika.
- In a baking dish, combine the cauliflower with the cheese sauce, mixing well to coat the florets.
- Bake in the preheated oven for 25-30 minutes until bubbly and golden on top.
- Garnish with chopped parsley before serving.
Autumn Salad with Apples and Pecans

This Autumn Salad with Apples and Pecans is a delightful addition to any Friendsgiving table. The vibrant colors of crisp apple slices and the rich brown of toasted pecans create a beautiful presentation. Fresh greens provide a perfect base, making this salad not only tasty but also visually appealing.
The combination of sweet apples and crunchy pecans adds a nice contrast to the peppery arugula. It’s a refreshing dish that balances the heavier foods often found at holiday gatherings. Plus, it’s super easy to whip up, leaving you more time to enjoy with friends and family.
To make this salad, you’ll want to gather some fresh ingredients. The dressing can be as simple as olive oil and balsamic vinegar, or you can get creative with honey or mustard for added flavor. This salad is versatile and can be adjusted to suit your taste.
Ingredients
- 4 cups arugula or mixed greens
- 2 medium apples, thinly sliced
- 1 cup pecans, toasted
- 1/4 cup dried cranberries (optional)
- 1/4 cup feta cheese (optional)
- 3 tablespoons olive oil
- 1 tablespoon balsamic vinegar
- Salt and pepper to taste
Instructions
- Prepare the Greens: In a large bowl, add the arugula or mixed greens.
- Add the Apples: Layer the thinly sliced apples on top of the greens.
- Toast the Pecans: In a skillet over medium heat, toast the pecans for about 5 minutes until fragrant. Add them to the salad.
- Mix in Extras: If using, sprinkle dried cranberries and feta cheese over the salad.
- Make the Dressing: In a small bowl, whisk together olive oil, balsamic vinegar, salt, and pepper.
- Toss and Serve: Drizzle the dressing over the salad, toss gently, and serve immediately.
Stuffed Mushrooms with Cream Cheese

Stuffed mushrooms are a fantastic addition to any Friendsgiving spread. They’re bite-sized, packed with flavor, and super easy to make. The image shows perfectly baked mushrooms topped with a creamy filling, garnished with fresh herbs. These little treats are sure to impress your friends and family!
The base of these stuffed mushrooms is simple. You start with fresh mushrooms, which are hollowed out to make room for a delicious cream cheese filling. This filling often includes garlic, herbs, and spices, giving it a savory kick. The mushrooms are then baked until golden, creating a delightful texture.
Not only do they taste amazing, but they also look great on the table. The contrast of the dark mushroom caps with the white cream cheese topping is visually appealing. Plus, they’re easy to grab and eat, making them a perfect finger food for your gathering.
Ingredients
- 20 large mushrooms
- 8 oz cream cheese, softened
- 1/4 cup grated Parmesan cheese
- 2 cloves garlic, minced
- 1/4 cup fresh parsley, chopped
- 1/4 teaspoon black pepper
- 1/4 teaspoon salt
- 1 tablespoon olive oil
Instructions
- Preheat your oven to 375°F (190°C).
- Clean the mushrooms and remove the stems. Finely chop the stems and set them aside.
- In a bowl, mix the cream cheese, Parmesan cheese, minced garlic, chopped mushroom stems, parsley, black pepper, and salt until well combined.
- Stuff each mushroom cap with the cream cheese mixture, pressing down gently to fill them.
- Place the stuffed mushrooms on a baking sheet and drizzle with olive oil.
- Bake for 20-25 minutes, or until the mushrooms are tender and the tops are golden.
- Let them cool slightly before serving. Enjoy your delicious stuffed mushrooms!
Garlic Butter Dinner Rolls
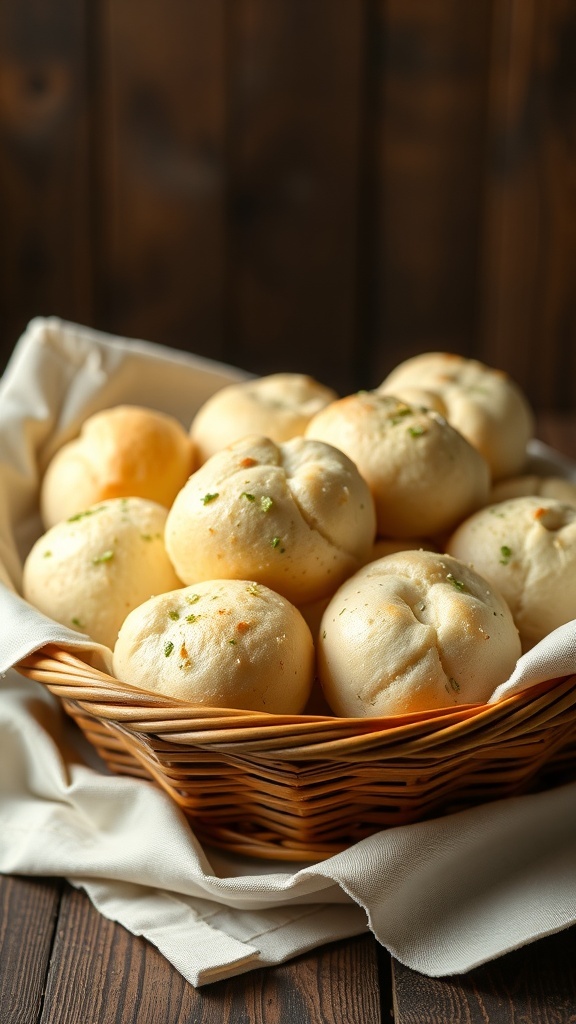
Garlic butter dinner rolls are a perfect addition to any Friendsgiving feast. These soft, fluffy rolls are infused with rich garlic flavor and topped with melted butter, making them irresistible. They not only complement the main dishes but also serve as a delightful snack on their own.
Imagine a warm basket filled with these golden rolls, their buttery aroma filling the air. Guests will love pulling apart the rolls, revealing their soft, pillowy insides. Pair them with your favorite dips or simply enjoy them fresh out of the oven.
Making these rolls is easier than you might think. With just a few ingredients and some simple steps, you can create a batch that will impress everyone at your gathering. Let’s get into the recipe!
Ingredients
- 4 cups all-purpose flour
- 1/4 cup granulated sugar
- 2 1/4 teaspoons active dry yeast
- 1 teaspoon salt
- 1/4 cup unsalted butter, melted
- 1 cup warm milk
- 2 large eggs
- 4 cloves garlic, minced
- 1/4 cup unsalted butter, softened
- 1 tablespoon fresh parsley, chopped
Instructions
- Prepare the Dough: In a large bowl, combine warm milk, sugar, and yeast. Let it sit for about 5 minutes until foamy. Stir in melted butter, eggs, and salt. Gradually add flour, mixing until a soft dough forms.
- Knead the Dough: Turn the dough onto a floured surface and knead for about 5-7 minutes until smooth and elastic. Place in a greased bowl, cover, and let rise in a warm place until doubled in size, about 1 hour.
- Shape the Rolls: Punch down the dough and divide it into small pieces. Shape each piece into a ball and place them in a greased baking dish.
- Prepare the Garlic Butter: In a small bowl, mix softened butter, minced garlic, and parsley. Brush the mixture over the rolls.
- Let Them Rise: Cover the rolls and let them rise for another 30 minutes. Preheat the oven to 350°F (175°C).
- Bake the Rolls: Bake for 20-25 minutes until golden brown. Brush with any remaining garlic butter before serving.
Mini Pumpkin Cheesecakes
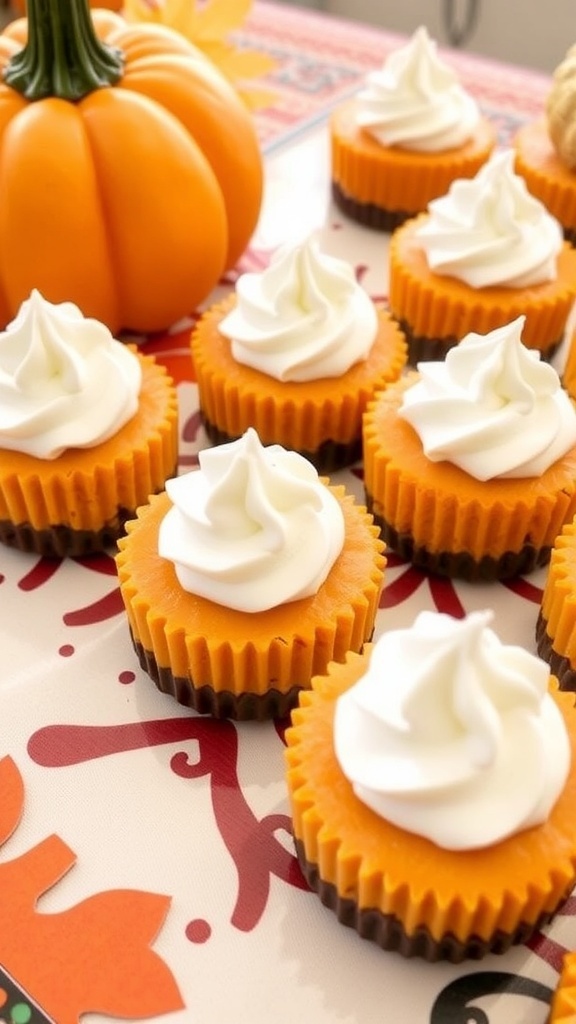
Mini pumpkin cheesecakes are a delightful treat for any Friendsgiving gathering. These little desserts pack a punch of flavor in a cute, bite-sized form. With their creamy texture and hint of spice, they are sure to impress your guests.
These cheesecakes are topped with a swirl of whipped cream, making them look as good as they taste. The vibrant orange color from the pumpkin adds a festive touch to your table. Plus, they are easy to serve and eat, which is perfect for a casual gathering.
To make these mini cheesecakes, you’ll need a few simple ingredients. The crust is made from crushed graham crackers, providing a nice crunch that complements the creamy filling. The pumpkin puree gives it that classic fall flavor, while the cream cheese adds richness.
Ingredients
- 1 cup graham cracker crumbs
- 1/4 cup granulated sugar
- 1/2 cup unsalted butter, melted
- 16 oz cream cheese, softened
- 1 cup pumpkin puree
- 3/4 cup granulated sugar
- 1 teaspoon vanilla extract
- 1 teaspoon ground cinnamon
- 1/2 teaspoon ground nutmeg
- 1/4 teaspoon ground ginger
- 3 large eggs
- Whipped cream for topping
Instructions
- Preheat your oven to 325°F (160°C). Line a muffin tin with cupcake liners.
- In a bowl, mix graham cracker crumbs, sugar, and melted butter until combined. Press this mixture into the bottom of each liner to form the crust.
- In another bowl, beat the cream cheese until smooth. Add pumpkin puree, sugar, vanilla, and spices. Mix until well combined.
- Beat in the eggs one at a time, mixing just until incorporated.
- Pour the cheesecake batter over the crust in each liner, filling them about 3/4 full.
- Bake for 20-25 minutes, or until the centers are set. Let them cool completely before refrigerating for at least 2 hours.
- Before serving, top each cheesecake with a dollop of whipped cream.
Chocolate Pumpkin Muffins

Chocolate pumpkin muffins are a delightful treat that perfectly blend the flavors of fall. These muffins are moist, rich, and have a hint of pumpkin spice that makes them ideal for Friendsgiving gatherings. The chocolate chips on top add a sweet touch, making them a favorite among friends and family.
These muffins are not just tasty; they are also easy to make. You can whip them up in no time and have a delicious dessert ready for your Friendsgiving feast. Pair them with coffee or hot cocoa for a cozy vibe.
Here’s how to make these scrumptious muffins:
Ingredients
- 1 cup canned pumpkin puree
- 1/2 cup vegetable oil
- 1 cup granulated sugar
- 2 large eggs
- 1 teaspoon vanilla extract
- 1 1/2 cups all-purpose flour
- 1/2 cup unsweetened cocoa powder
- 1 teaspoon baking soda
- 1/2 teaspoon baking powder
- 1/2 teaspoon salt
- 1 teaspoon ground cinnamon
- 1/2 teaspoon ground nutmeg
- 1/2 cup chocolate chips (plus more for topping)
Instructions
- Preheat your oven to 350°F (175°C) and line a muffin tin with paper liners.
- In a large bowl, mix together the pumpkin puree, vegetable oil, sugar, eggs, and vanilla until well combined.
- In another bowl, whisk together the flour, cocoa powder, baking soda, baking powder, salt, cinnamon, and nutmeg.
- Gradually add the dry ingredients to the wet ingredients, stirring until just combined. Fold in the chocolate chips.
- Scoop the batter into the prepared muffin tin, filling each cup about 2/3 full. Sprinkle additional chocolate chips on top.
- Bake for 18-20 minutes, or until a toothpick inserted in the center comes out clean. Let the muffins cool in the pan for a few minutes before transferring them to a wire rack.
Zucchini and Corn Fritters
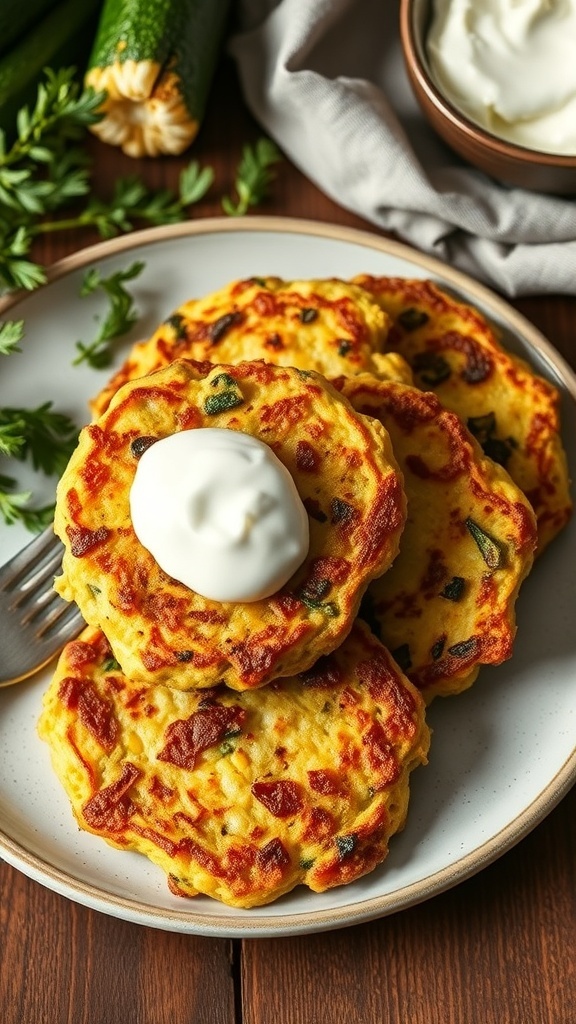
Friendsgiving is a time to gather with loved ones and enjoy delicious food. Zucchini and corn fritters are a fantastic addition to your spread. They are crispy on the outside and soft on the inside, making them a crowd-pleaser.
These fritters are not only tasty but also easy to make. You can whip them up quickly and serve them as an appetizer or side dish. The combination of zucchini and corn adds a fresh twist, perfect for autumn gatherings. Pair them with a dollop of sour cream or your favorite dipping sauce for extra flavor.
Here’s how to make these delightful fritters:
Ingredients
- 2 medium zucchinis, grated
- 1 cup corn kernels (fresh or frozen)
- 1/2 cup all-purpose flour
- 1/4 cup cornmeal
- 2 large eggs
- 1/4 cup grated Parmesan cheese
- 1 teaspoon baking powder
- Salt and pepper to taste
- Oil for frying
Instructions
- Prepare the Zucchini: Grate the zucchinis and place them in a clean kitchen towel. Squeeze out excess moisture.
- Mix Ingredients: In a bowl, combine the grated zucchini, corn, flour, cornmeal, eggs, Parmesan cheese, baking powder, salt, and pepper. Stir until well mixed.
- Heat Oil: In a large skillet, heat oil over medium heat.
- Fry Fritters: Drop spoonfuls of the mixture into the hot oil. Flatten slightly and cook for about 3-4 minutes on each side until golden brown.
- Drain: Remove fritters and place them on a paper towel to drain excess oil.
- Serve: Enjoy warm with sour cream or your favorite sauce!
Baked Macaroni and Cheese
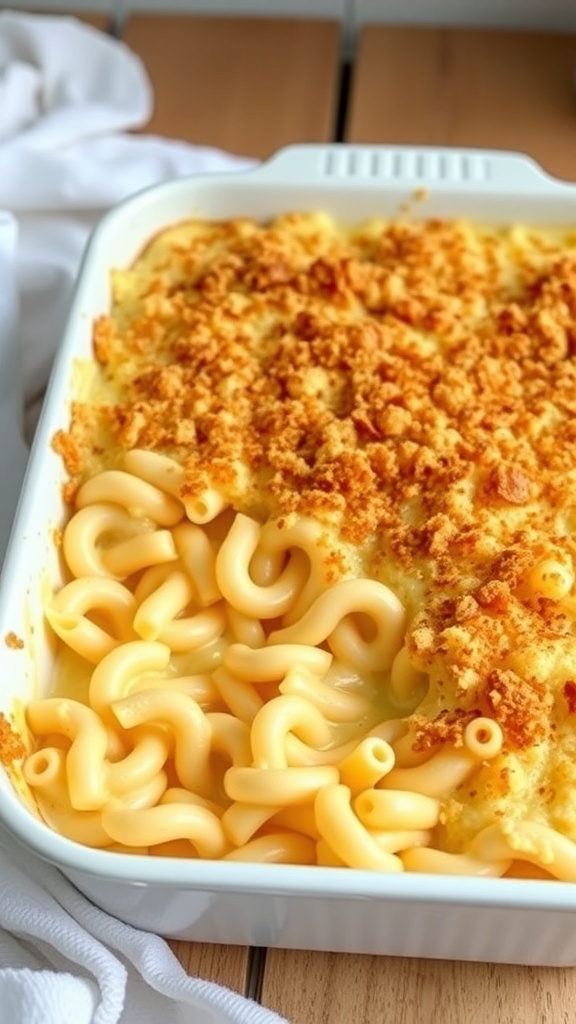
Baked macaroni and cheese is a classic comfort food that brings everyone together. This dish is creamy, cheesy, and topped with a crunchy layer that makes it irresistible. It’s perfect for Friendsgiving, where sharing delicious food is the highlight of the day.
The image shows a bubbling casserole filled with macaroni noodles coated in a rich cheese sauce. The golden, crispy topping adds a delightful texture, making each bite a treat. This dish not only looks inviting but also fills the room with a warm, cheesy aroma that makes mouths water.
Making baked macaroni and cheese is simple and fun. You can customize it with your favorite cheeses or add extras like bacon or vegetables. It’s a dish that everyone loves, making it a great choice for your Friendsgiving feast.
Ingredients
- 1 pound elbow macaroni
- 4 cups shredded sharp cheddar cheese
- 2 cups milk
- 1/2 cup butter
- 1/4 cup all-purpose flour
- 1/2 teaspoon salt
- 1/4 teaspoon black pepper
- 1/4 teaspoon paprika
- 1 cup breadcrumbs
Instructions
- Cook the macaroni according to package instructions until al dente. Drain and set aside.
- In a large saucepan, melt the butter over medium heat. Stir in the flour, salt, pepper, and paprika, cooking for about 1 minute.
- Gradually whisk in the milk, cooking until the mixture thickens. Remove from heat and stir in 3 cups of cheddar cheese until melted.
- Add the cooked macaroni to the cheese sauce and mix well.
- Pour the macaroni mixture into a greased baking dish. Top with remaining cheese and breadcrumbs.
- Bake in a preheated oven at 350°F (175°C) for 25-30 minutes, or until golden and bubbly.
Homemade Cranberry Sauce

Homemade cranberry sauce is a classic addition to any Friendsgiving feast. It brings a burst of tartness that perfectly balances the rich flavors of turkey and stuffing. The vibrant red color adds a festive touch to your table, making it not just delicious but visually appealing too.
Making your own cranberry sauce is simple and rewarding. You can control the sweetness and adjust flavors to your liking. Plus, it’s a great way to impress your friends with a homemade touch!
Here’s how to whip up a batch of this tasty sauce:
Ingredients
- 12 ounces fresh cranberries
- 1 cup granulated sugar
- 1 cup water
- 1/2 teaspoon cinnamon (optional)
- 1 tablespoon orange zest (optional)
Instructions
- Rinse the cranberries under cold water and remove any stems or bad berries.
- In a medium saucepan, combine the water and sugar. Bring to a boil over medium heat, stirring until the sugar dissolves.
- Add the cranberries to the saucepan. Return to a boil, then reduce heat to a simmer.
- Cook for about 10 minutes, or until the cranberries burst and the sauce thickens. Stir occasionally.
- If using, add cinnamon and orange zest for extra flavor. Stir well.
- Remove from heat and let the sauce cool. It will thicken further as it cools.
- Transfer to a serving bowl and refrigerate until ready to serve.
This homemade cranberry sauce is sure to be a hit at your Friendsgiving gathering!
Chocolate Fondue with Fruits

Chocolate fondue is a fun and interactive dessert that fits perfectly into any Friendsgiving celebration. It invites everyone to gather around and enjoy dipping their favorite fruits and treats into warm, melted chocolate. The image showcases a delightful spread with a pot of rich chocolate surrounded by fresh strawberries, marshmallows, and cubes of cake. This setup not only looks inviting but also encourages sharing and laughter.
Using a variety of fruits like strawberries, bananas, and apples adds color and flavor. The sweetness of the chocolate pairs beautifully with the fresh, juicy fruits. Marshmallows add a fluffy texture, while cake cubes provide a nice contrast. This dessert is simple to prepare and can be customized to suit everyone’s taste.
To make your chocolate fondue, you’ll need just a few ingredients and some easy steps to follow. It’s a great way to end your Friendsgiving meal on a sweet note!
Ingredients
- 8 ounces semi-sweet chocolate, chopped
- 1 cup heavy cream
- 1 teaspoon vanilla extract
- Fresh strawberries, halved
- Bananas, sliced
- Marshmallows
- Angel food cake or pound cake, cut into cubes
Instructions
- Prepare the Chocolate: In a medium saucepan, heat the heavy cream over medium heat until it just starts to simmer. Remove from heat and add the chopped chocolate. Stir until smooth and fully melted.
- Add Flavor: Mix in the vanilla extract for added flavor.
- Set Up: Pour the chocolate into a fondue pot or a heatproof bowl. Keep warm over a low flame or a candle.
- Serve: Arrange the fruits, marshmallows, and cake cubes around the pot. Provide skewers for dipping.
- Enjoy: Invite everyone to dip their favorites into the warm chocolate and enjoy the delicious combination!